Aller au contenu principal
Pour réparer ensemble - Je crée un compte

How to Adjust a Piano Key Slip

Ce dont vous avez besoin

  1. How to Adjust a Piano Key Slip, How to Adjust a Piano Key Slip: étape 1, image 1 de 3 How to Adjust a Piano Key Slip, How to Adjust a Piano Key Slip: étape 1, image 2 de 3 How to Adjust a Piano Key Slip, How to Adjust a Piano Key Slip: étape 1, image 3 de 3
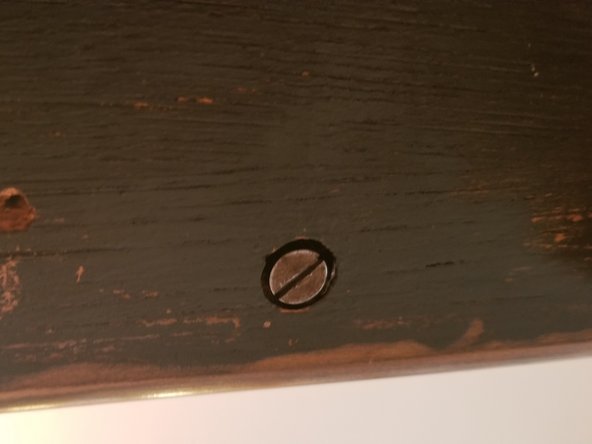
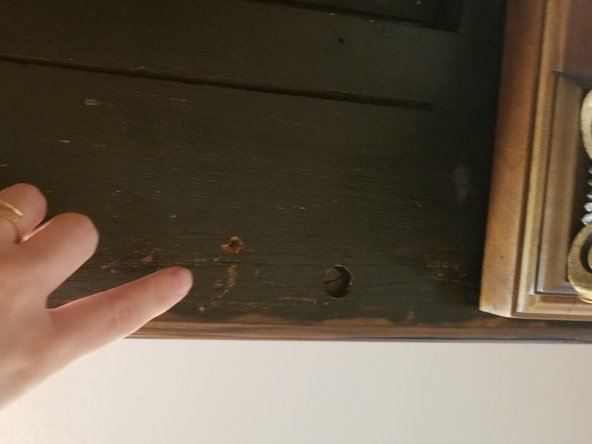
    • Locate the keys that hold your key slip to the piano.

    • They are typically underneath the piano keyboard and there will be between two and four screws.

    • Check to see what kind of screw it is. In the case of this piano, it is a flathead screw; however there could be a variety of screws.

    Demander à FixBot

    Ajouter un commentaire

  2. How to Adjust a Piano Key Slip: étape 2, image 1 de 3 How to Adjust a Piano Key Slip: étape 2, image 2 de 3 How to Adjust a Piano Key Slip: étape 2, image 3 de 3
    • Remove all the screws from the piano and set them aside.

    Demander à FixBot

    Ajouter un commentaire

  3. How to Adjust a Piano Key Slip: étape 3, image 1 de 2 How to Adjust a Piano Key Slip: étape 3, image 2 de 2
    • Gently remove your key slip using your hands.

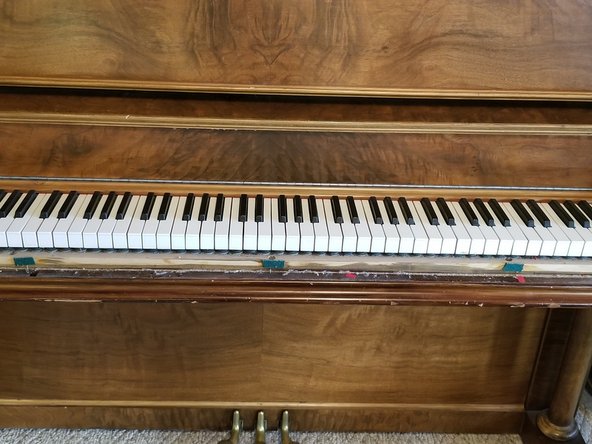
    • The key slip is the piece of wood that sits in front of the keys.

    Demander à FixBot

    Ajouter un commentaire

  4. How to Adjust a Piano Key Slip: étape 4, image 1 de 3 How to Adjust a Piano Key Slip: étape 4, image 2 de 3 How to Adjust a Piano Key Slip: étape 4, image 3 de 3
    • Check for debris under the keys.

    • You can vacuum out dust or remove pieces of paper and other objects that have fallen behind the key slip or through the keys.

    Demander à FixBot

    Ajouter un commentaire

  5. How to Adjust a Piano Key Slip: étape 5, image 1 de 3 How to Adjust a Piano Key Slip: étape 5, image 2 de 3 How to Adjust a Piano Key Slip: étape 5, image 3 de 3
    • Replace your key slip, ensuring that it sits evenly between the two ends of the piano.

    Demander à FixBot

    Ajouter un commentaire

  6. How to Adjust a Piano Key Slip: étape 6, image 1 de 3 How to Adjust a Piano Key Slip: étape 6, image 2 de 3 How to Adjust a Piano Key Slip: étape 6, image 3 de 3
    • Re-screw the key slip onto the piano.

    • Don't tighten the screws all the way down at first. Screw each one in a little bit to make it doesn't become uneven.

    • Go back and tighten the screws to your desired tightness.

    • Check the keys to make sure that the they are no longer sticking, and that the key slip is not too tight.

    Demander à FixBot

    Ajouter un commentaire

  7. How to Adjust a Piano Key Slip: étape 7, image 1 de 3 How to Adjust a Piano Key Slip: étape 7, image 2 de 3 How to Adjust a Piano Key Slip: étape 7, image 3 de 3
    • Check each key to make sure they are no longer sticking.

    • If you were successful, no keys will stick and your key slip will be properly placed!

    Demander à FixBot

    Ajouter un commentaire

Conclusion

Congratulations! Your keys are no longer sticky and if your key slip slips out of place again you now know how to fix it!

Annulation : je n'ai pas terminé ce tutoriel.

2 autres ont terminé cette réparation.

Chloe Nielsen

Membre depuis le 11/17/21

184 Réputation

1 tutoriel rédigé

Équipe

0 commentaires de tutoriel

Ajouter un commentaire

Nombre de vues :

Dernières 24 heures : 3

7 derniers jours : 10

30 derniers jours : 62

Total : 2,600