Aller au contenu principal

How to Change Mortise Lock and its Cylinder

Ce dont vous avez besoin

  1. How to Change Mortise Lock and its Cylinder, Mortise Lock and Cylinder: étape 1, image 1 de 3 How to Change Mortise Lock and its Cylinder, Mortise Lock and Cylinder: étape 1, image 2 de 3 How to Change Mortise Lock and its Cylinder, Mortise Lock and Cylinder: étape 1, image 3 de 3
    • Determine the position of the screws on both door handles and the front plate.

  2. How to Change Mortise Lock and its Cylinder: étape 2, image 1 de 2 How to Change Mortise Lock and its Cylinder: étape 2, image 2 de 2
    • Use a flathead screwdriver to remove the eight 6 mm screws on both handles.

  3. How to Change Mortise Lock and its Cylinder: étape 3, image 1 de 3 How to Change Mortise Lock and its Cylinder: étape 3, image 2 de 3 How to Change Mortise Lock and its Cylinder: étape 3, image 3 de 3
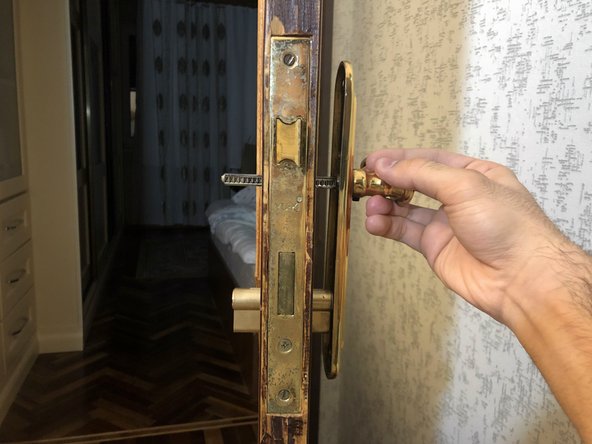
    • Pull out the door handles on both sides of the door.

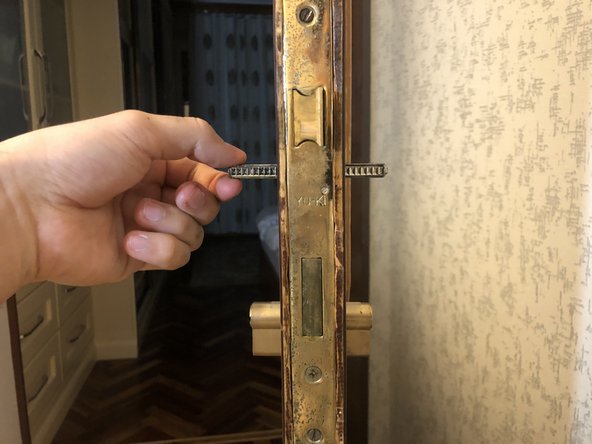
  4. How to Change Mortise Lock and its Cylinder: étape 4, image 1 de 3 How to Change Mortise Lock and its Cylinder: étape 4, image 2 de 3 How to Change Mortise Lock and its Cylinder: étape 4, image 3 de 3
    • Pull out the spindle (the rectangular piece of metal) from the door.

  5. How to Change Mortise Lock and its Cylinder: étape 5, image 1 de 3 How to Change Mortise Lock and its Cylinder: étape 5, image 2 de 3 How to Change Mortise Lock and its Cylinder: étape 5, image 3 de 3
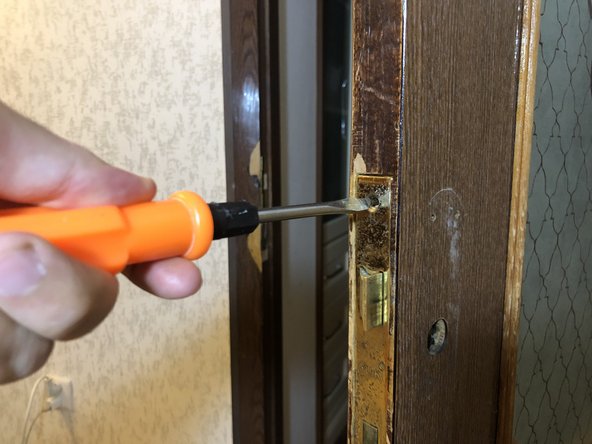
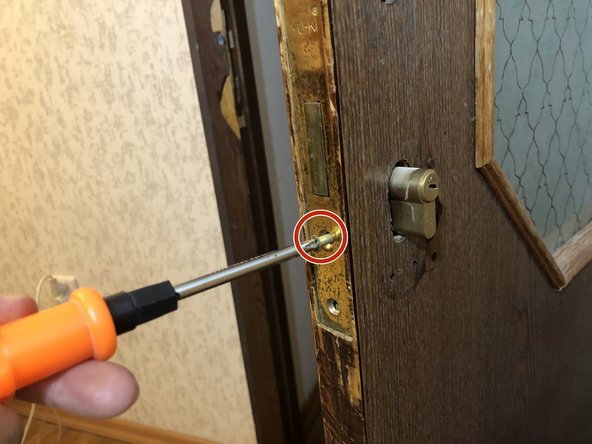
    • Loosen the two 6 mm flathead screws at the top and bottom of the lock using a flathead screwdriver.

    • Remove the third 6 mm Phillips screw in the middle using a Phillips #1 screwdriver.

  6. How to Change Mortise Lock and its Cylinder: étape 6, image 1 de 2 How to Change Mortise Lock and its Cylinder: étape 6, image 2 de 2
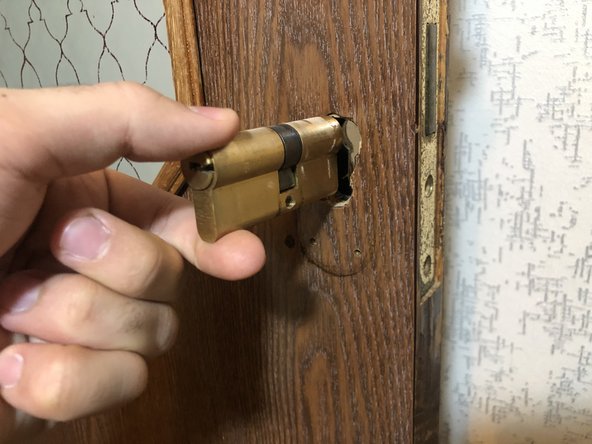
    • Pull the lock cylinder out to either side of the door.

  7. How to Change Mortise Lock and its Cylinder: étape 7, image 1 de 3 How to Change Mortise Lock and its Cylinder: étape 7, image 2 de 3 How to Change Mortise Lock and its Cylinder: étape 7, image 3 de 3
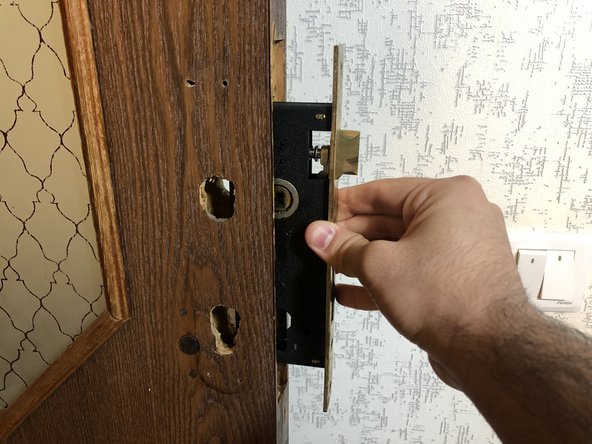
    • Grasp the mortise lock on either side and pull it out from the edge of the door.

Conclusion

To reassemble your device, follow these instructions in reverse order.

Une autre personne a terminé cette réparation.

Hikmat Guliyev

Membre depuis le 01/16/21

172 Réputation

1 tutoriel rédigé

Équipe

York University, Team S1-G11, O'Regan Winter 2021 Membre de l'équipe York University, Team S1-G11, O'Regan Winter 2021

YORK-O'REGAN-W21S1G11

1 membre

1 tutoriel rédigé

0 commentaires

Ajouter un commentaire

Nombre de vues :

Dernières 24 heures : 3

7 derniers jours : 17

30 derniers jours : 84

Total : 1,875