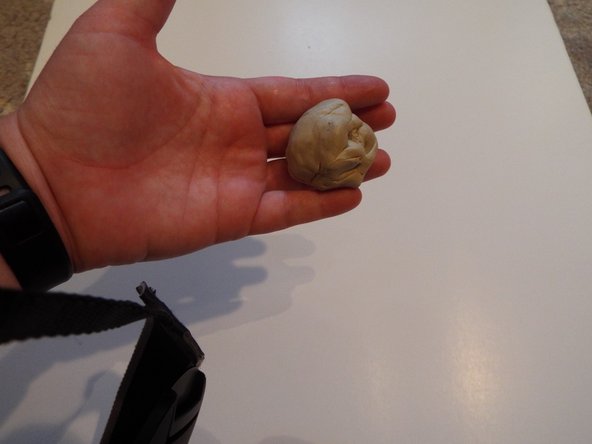
Aller au contenu principal

How to Fix a Leaking Garbage Disposal at Flange

Ce dont vous avez besoin

  1. How to Fix a Leaking Garbage Disposal at Flange, How to Fix a Leaking Garbage Disposal at Flange: étape 1, image 1 de 2 How to Fix a Leaking Garbage Disposal at Flange, How to Fix a Leaking Garbage Disposal at Flange: étape 1, image 2 de 2
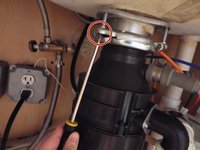
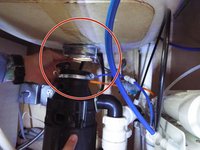
    • Unplug the garbage disposal from the power source.

    • Be sure to place the wall plug in a dry location for the duration of the fix.

  2. How to Fix a Leaking Garbage Disposal at Flange: étape 2, image 1 de 2 How to Fix a Leaking Garbage Disposal at Flange: étape 2, image 2 de 2
    • Loosen and disconnect the dishwasher drain hose from the garbage disposal unit by loosening the clamp and removing the screws with a flathead screwdriver.

    • Pull the gray tube from the disposal.

  3. How to Fix a Leaking Garbage Disposal at Flange: étape 3, image 1 de 2 How to Fix a Leaking Garbage Disposal at Flange: étape 3, image 2 de 2
    • Remove the three screws from the flange at the top of the garbage disposal unit. These screws are at the top right above the black disposal box.

    • Disconnect the lock-nut at the flange.

    • Adequate lighting is imperative for this step.

  4. How to Fix a Leaking Garbage Disposal at Flange: étape 4, image 1 de 2 How to Fix a Leaking Garbage Disposal at Flange: étape 4, image 2 de 2
    • Use the screwdriver to turn the locking ring counter clock-wise, disengaging the drain hose and disposal.

    • You will be able to hear the locking ring come undone after pushing it forcefully to the left.

    • The disposal will drop down—be sure to catch the disposal and place on the bottom of the sink.

    • Move from underneath the sink to the top of the sink.

  5. How to Fix a Leaking Garbage Disposal at Flange: étape 5, image 1 de 2 How to Fix a Leaking Garbage Disposal at Flange: étape 5, image 2 de 2
    • To remove the flange, push from underneath the sink with one hand and pull it out through the top of the sink with your other hand.

    • Scrape off ALL excess putty from the flange and the sink.

  6. How to Fix a Leaking Garbage Disposal at Flange: étape 6, image 1 de 3 How to Fix a Leaking Garbage Disposal at Flange: étape 6, image 2 de 3 How to Fix a Leaking Garbage Disposal at Flange: étape 6, image 3 de 3
    • Remove a small ball of putty and roll into a golf ball shape.

    • Roll the putty flat into a snakelike shape, approximately 3/4 inch diameter.

    • Be sure that the putty is long enough to wrap completely around the flange.

  7. How to Fix a Leaking Garbage Disposal at Flange: étape 7, image 1 de 2 How to Fix a Leaking Garbage Disposal at Flange: étape 7, image 2 de 2
    • Wrap the putty around the flange and place the flange back into the sink.

    • Press down hard into the sink and remove any excess Plumber's Putty.

  8. How to Fix a Leaking Garbage Disposal at Flange: étape 8, image 1 de 1
    • Reassemble the flange and garbage disposal by reversing these steps.

    • Put a sink stopper in and fill up the sink approximately halfway.

    • Remove the stopper and check underneath the sink to make sure there are no leaks.

Conclusion

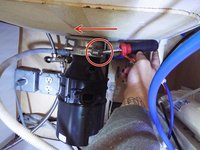
To reassemble your device, follow these instructions in reverse order.

Une autre personne a terminé cette réparation.

Amy Haren

Membre depuis le 01/19/18

175 Réputation

1 tutoriel rédigé

Équipe

Un commentaire

How do you stop the flange screws from backing out? Fixed it yesterday and screws were loose already this evening…help…

Mike T - Réponse

Ajouter un commentaire

Nombre de vues :

Dernières 24 heures : 3

7 derniers jours : 20

30 derniers jours : 102

Total : 6,218