Aller au contenu principal

How to Rebuild a Briggs and Stratton Quantum Engine Carburetor

Ce dont vous avez besoin

  1. How to Rebuild a Briggs and Stratton Quantum Engine Carburetor, Remove the Air Filter Cover: étape 1, image 1 de 3 How to Rebuild a Briggs and Stratton Quantum Engine Carburetor, Remove the Air Filter Cover: étape 1, image 2 de 3 How to Rebuild a Briggs and Stratton Quantum Engine Carburetor, Remove the Air Filter Cover: étape 1, image 3 de 3
    • The air filter and its cover are located to the right of the yellow warning label under the throttle cable.

    • Remove the single screw attaching the cover and filter using a 5/16'' socket.

    • Pull straight outward until the filter assembly is detached.

    • The screw is a flat head as well as a 5/16'' socket.

  2. How to Rebuild a Briggs and Stratton Quantum Engine Carburetor, Remove the throttle Cable: étape 2, image 1 de 1
    • The throttle cable will be located above the air filter assembly.

    • Use a flathead screwdriver to remove the throttle cable.

    • If your engine is not equipped with a throttle, skip this step.

  3. How to Rebuild a Briggs and Stratton Quantum Engine Carburetor: étape 3, image 1 de 2 How to Rebuild a Briggs and Stratton Quantum Engine Carburetor: étape 3, image 2 de 2
    • Remove the backplate of the air filter assembly to access the carburetor.

    • Using a 5/16" socket, remove the three screws inside of the assembly.

  4. How to Rebuild a Briggs and Stratton Quantum Engine Carburetor: étape 4, image 1 de 3 How to Rebuild a Briggs and Stratton Quantum Engine Carburetor: étape 4, image 2 de 3 How to Rebuild a Briggs and Stratton Quantum Engine Carburetor: étape 4, image 3 de 3
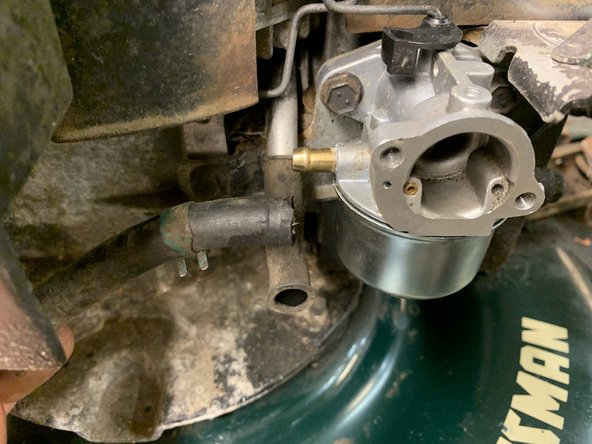
    • Remove the fuel line spring clamp with pliers.

    • Remove the fuel line from the carburetor by pulling directly outward.

    • Crimp the line with locking pliers. Do this before removing the fuel line to mitigate fuel spillage.

    • Drain the fuel line into a container and dispose of it properly.

  5. How to Rebuild a Briggs and Stratton Quantum Engine Carburetor: étape 5, image 1 de 2 How to Rebuild a Briggs and Stratton Quantum Engine Carburetor: étape 5, image 2 de 2
    • To remove the carburetor, use a 3/8" socket with an extension and ratchet to remove the two screws attached to the engine block.

    • Turn the carb 90 degrees, and pull off of the Z bend in the carb linkage.

  6. How to Rebuild a Briggs and Stratton Quantum Engine Carburetor: étape 6, image 1 de 3 How to Rebuild a Briggs and Stratton Quantum Engine Carburetor: étape 6, image 2 de 3 How to Rebuild a Briggs and Stratton Quantum Engine Carburetor: étape 6, image 3 de 3
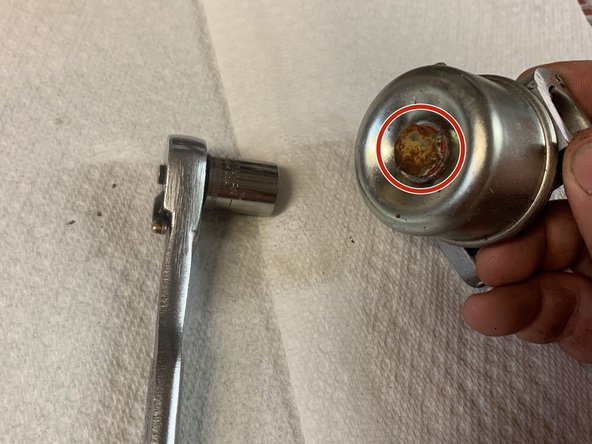
    • Remove the carburetor bowl screw with a 1/2" socket and ratchet.

    • Empty fuel from the carburetor bowl into a container for disposal.

  7. How to Rebuild a Briggs and Stratton Quantum Engine Carburetor: étape 7, image 1 de 3 How to Rebuild a Briggs and Stratton Quantum Engine Carburetor: étape 7, image 2 de 3 How to Rebuild a Briggs and Stratton Quantum Engine Carburetor: étape 7, image 3 de 3
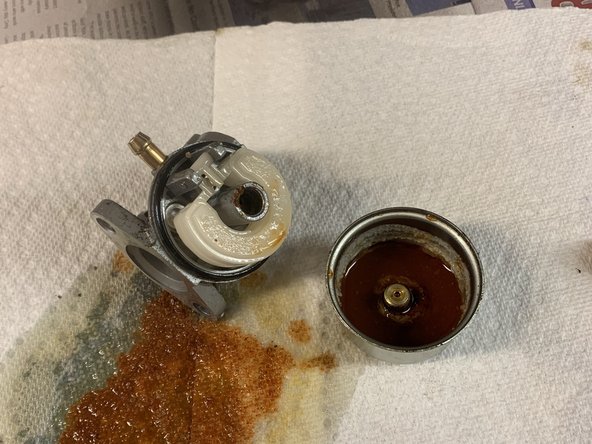
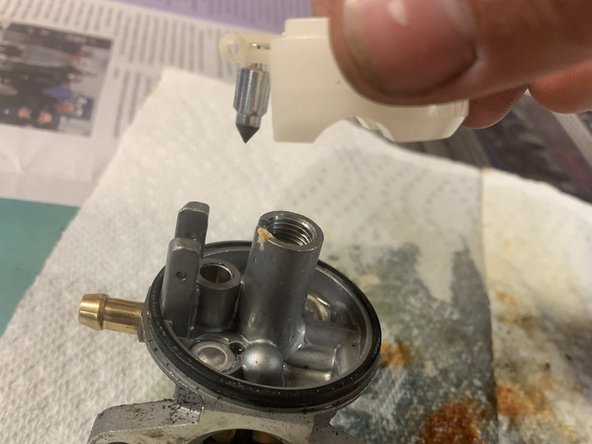
    • Spray the interior of the carburetor with carb cleaner.

    • Remove the float pin.

    • This will allow the float and needle to be removed as one piece.

    • This is not a full carburetor cleaning. This is just a rinse-off.

  8. How to Rebuild a Briggs and Stratton Quantum Engine Carburetor: étape 8, image 1 de 3 How to Rebuild a Briggs and Stratton Quantum Engine Carburetor: étape 8, image 2 de 3 How to Rebuild a Briggs and Stratton Quantum Engine Carburetor: étape 8, image 3 de 3
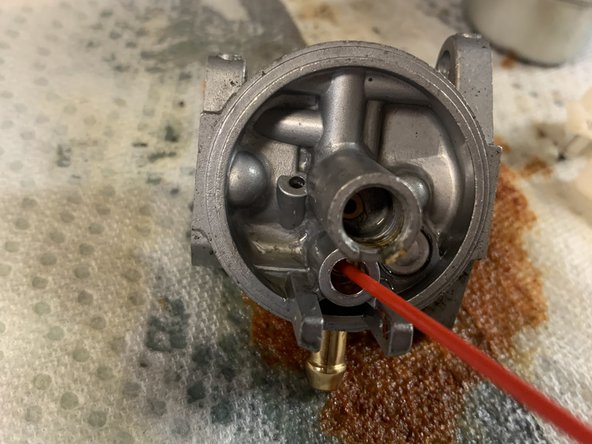
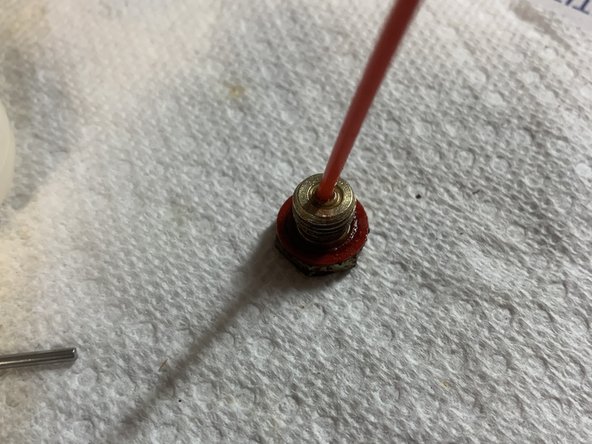
    • Spray out the three major spots in the following order: the main adjustment hole, the inlet needle hole, and the main jet.

    • If the carb cleaner does not pass through any component, use a small piece of wire to poke through the passage.

    • If using a needle to clear passages, spray the passages with carb cleaner after clearing.

  9. How to Rebuild a Briggs and Stratton Quantum Engine Carburetor: étape 9, image 1 de 1
    • After all parts are clean, lay them out to prepare for reassembly.

Conclusion

To reassemble your device, follow these instructions in reverse order.

Une autre personne a terminé cette réparation.

Matthew Dunham

Membre depuis le 03/24/21

166 Réputation

1 tutoriel rédigé

Équipe

UMass Dartmouth, Team S6-G8, Riel Spring 2021 Membre de l'équipe UMass Dartmouth, Team S6-G8, Riel Spring 2021

UMASSD-RIEL-S21S6G8

1 membre

1 tutoriel rédigé

0 commentaires

Ajouter un commentaire

Nombre de vues :

Dernières 24 heures : 7

7 derniers jours : 64

30 derniers jours : 296

Total : 5,498