Aller au contenu principal

How to Repair a Glitchy TI-83 Plus Screen

Ce dont vous avez besoin

  1. How to Repair a Glitchy TI-83 Plus Screen, How to Repair a Glitchy TI-83 Plus Screen: étape 1, image 1 de 2 How to Repair a Glitchy TI-83 Plus Screen, How to Repair a Glitchy TI-83 Plus Screen: étape 1, image 2 de 2
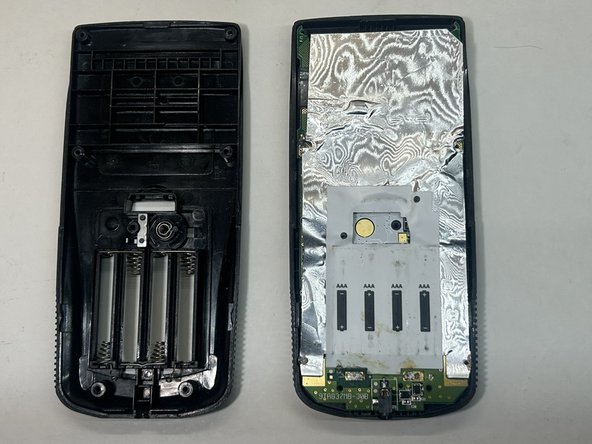
    • Remove the battery cover and the batteries that come with it.

  2. How to Repair a Glitchy TI-83 Plus Screen: étape 2, image 1 de 1
    • Remove the 5 mm Phillips #00 screw holding the backup battery cover.

    • Remove the backup battery cover

  3. How to Repair a Glitchy TI-83 Plus Screen: étape 3, image 1 de 1
    • Remove the backup battery by using the plastic opening tool. Pry it on the left of the battery where their is an opening to stick the tool into.

  4. How to Repair a Glitchy TI-83 Plus Screen: étape 4, image 1 de 1
    • Unscrew the six 7.5 mm T6 screws on the back shell. You will need to use a screwdriver with a long and skinny head

  5. How to Repair a Glitchy TI-83 Plus Screen: étape 5, image 1 de 2 How to Repair a Glitchy TI-83 Plus Screen: étape 5, image 2 de 2
    • Pry back shell off by Inserting the plastic opening tool in the track where the protective cover slides into and pry the halves of the shell apart.

  6. How to Repair a Glitchy TI-83 Plus Screen: étape 6, image 1 de 2 How to Repair a Glitchy TI-83 Plus Screen: étape 6, image 2 de 2
    • Remove the protective sheet from the mother board by unscrewing the two 1 mm Phillips #00 screws.

  7. How to Repair a Glitchy TI-83 Plus Screen: étape 7, image 1 de 3 How to Repair a Glitchy TI-83 Plus Screen: étape 7, image 2 de 3 How to Repair a Glitchy TI-83 Plus Screen: étape 7, image 3 de 3
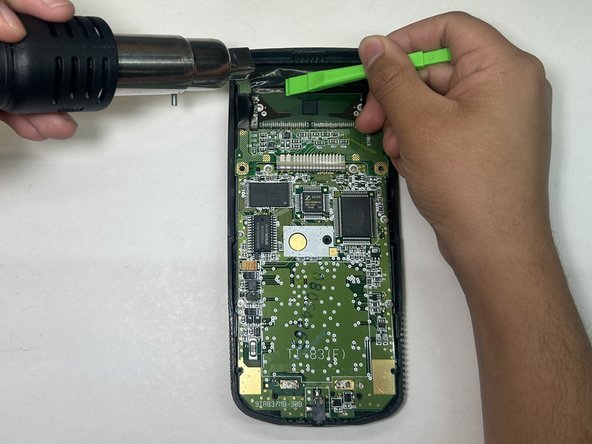
    • Set your heat gun to the lowest setting(around 150 degrees)

    • If you are missing lines on the screen, aim at the top ribbon cables and heat the cable evenly for about 5 seconds.

    • Then heat and apply pressure using the plastic opening tool for about 5-10 seconds, applying pressure to different sections of the ribbon cable within that timeframe.

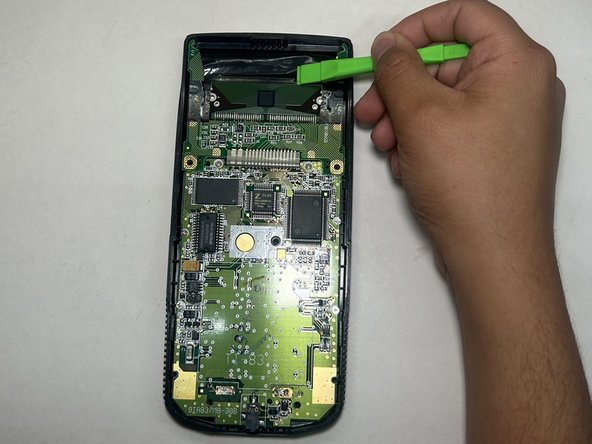
    • Continue to apply pressure throughout the ribbons.

    • If the screen is Glitchy, do the same for the bottom ribbon cable.

Conclusion

To reassemble your device, follow these instructions in reverse order.

Simon Rafael

Membre depuis le 03/20/24

145 Réputation

1 tutoriel rédigé

Équipe

CSU Los Angeles, Team 1-66, Harris Spring 2024 Membre de l'équipe CSU Los Angeles, Team 1-66, Harris Spring 2024

CSULA-HARRIS-S24S1G66

1 membre

1 tutoriel rédigé

0 commentaires

Ajouter un commentaire

Nombre de vues :

Dernières 24 heures : 0

7 derniers jours : 3

30 derniers jours : 33

Total : 74