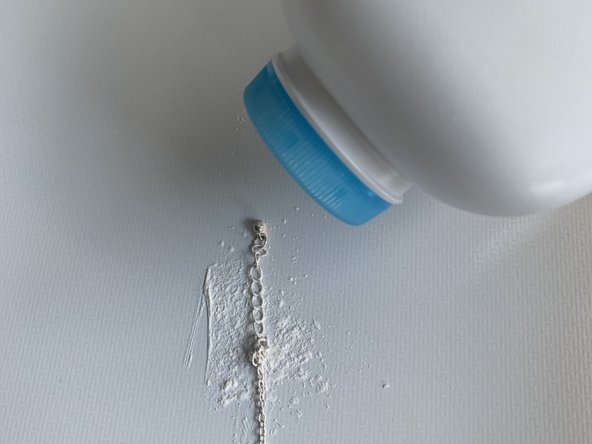
Aller au contenu principal

How to Repair a Knotted Chain

Ce dont vous avez besoin

  1. How to Repair a Knotted Chain, How to Repair a Knotted Chain: étape 1, image 1 de 1
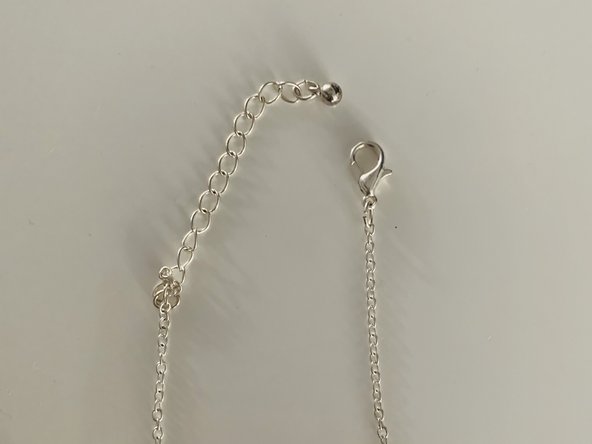
    • Find a flat surface.

    • Remove all clutter from your workspace to ensure you can access the chain easily.

    • The flat surface will provide stability when you begin working through the tangles and will prevent other tangles from forming during the process.

  2. How to Repair a Knotted Chain: étape 2, image 1 de 3 How to Repair a Knotted Chain: étape 2, image 2 de 3 How to Repair a Knotted Chain: étape 2, image 3 de 3
    • Rest the chain on the surface.

    • Slowly spread the chain out so you can recognize the tangled areas.

    • While spreading the chain on the surface, make sure to do so slowly in order to avoid tightening the tangle.

  3. How to Repair a Knotted Chain: étape 3, image 1 de 3 How to Repair a Knotted Chain: étape 3, image 2 de 3 How to Repair a Knotted Chain: étape 3, image 3 de 3
    • Unclasp the chain.

    • Separate the strands gently.

    • Opening the clasp will isolate the chain strands, permitting them to slide through the knots easily.

  4. How to Repair a Knotted Chain: étape 4, image 1 de 2 How to Repair a Knotted Chain: étape 4, image 2 de 2
    • Gently sprinkle baby powder onto the knotted area.

    • Sprinkle the powder until the knot is lightly coated.

    • This is an optional step.

  5. How to Repair a Knotted Chain: étape 5, image 1 de 3 How to Repair a Knotted Chain: étape 5, image 2 de 3 How to Repair a Knotted Chain: étape 5, image 3 de 3
    • Bring your thumb and index finger into a pinching pose.

    • Put the knot between the thumb and index finger.

    • Carefully and gently lightly rub the knot together.

  6. How to Repair a Knotted Chain: étape 6, image 1 de 2 How to Repair a Knotted Chain: étape 6, image 2 de 2
    • Insert two toothpicks between the focal point of the knot.

    • Any fine toothpick style tool can work to untangle the knot.

  7. How to Repair a Knotted Chain: étape 7, image 1 de 3 How to Repair a Knotted Chain: étape 7, image 2 de 3 How to Repair a Knotted Chain: étape 7, image 3 de 3
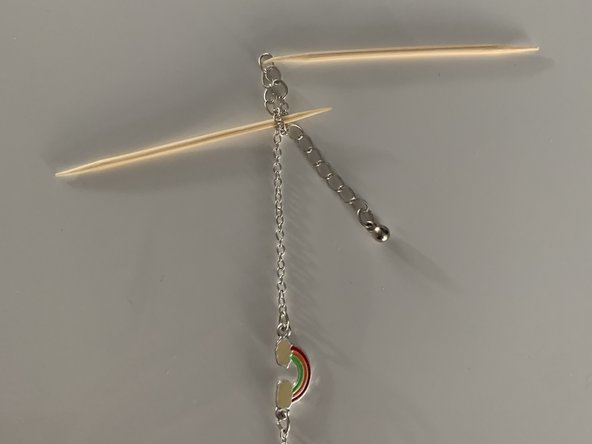
    • Gently draw the toothpicks from one another to open and release the tight knot.

    • When you get an opening in the knot using the toothpicks, take it apart by pulling each separated strand through the knot to fully open it.

    • Then slowly pull apart the loosened knot to separate the chain strands.

  8. How to Repair a Knotted Chain: étape 8, image 1 de 2 How to Repair a Knotted Chain: étape 8, image 2 de 2
    • Restore chain back into its original form.

    • Clasp the chain to avoid it from re-tangling.

  9. How to Repair a Knotted Chain: étape 9, image 1 de 2 How to Repair a Knotted Chain: étape 9, image 2 de 2
    • Wipe the chain with a damp towel or tissue before use.

    • This is an optional step.

Ligne d'arrivée

2 autres ont terminé cette réparation.

Momena Masood

Membre depuis le 05/10/20

223 Réputation

1 tutoriel rédigé

Équipe

York University, Team S1-G19, O'Regan Summer 2020 Membre de l'équipe York University, Team S1-G19, O'Regan Summer 2020

YORK-O'REGAN-SU20S1G19

1 membre

1 tutoriel rédigé

0 commentaires

Ajouter un commentaire

Nombre de vues :

Dernières 24 heures : 0

7 derniers jours : 8

30 derniers jours : 21

Total : 558