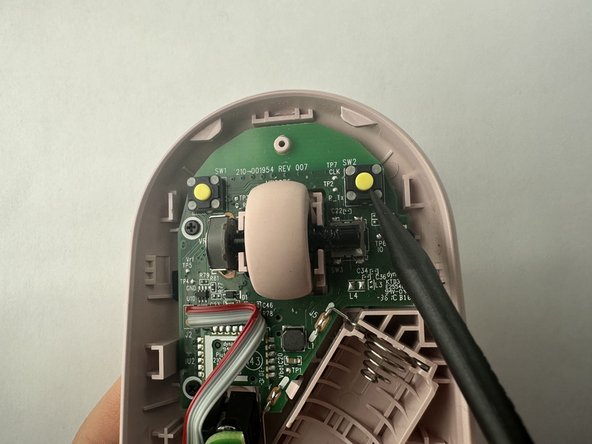
Aller au contenu principal

How to Repair the Buttons on a Logitech Pebble Mouse

Ce dont vous avez besoin

  1. How to Repair the Buttons on a Logitech Pebble Mouse, How to Repair the Buttons on a Logitech Pebble Mouse: étape 1, image 1 de 3 How to Repair the Buttons on a Logitech Pebble Mouse, How to Repair the Buttons on a Logitech Pebble Mouse: étape 1, image 2 de 3 How to Repair the Buttons on a Logitech Pebble Mouse, How to Repair the Buttons on a Logitech Pebble Mouse: étape 1, image 3 de 3
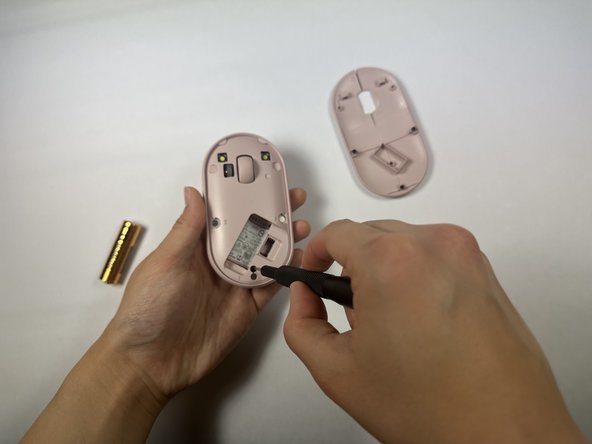
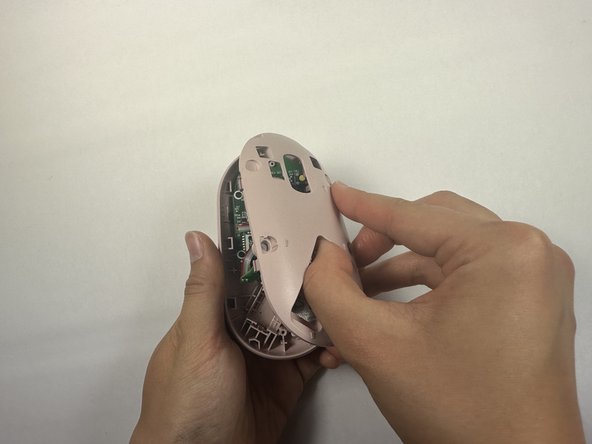
    • Use your hands to remove the magnetic top panel of the mouse.

  2. How to Repair the Buttons on a Logitech Pebble Mouse: étape 2, image 1 de 3 How to Repair the Buttons on a Logitech Pebble Mouse: étape 2, image 2 de 3 How to Repair the Buttons on a Logitech Pebble Mouse: étape 2, image 3 de 3
    • Remove the USB adaptor in the small rectangular hole on the lower right corner.

    • Remove the battery.

  3. How to Repair the Buttons on a Logitech Pebble Mouse: étape 3, image 1 de 2 How to Repair the Buttons on a Logitech Pebble Mouse: étape 3, image 2 de 2
    • Use a Phillips #000 screwdriver to remove one screw holding the inner panel in place.

  4. How to Repair the Buttons on a Logitech Pebble Mouse: étape 4, image 1 de 3 How to Repair the Buttons on a Logitech Pebble Mouse: étape 4, image 2 de 3 How to Repair the Buttons on a Logitech Pebble Mouse: étape 4, image 3 de 3
    • Remove the the inner panel.

    • This may take a little bit of effort but it should come off fairly easily.

    • You can use the battery socket as leverage to remove the panel. To avoid breaking the panel, be gentle but firm.

  5. How to Repair the Buttons on a Logitech Pebble Mouse: étape 5, image 1 de 1
    • Use a fine-tipped object or a Q-tip and dip it in a small amount of oil.

  6. How to Repair the Buttons on a Logitech Pebble Mouse: étape 6, image 1 de 3 How to Repair the Buttons on a Logitech Pebble Mouse: étape 6, image 2 de 3 How to Repair the Buttons on a Logitech Pebble Mouse: étape 6, image 3 de 3
    • Gently wipe the metal axle where the scroll wheel is mounted with a small amount of 3-in-1 oil.

    • Repeat for the left and right click buttons.

Conclusion

To reassemble your device, follow these instructions in reverse order.

Une autre personne a terminé cette réparation.

Emma Whitmer

Membre depuis le 04/19/23

151 Réputation

1 tutoriel rédigé

Équipe

UC Davis, Team 2-6, Morris Spring 2023 Membre de l'équipe UC Davis, Team 2-6, Morris Spring 2023

UCD-MORRIS-S23S2G6

3 membres

1 tutoriel rédigé

2 commentaires

At first i'm laugh about fixing button with oil, but then i tried it... and it worked like a charm!

Marat - Réponse

I didn't even disassemble (unscrew) my pebble. Just applied a drop of mineral oil to the button and it did help a lot! Thanks!

Tomek Luzak - Réponse

Ajouter un commentaire

Nombre de vues :

Dernières 24 heures : 7

7 derniers jours : 53

30 derniers jours : 167

Total : 1,564