Aller au contenu principal

How to Replace Sony MDR-7506 Ear Pads

Ce dont vous avez besoin

  1. How to Replace Sony MDR-7506 Ear Pads, Ear Pads: étape 1, image 1 de 1
    • CAUTION: For safe-handling (preventing damage or dislocation of the wires or other components) rotate the earcups to their inverse position about ~ 180° degrees from resting position.

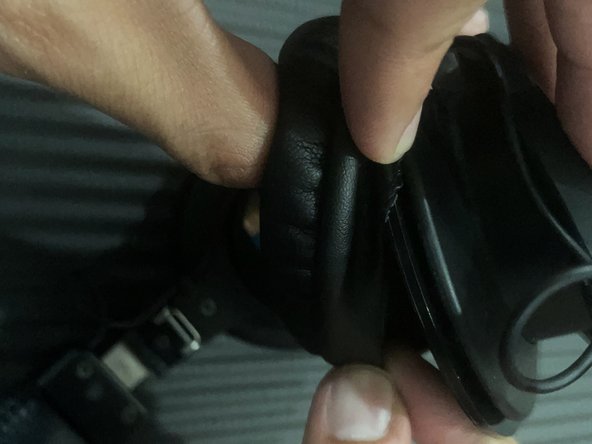
  2. How to Replace Sony MDR-7506 Ear Pads: étape 2, image 1 de 3 How to Replace Sony MDR-7506 Ear Pads: étape 2, image 2 de 3 How to Replace Sony MDR-7506 Ear Pads: étape 2, image 3 de 3
    • Carefully peel the cushions off, closer to the seams, along the speaker's outer edge.

    • Fully remove the ear pads without any yanking or excessive jerking motions.

    • Repeat for the other side's ear pad.

  3. How to Replace Sony MDR-7506 Ear Pads: étape 3, image 1 de 1
    • These replacement ear cushions appear to be high-quality, come with a warranty, and a set of instructions (as shown in the first image).

    • Also, "hear" is a quick comparison between the tattered/old ear cushions (left) and the new ear cushions (right).

  4. How to Replace Sony MDR-7506 Ear Pads: étape 4, image 1 de 2 How to Replace Sony MDR-7506 Ear Pads: étape 4, image 2 de 2
    • Place the new headphone cushions flush to each of the speakers' edges (padded-side facing outward from speaker).

    • Align with proper orientation of side-lengths.

    • The first image in this step is misaligned and can lead to tearing or inconvenience, once fixating begins.

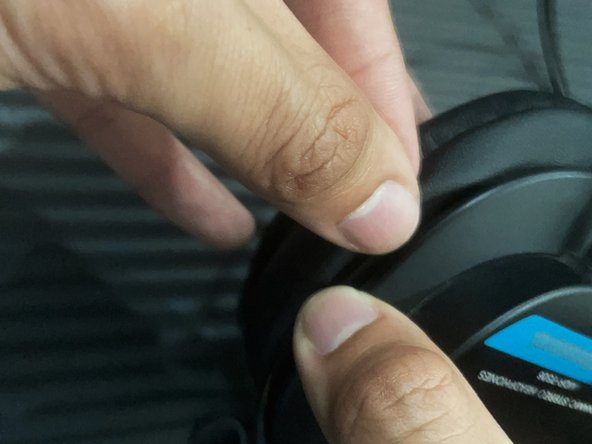
  5. How to Replace Sony MDR-7506 Ear Pads: étape 5, image 1 de 3 How to Replace Sony MDR-7506 Ear Pads: étape 5, image 2 de 3 How to Replace Sony MDR-7506 Ear Pads: étape 5, image 3 de 3
    • Begin wrapping the ear cushions by securing the leather around the edges of each speaker. Insert the non-cushion side flaps into the allotted crevice.

    • Work around the edges of each speaker until complete.

    • Initial stretching for proper fitment may be required; however, carefully hold down the wrapped parts in place while pulling the free lip over the speaker edges - as shown in the second image.

  6. How to Replace Sony MDR-7506 Ear Pads: étape 6, image 1 de 2 How to Replace Sony MDR-7506 Ear Pads: étape 6, image 2 de 2
    • Finally, check around the ear pads to ensure they are completely wrapped and secure.

    • For any mistakes, misalignments, or loose ends, this process may be repeated or small corrections can be made (avoid tearing by removing ear pads completely for large adjustments).

Conclusion

Enjoy your refreshed ear pads!

2 autres ont terminé cette réparation.

Zachary Taha

Membre depuis le 08/24/22

181 Réputation

1 tutoriel rédigé

Équipe

CSU Los Angeles, Team 3-22, Briggs Fall 2022 Membre de l'équipe CSU Los Angeles, Team 3-22, Briggs Fall 2022

CSULA-BRIGGS-F22S3G22

1 membre

1 tutoriel rédigé

0 commentaires

Ajouter un commentaire

Nombre de vues :

Dernières 24 heures : 6

7 derniers jours : 37

30 derniers jours : 113

Total : 1,518