Introduction
Luckily, this turned out to be a straight-forward repair. The Lowrider headphones only needed a new audio connector. This guide will show how to simply test the function, and what to look for. The trickiest part here is the removal of the ear cushion. It appears as if every manufacturer changes the way they are fastened. Hopefully, this will prevent somebody from breaking their headphones while trying to repair them.
Ce dont vous avez besoin
-
-
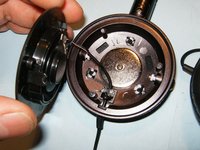
Here is the complete headphone. I got no sound from either side when I plugged it in to my old iPod.
-
The cushion is simply stuck into a space between the speaker (driver) and the case.
-
Remove the cushion by gently tugging it out of that groove.
-
-
-
With the three screws removed, the driver will simply fold up to reveal the wiring. In this case, the color code for the wires is Blue for left and Gold for ground.
-
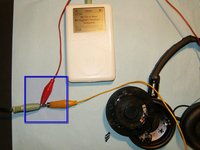
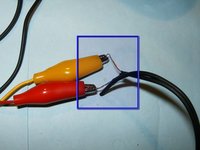
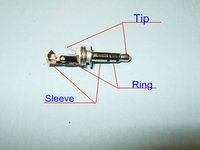
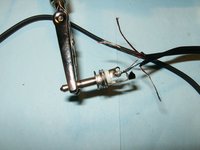
Here is the way I connected some alligator test leads. Use a male-male 3.5 mm stereo cable. Attach one lead to the sleeve, the upper part of the connector, and one lead to either tip (front) or Ring (middle) of the connector.
-
Attach some test points to the end of the alligator cables and touch the solder connections of the speaker (driver). In this case, there was clear sound. This determined that there was no signal going from the connector to the drivers.
-
-
-
-
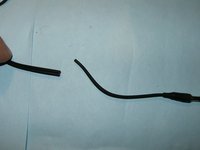
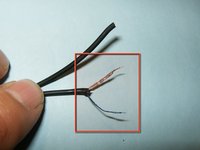
Cut about 3 inches off the end of the cable.
-
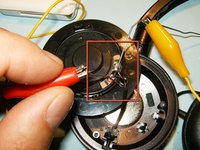
To make sure that it was indeed the connector, and not a cracked wire further up, remove the insulation of one set of wires. The device uses one set for each side. To remove the insulation, you can use a boxcutter, a sharp knife, a lighter, etc.
-
Attach the test lead from any MP3 player, as previously shown. If the reason for the non-functioning headphones was the connector, there should now be sound coming from the headphone speaker (driver). In this case, there was. Therefore, it was indeed the audio connector that was broken.
-
-
-
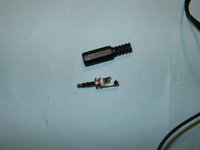
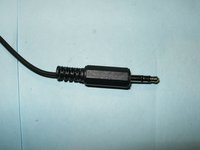
Here is a new 3.5 mm stereo audio connector. The cover simply screws on the actual connector.
-
Place the cover in the proper direction over the wire
-
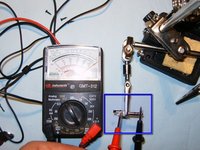
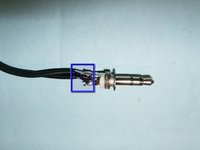
Here is how to determine which solder tab fits to what part of the connector. Set a multimeter to the Ohm scale. Touching the tip and the shortest tab showed continuity.
-
-
-
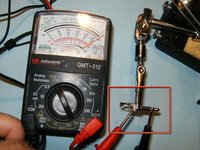
Since the ring (middle) of the connector and the medium size tab showed continuity, they are a match for soldering.
-
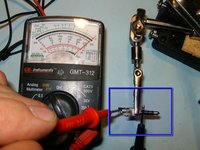
Lastly, the sleeve (top) and the longest tab showed continuity. Now we have determined which parts are a match. This is important to properly connect the left and right speaker (driver).
-
If no multimeter is available, here is a quick sketch of the three corresponding connections.
-
-
-
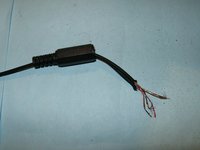
Most MP3 players, including the iPod, use the Tip for the left channel. Solder the Blue wire to the tip connector, the Red wire to the Ring connector, and both Gold wires to the Sleeve connector.
-
When all wires are soldered to their respective connectors, squeeze the cable tab at the sleeve connector tight around the cable. This helps to keep the solder connection when the headphones get disconnected by pulling on the wire.
-
Attach the cover to the audio jack connector.
-


To reassemble your device, follow these instructions in reverse order.
Annulation : je n'ai pas terminé ce tutoriel.
5 autres ont terminé cette réparation.
