Aller au contenu principal

How to check or clean Samsung DVD-P230 buttons

Ce dont vous avez besoin

  1. How to check or clean Samsung DVD-P230 buttons, Outer Cover & Faceplate: étape 1, image 1 de 3 How to check or clean Samsung DVD-P230 buttons, Outer Cover & Faceplate: étape 1, image 2 de 3 How to check or clean Samsung DVD-P230 buttons, Outer Cover & Faceplate: étape 1, image 3 de 3
    • Open the tray by pressing the eject button

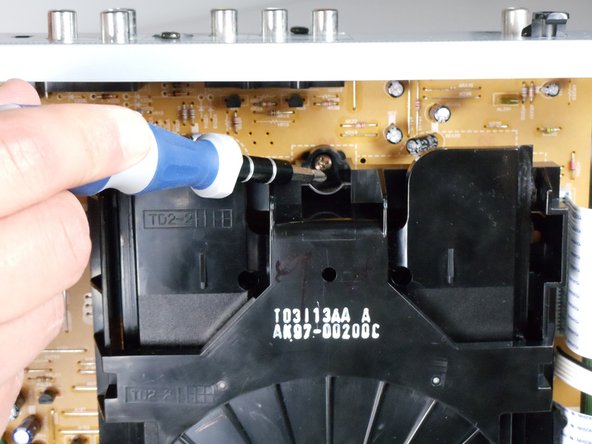
    • Remove the DVD tray faceplate by pushing the faceplate up off of the tray.

  2. How to check or clean Samsung DVD-P230 buttons: étape 2, image 1 de 1
    • Press the eject button to insert the tray

    • After the tray is closed unplug DVD player

  3. How to check or clean Samsung DVD-P230 buttons: étape 3, image 1 de 1
    • Unscrew the 3 screws in the back.

  4. How to check or clean Samsung DVD-P230 buttons: étape 4, image 1 de 2 How to check or clean Samsung DVD-P230 buttons: étape 4, image 2 de 2
    • Pull the outer case upward and then towards you.

  5. How to check or clean Samsung DVD-P230 buttons: étape 5, image 1 de 3 How to check or clean Samsung DVD-P230 buttons: étape 5, image 2 de 3 How to check or clean Samsung DVD-P230 buttons: étape 5, image 3 de 3
    • There are six symmetrically placed tabs holding in the front faceplate. Unhook these six tabs to loosen the faceplate.

  6. How to check or clean Samsung DVD-P230 buttons: étape 6, image 1 de 2 How to check or clean Samsung DVD-P230 buttons: étape 6, image 2 de 2
    • Pull off front faceplate. This may take a couple of tries to get all six tabs unhooked simultaneously.

  7. How to check or clean Samsung DVD-P230 buttons, Power Cord: étape 7, image 1 de 3 How to check or clean Samsung DVD-P230 buttons, Power Cord: étape 7, image 2 de 3 How to check or clean Samsung DVD-P230 buttons, Power Cord: étape 7, image 3 de 3
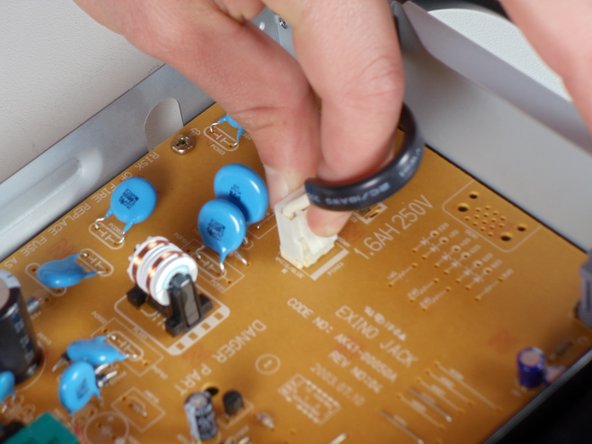
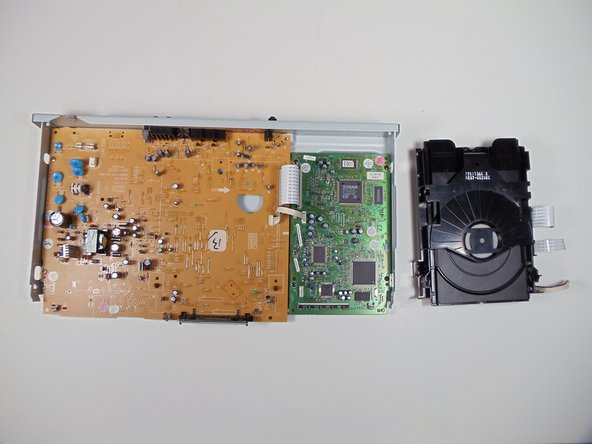
    • Locate the white clip that attaches the cord to the motherboard

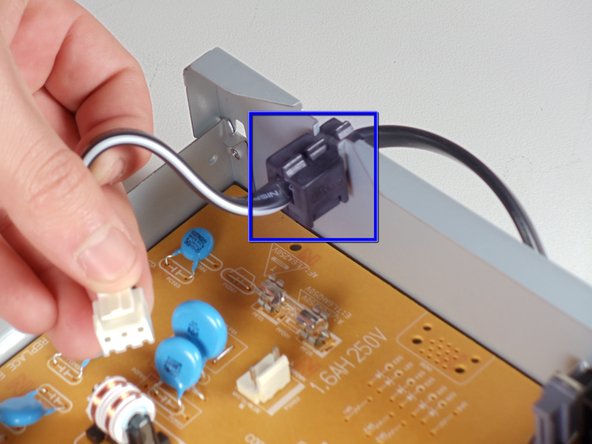
    • Grasp clip and squeeze to release

    • Lift up and remove power cord

    • Slide cord mount from outer case

  8. How to check or clean Samsung DVD-P230 buttons, Tray: étape 8, image 1 de 3 How to check or clean Samsung DVD-P230 buttons, Tray: étape 8, image 2 de 3 How to check or clean Samsung DVD-P230 buttons, Tray: étape 8, image 3 de 3
    • Remove the three screws holding in the DVD tray

  9. How to check or clean Samsung DVD-P230 buttons: étape 9, image 1 de 2 How to check or clean Samsung DVD-P230 buttons: étape 9, image 2 de 2
    • Remove the power cord and first two ribbons by pulling them directly out of their sockets.

  10. How to check or clean Samsung DVD-P230 buttons: étape 10, image 1 de 2 How to check or clean Samsung DVD-P230 buttons: étape 10, image 2 de 2
    • Gently lift the DVD tray off of the motherboard.

  11. How to check or clean Samsung DVD-P230 buttons, How to check or clean Samsung DVD-P230 buttons: étape 11, image 1 de 1
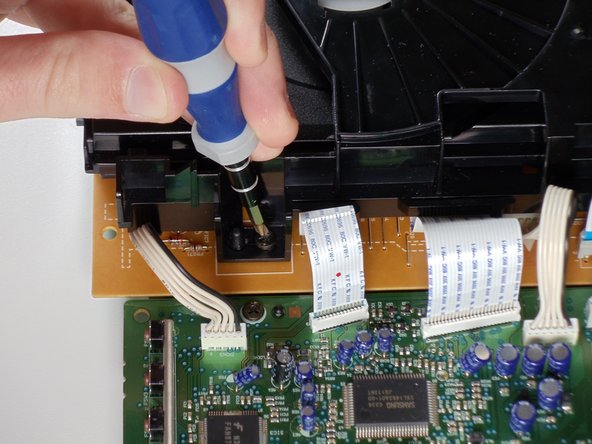
    • Use the tweezers to make sure all the buttons aren't stuck.

Conclusion

To reassemble your device, follow these instructions in reverse order.

3 autres ont terminé cette réparation.

Mitchell Hart

Membre depuis le 01/21/11

903 Réputation

5 tutoriels rédigés

Équipe

Cal Poly, Team 3-30, Regan Winter 2011 Membre de l'équipe Cal Poly, Team 3-30, Regan Winter 2011

CPSU-REGAN-W11S3G30

4 membres

8 tutoriels rédigés

0 commentaires

Ajouter un commentaire

Nombre de vues :

Dernières 24 heures : 0

7 derniers jours : 0

30 derniers jours : 2

Total : 1,478