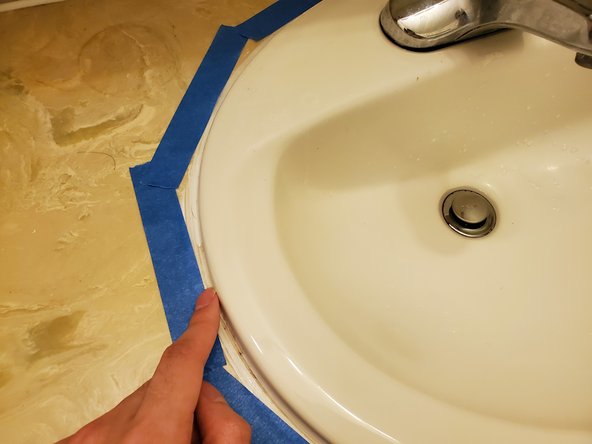
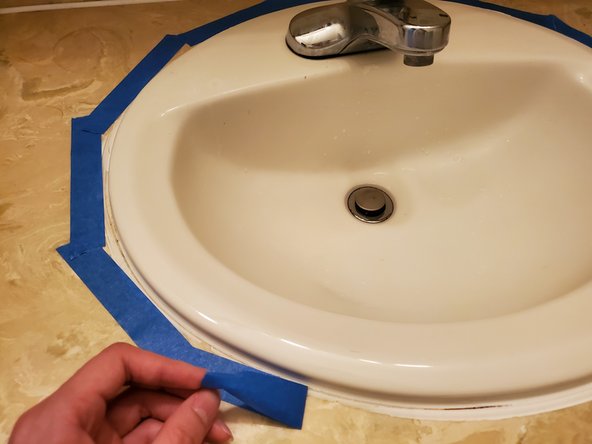
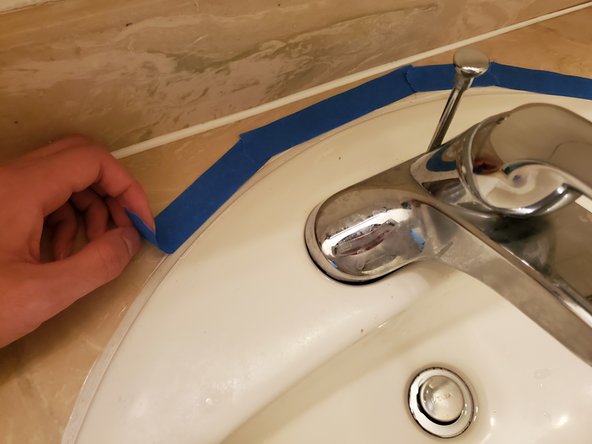
Aller au contenu principal

How to re-caulk a bathroom sink

Ce dont vous avez besoin

  1. How to re-caulk a bathroom sink, Caulk seal: étape 1, image 1 de 1
    • Clean and dry around the rim of the sink with a paper towel.

    • Make sure the old caulk is completely dry before moving on.

  2. How to re-caulk a bathroom sink: étape 2, image 1 de 1
    • Remove the old caulk around the rim of the sink with a utility knife.

  3. How to re-caulk a bathroom sink: étape 3, image 1 de 1
    • Remove any old caulk residue around the rim of the sink with a wet paper towel.

    • Then dry the area completely.

    • Ensure the area is completely clean and dry before applying the new caulk.

  4. How to re-caulk a bathroom sink: étape 4, image 1 de 3 How to re-caulk a bathroom sink: étape 4, image 2 de 3 How to re-caulk a bathroom sink: étape 4, image 3 de 3
    • Apply painter's tape around the rim of the sink while leaving a small gap for caulk to be applied.

  5. How to re-caulk a bathroom sink: étape 5, image 1 de 2 How to re-caulk a bathroom sink: étape 5, image 2 de 2
    • Place the caulk tube into the gun.

    • Slowly press the trigger to release a thin line of caulk and move around the edge of the sink as you go.

  6. How to re-caulk a bathroom sink: étape 6, image 1 de 3 How to re-caulk a bathroom sink: étape 6, image 2 de 3 How to re-caulk a bathroom sink: étape 6, image 3 de 3
    • Smooth out the caulk against the edge of the rim and counter with your wet index finger.

    • Keep a rag nearby to wipe excess caulk from your finger periodically.

    • Press against the caulk firmly while sliding your index finger as you go around the rim of the sink.

  7. How to re-caulk a bathroom sink: étape 7, image 1 de 3 How to re-caulk a bathroom sink: étape 7, image 2 de 3 How to re-caulk a bathroom sink: étape 7, image 3 de 3
    • Pull the tape away from the counter immediately after applying the caulk.

    • Pulling away from the counter will help keep the caulk in a straight line.

  8. How to re-caulk a bathroom sink: étape 8, image 1 de 1
    • Wipe off any excess caulk from the edge of the rim with a wet paper towel.

  9. How to re-caulk a bathroom sink: étape 9, image 1 de 1
    • Let the new caulk dry for at least a day before using the sink.

Ligne d'arrivée

Une autre personne a terminé cette réparation.

Thi Nguyen

Membre depuis le 04/29/20

201 Réputation

1 tutoriel rédigé

Équipe

UW Tacoma, Team S1-G43, Cardinal Spring 2020 Membre de l'équipe UW Tacoma, Team S1-G43, Cardinal Spring 2020

UWT-CARDINAL-S20S1G43

1 membre

3 tutoriels rédigés

0 commentaires

Ajouter un commentaire

Nombre de vues :

Dernières 24 heures : 1

7 derniers jours : 56

30 derniers jours : 195

Total : 4,539