Aller au contenu principal

Huawei MediaPad M3 Motherboard Replacement

Ce dont vous avez besoin

  1. Huawei MediaPad M3 Motherboard Replacement, Display Assembly: étape 1, image 1 de 2 Huawei MediaPad M3 Motherboard Replacement, Display Assembly: étape 1, image 2 de 2
    • Use a heat gun to heat the display. It may take up to 30 seconds.

    • Slide in the opening picks to the four corners of the tablet and peel off the display carefully.

  2. Huawei MediaPad M3 Motherboard Replacement: étape 2, image 1 de 2 Huawei MediaPad M3 Motherboard Replacement: étape 2, image 2 de 2
    • Open the display carefully.

    • Use a Phillips #00 screwdriver to remove the two 3.0mm screws.

  3. Huawei MediaPad M3 Motherboard Replacement: étape 3, image 1 de 2 Huawei MediaPad M3 Motherboard Replacement: étape 3, image 2 de 2
    • After removing the two screws, use your hand to take out the silver metal bracket.

  4. Huawei MediaPad M3 Motherboard Replacement: étape 4, image 1 de 3 Huawei MediaPad M3 Motherboard Replacement: étape 4, image 2 de 3 Huawei MediaPad M3 Motherboard Replacement: étape 4, image 3 de 3
    • Use the plastic opening tool to disconnect the two ribbon cable connectors.

  5. Huawei MediaPad M3 Motherboard Replacement: étape 5, image 1 de 2 Huawei MediaPad M3 Motherboard Replacement: étape 5, image 2 de 2
    • Remove the display assembly from the device.

  6. Huawei MediaPad M3 Motherboard Replacement, Front Camera: étape 6, image 1 de 1
    • Use a Phillips #00 screwdriver to remove the six 3.0mm screws.

  7. Huawei MediaPad M3 Motherboard Replacement: étape 7, image 1 de 1
    • Use your hand to remove the silver metal bracket.

  8. Huawei MediaPad M3 Motherboard Replacement: étape 8, image 1 de 2 Huawei MediaPad M3 Motherboard Replacement: étape 8, image 2 de 2
    • Use your hand to remove the two black plastic covers.

  9. Huawei MediaPad M3 Motherboard Replacement: étape 9, image 1 de 3 Huawei MediaPad M3 Motherboard Replacement: étape 9, image 2 de 3 Huawei MediaPad M3 Motherboard Replacement: étape 9, image 3 de 3
    • Use a plastic opening tool to remove the front camera.

  10. Huawei MediaPad M3 Motherboard Replacement, Rear Camera: étape 10, image 1 de 3 Huawei MediaPad M3 Motherboard Replacement, Rear Camera: étape 10, image 2 de 3 Huawei MediaPad M3 Motherboard Replacement, Rear Camera: étape 10, image 3 de 3
    • Disconnect and remove the camera from the motherboard.

  11. Huawei MediaPad M3 Motherboard Replacement, Motherboard: étape 11, image 1 de 2 Huawei MediaPad M3 Motherboard Replacement, Motherboard: étape 11, image 2 de 2
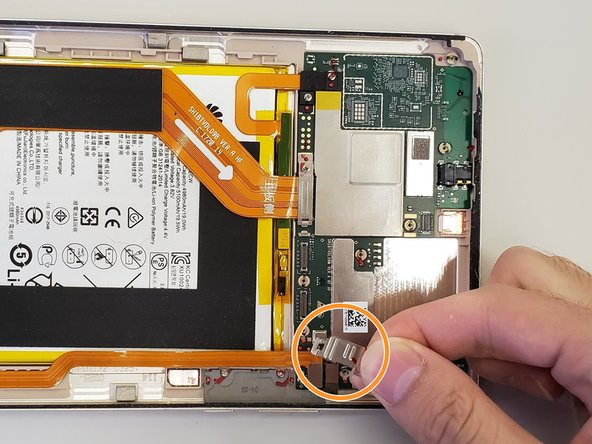
    • Use a Phillips #00 screwdriver to remove this 3mm screw.

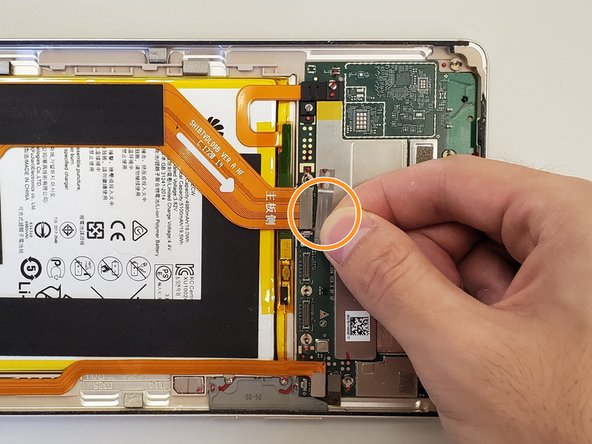
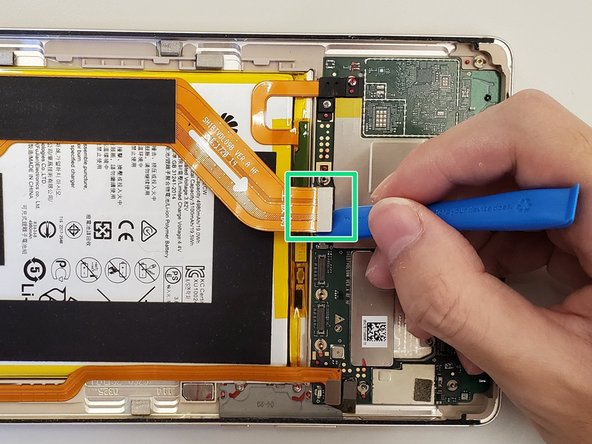
    • Remove the small silver metal bracket.

  12. Huawei MediaPad M3 Motherboard Replacement: étape 12, image 1 de 2 Huawei MediaPad M3 Motherboard Replacement: étape 12, image 2 de 2
    • First, remove the right ribbon cable from the board.

    • Next, remove the left ribbon cable from the board.

  13. Huawei MediaPad M3 Motherboard Replacement: étape 13, image 1 de 3 Huawei MediaPad M3 Motherboard Replacement: étape 13, image 2 de 3 Huawei MediaPad M3 Motherboard Replacement: étape 13, image 3 de 3
    • Use a Phillips #00 screwdriver to remove the 3mm screw present on top of the silver metal bracket.

    • Remove the silver metal bracket from the board.

    • Remove the yellow ribbon cable using a plastic opening tool.

  14. Huawei MediaPad M3 Motherboard Replacement: étape 14, image 1 de 3 Huawei MediaPad M3 Motherboard Replacement: étape 14, image 2 de 3 Huawei MediaPad M3 Motherboard Replacement: étape 14, image 3 de 3
    • Use a Phillips #00 screwdriver to remove the two 3mm screws.

    • Remove the black plastic cover from the board.

    • Remove the yellow ribbon cable using a plastic opening tool.

  15. Huawei MediaPad M3 Motherboard Replacement: étape 15, image 1 de 3 Huawei MediaPad M3 Motherboard Replacement: étape 15, image 2 de 3 Huawei MediaPad M3 Motherboard Replacement: étape 15, image 3 de 3
    • Carefully remove the motherboard from the device by using a plastic opening tool.

Conclusion

To reassemble your device, follow these instructions in reverse order.

3 autres ont terminé cette réparation.

0 commentaires

Ajouter un commentaire

Nombre de vues :

Dernières 24 heures : 0

7 derniers jours : 3

30 derniers jours : 16

Total : 1,901