Introduction
Use this guide to remove the rear glass on your Huawei P40 Pro.
You’ll need replacement adhesive to reattach components when reassembling the device.
Ce dont vous avez besoin
-
-
Apply a heated iOpener to the rear glass to loosen the adhesive underneath. Apply the iOpener for at least two minutes.
-
-
-
Secure a suction handle to the bottom edge of the rear glass, as close to the curved edge as possible.
-
Lift the back cover with the suction handle to create a small gap between the back cover and the frame.
-
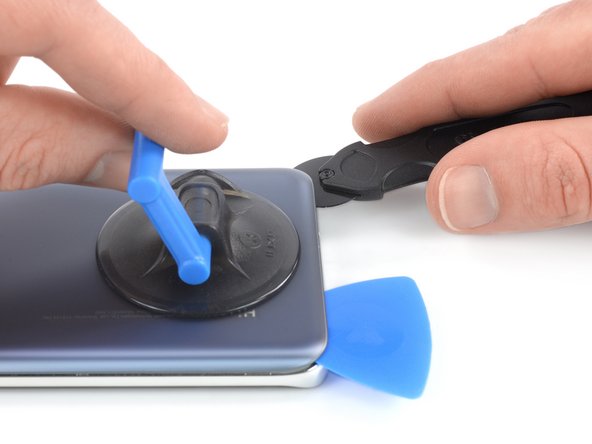
Insert an iMac opening wheel into the gap.
-
Slide the opening wheel to the bottom left corner to slice the adhesive.
-
-
-
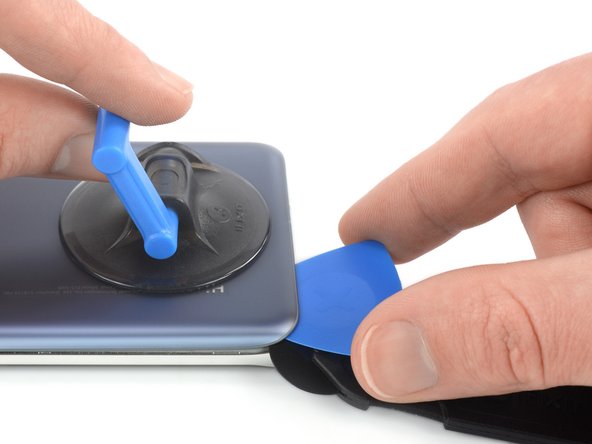
Insert an opening pick into the gap between rear glass and frame at the bottom left corner of your phone to prevent the adhesive from resealing.
-
-
-
-
Reinsert the opening wheel at the bottom edge of the rear glass.
-
Slide the opening wheel to the bottom right corner to slice the adhesive.
-
Insert an opening pick underneath the bottom right corner of the rear glass, next to the opening wheel to prevent the adhesive from resealing.
-
-
-
Insert the opening wheel underneath the bottom left corner of the rear glass.
-
Slide the opening wheel along the left edge of your Huawei P40 Pro to cut the adhesive.
-
Insert an opening pick underneath the top left corner of the rear glass, next to the opening wheel to prevent the adhesive from resealing.
-
-
-
Insert the opening wheel underneath the top left corner of the rear glass.
-
Slide the opening wheel along the top edge of your phone to cut the adhesive.
-
Insert an opening pick underneath the top right corner of the rear glass, next to the opening wheel to prevent the adhesive from resealing
-


To reassemble your device, follow these instructions in reverse order. Apply new adhesive where necessary after cleaning the relevant areas with isopropyl alcohol (>90%).
Secure the rear glass with pre-cut adhesive or double-sided adhesive tape during reassembly.
Removal didn’t go as planned? Try some basic troubleshooting, or ask our Answers community for help.
Annulation : je n'ai pas terminé ce tutoriel.
Une autre personne a terminé cette réparation.

