Aller au contenu principal

IBM ThinkPad R40 Hard Drive Replacement

Ce dont vous avez besoin

  1. IBM ThinkPad R40 Hard Drive Replacement, Remove the battery: étape 1, image 1 de 2 IBM ThinkPad R40 Hard Drive Replacement, Remove the battery: étape 1, image 2 de 2
    • To remove the battery, slide the battery lock lever right, while pulling on the battery tab.

  2. IBM ThinkPad R40 Hard Drive Replacement, Remove the hard drive holder.: étape 2, image 1 de 2 IBM ThinkPad R40 Hard Drive Replacement, Remove the hard drive holder.: étape 2, image 2 de 2
    • Remove the Phillips #1 screw from the bottom of the laptop.

    • Pull on the small rise in the plastic to remove the hard drive holder.

    • Don't be afraid to use some force, it requires quite a bit of pressure to remove.

  3. IBM ThinkPad R40 Hard Drive Replacement, Remove the hard drive holder.: étape 3, image 1 de 3 IBM ThinkPad R40 Hard Drive Replacement, Remove the hard drive holder.: étape 3, image 2 de 3 IBM ThinkPad R40 Hard Drive Replacement, Remove the hard drive holder.: étape 3, image 3 de 3
    • Remove the hard drive holder completely from the computer.

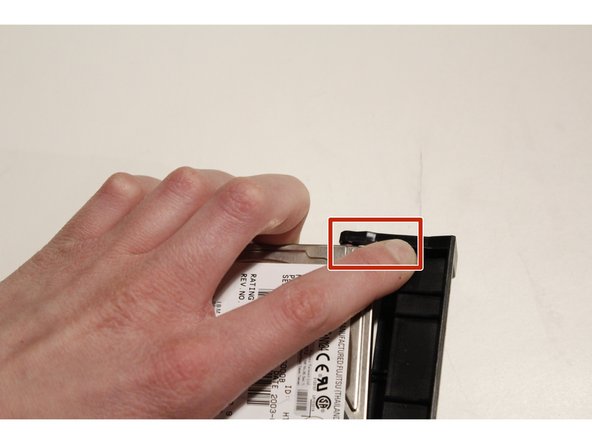
    • Push on the plastic, and the hard drive will pop out.

  4. IBM ThinkPad R40 Hard Drive Replacement, Remove the hard drive.: étape 4, image 1 de 1
    • Remove the four Phillips #1 screws.

Conclusion

To reassemble your device, follow these instructions in reverse order.

2 autres ont terminé cette réparation.

Alec M

Membre depuis le 12/26/15

82 Réputation

2 tutoriels rédigés

0 commentaires

Ajouter un commentaire

Nombre de vues :

Dernières 24 heures : 1

7 derniers jours : 5

30 derniers jours : 18

Total : 4,950