Introduction
Mettez à niveau la RAM de votre iMac et optimisez instantanément la vitesse.
Ce dont vous avez besoin
-
-
Desserrez les trois vis Phillips par lesquelles la trappe d'accès est fixée en dessous de votre iMac.
-
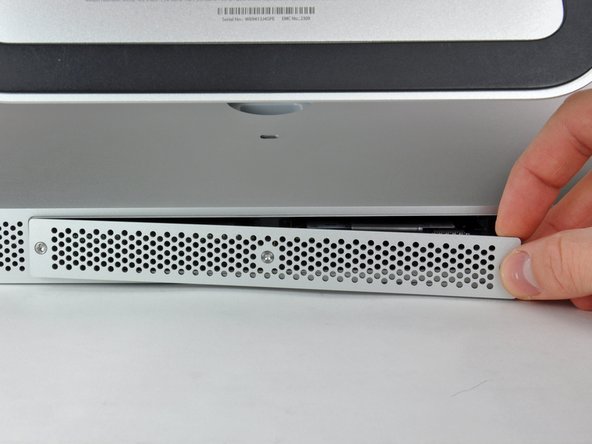
Retirez la trappe d'accès de votre iMac.
-
-
-
-
À l'aide de vos doigts ou de la pointe d'un spudger, sortez la languette d'extraction en plastique noir de l'emplacement de la RAM.
-


Pour remonter votre appareil, suivez les mêmes instructions dans l'ordre inverse.
Pour remonter votre appareil, suivez les mêmes instructions dans l'ordre inverse.
Annulation : je n'ai pas terminé ce tutoriel.
166 autres ont terminé cette réparation.
Merci à ces traducteurs :
100%

Fabienne Detoc nous aide à réparer le monde ! Vous voulez contribuer ?
Commencez à traduire ›

8 commentaires
Interestingly, the mid 2011 iMac 27 inch also goes to 12GB!
I originally thought I'd be upgrading to 8GB today but found 4 slots instead of 2 :-)
As long as the two front (close to the screen) slots are paired with the exact same RAM config.
For example:
Two front slots Apple 2GB chips = 4GB.
Two rear slots, Crucial Lexar 4GB chips = 8GB
Total 12GB
Hoorah no waste and more RAM, come on Lion... I'm Ready!
Need a#0 screwdriver, not #1
Be sure to really push the RAM all the way into the socket. I had a "no RAM" error beep when I first booted up my iMac after doing this. Just an extra two millimetres was all it needed to be properly installed. It can be quite tough to get in.
Hi,
I've got a 2309 and just received my two additional 4GB RAM Cards. Put them in and I can say that the speed improved (now with 16GB). Not dramatically, however, some applications did always show the little rainbow disc when my Mac was "thinking". This is now gone.
I am on OS X 10.9.5 still and the whole Mac feels as if it can "breathe" more lightly with the additional RAM.
Thanks!
My 11,1 27” 2.66Ghz iMac happy eats up all the 4x8GB I put in there.