Introduction
This guide is for replacing the outer casing of the JBL Pulse for when some kind of damage has occurred to the outside of the device.
Ce dont vous avez besoin
-
-
-
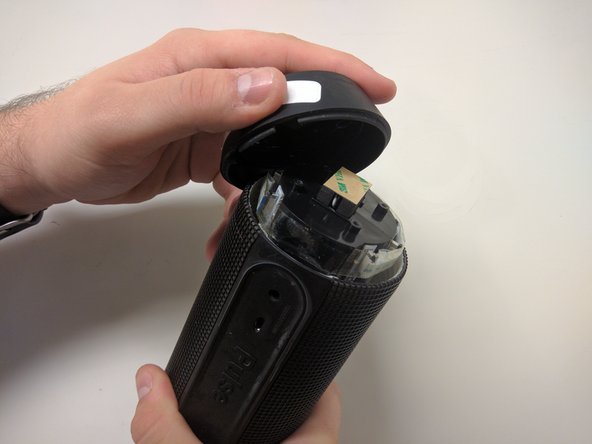
Use a plastic opening tool to pry around the edges of the circular rubber panel.
 Demander à FixBot
-
-
-
Once the edges are loose, pull off the rubber button panel completely.
-
-
-
-
Use your plastic opening tool to pry the button board loose by lifting the edges.
-
-
-
Pull black piece on top of socket away from board to loosen, then detach the cable.
-
-
-
-
-
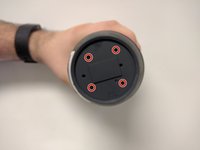
Take out the four 9mm black PH0 screws from the top and bottom of the device.
-
Pull off cap by hand.
-
The outer casing can now be removed.
-
-


To reassemble your device, follow these instructions in reverse order.
Annulation : je n'ai pas terminé ce tutoriel.
3 autres ont terminé cette réparation.
Équipe

USF Tampa, Team 18-6, Blackwell Fall 2016 Membre de l'équipe USF Tampa, Team 18-6, Blackwell Fall 2016
USFT-BLACKWELL-F16S18G6
3 membres
20 tutoriels rédigés