Aller au contenu principal

Jabra Freeway Microphone Replacement

Ce dont vous avez besoin

  1. Jabra Freeway Microphone Replacement, Front Panel: étape 1, image 1 de 3 Jabra Freeway Microphone Replacement, Front Panel: étape 1, image 2 de 3 Jabra Freeway Microphone Replacement, Front Panel: étape 1, image 3 de 3
    • Turn off the device before proceeding. Failure to do so may result in device damage or injury to oneself.

    • Remove the rubber pads from the bottom of the device using the spudger.

  2. Jabra Freeway Microphone Replacement: étape 2, image 1 de 3 Jabra Freeway Microphone Replacement: étape 2, image 2 de 3 Jabra Freeway Microphone Replacement: étape 2, image 3 de 3
    • Remove the eight 6mm T9 screws.

    • Two of these screws are underneath the foam padding. This padding is glued on and will be destroyed in this process. Poking through the foam minimizes the damage to the device.

  3. Jabra Freeway Microphone Replacement: étape 3, image 1 de 3 Jabra Freeway Microphone Replacement: étape 3, image 2 de 3 Jabra Freeway Microphone Replacement: étape 3, image 3 de 3
    • Gently lift the front panel off of the device and carefully rest it to the side.

  4. Jabra Freeway Microphone Replacement, Microphone: étape 4, image 1 de 3 Jabra Freeway Microphone Replacement, Microphone: étape 4, image 2 de 3 Jabra Freeway Microphone Replacement, Microphone: étape 4, image 3 de 3
    • Remove the microphone from the microphone holding slot.

  5. Jabra Freeway Microphone Replacement: étape 5, image 1 de 1
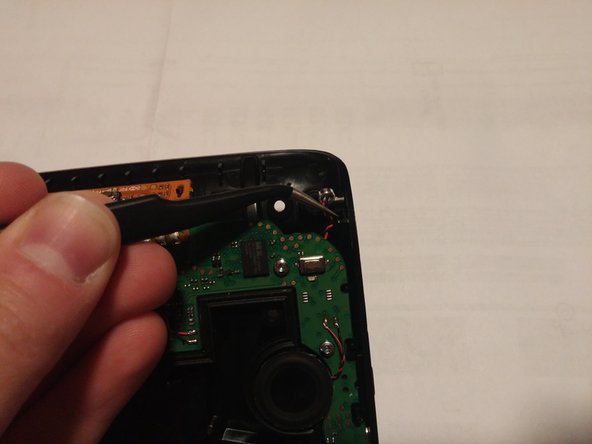
    • Desolder the two wires connecting to the microphone.

    • Please refer to the soldering technique guide for instructions on desoldering and soldering.

Conclusion

To reassemble your device, follow these instructions in reverse order.

Une autre personne a terminé cette réparation.

Alec Wilson

Membre depuis le 10/19/16

741 Réputation

5 tutoriels rédigés

Équipe

UMass Dartmouth, Team 4-8, Catania Fall 2016 Membre de l'équipe UMass Dartmouth, Team 4-8, Catania Fall 2016

UMASSD-CATANIA-F16S4G8

2 membres

6 tutoriels rédigés

2 commentaires

Perfect, thank you.

Edmond Lleshi - Réponse

Based on my limited experience with this device, the component being replaced here is the secondary, or noise-cancelling microphone - not to be confused with the primary microphone. The other video showing replacement of the motion detector seems to be actually replacing the primary microphone.

Steve MacLeod - Réponse

Ajouter un commentaire

Nombre de vues :

Dernières 24 heures : 2

7 derniers jours : 2

30 derniers jours : 6

Total : 996