Aller au contenu principal

Jabra Speak 510 Outer Casing Replacement

Conditions préalables uniquement
Ce tutoriel est uniquement destiné à être utilisé comme prérequis d'autres tutoriels. Il ne se suffit pas à lui-même.

Ce dont vous avez besoin

  1. Jabra Speak 510 Outer Casing Replacement, Outer Casing: étape 1, image 1 de 2 Jabra Speak 510 Outer Casing Replacement, Outer Casing: étape 1, image 2 de 2
    • Using a metal spudger, peel back the foam pad on the bottom of the device to reveal six screws.

  2. Jabra Speak 510 Outer Casing Replacement: étape 2, image 1 de 1
    • Remove the six 20 mm T6 screws from the bottom of the device.

  3. Jabra Speak 510 Outer Casing Replacement: étape 3, image 1 de 2 Jabra Speak 510 Outer Casing Replacement: étape 3, image 2 de 2
    • Remove the back plate and the grey foam underneath.

  4. Jabra Speak 510 Outer Casing Replacement: étape 4, image 1 de 3 Jabra Speak 510 Outer Casing Replacement: étape 4, image 2 de 3 Jabra Speak 510 Outer Casing Replacement: étape 4, image 3 de 3
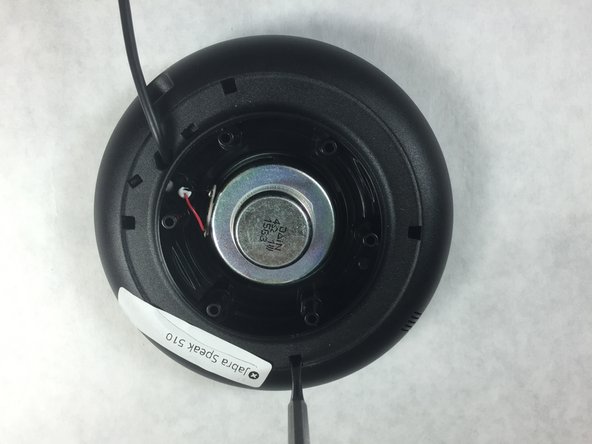
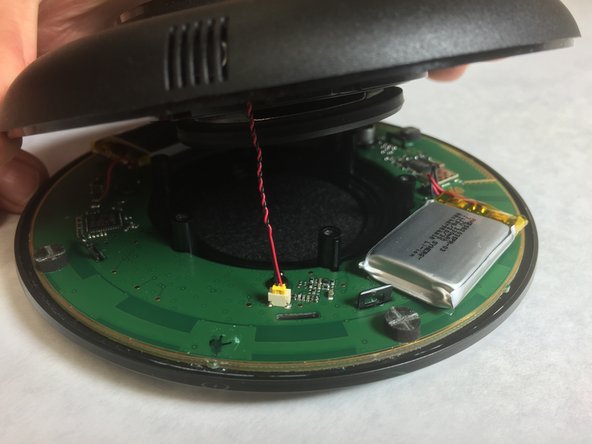
    • Use a small, pointed metal spudger to release the plastic tabs connecting the faceplate to the bottom of the speaker.

    • A small cable connects the faceplate to the device. Carefully disconnect the cable before fully opening the device.

    • Slowly flip the device open like a clam shell.

    • There are several wires soldered to the motherboard that prevent the faceplate from detaching completely.

Conclusion

To reassemble your device, follow these instructions in reverse order.

Jordan Murphy

Membre depuis le 02/16/16

711 Réputation

3 tutoriels rédigés

Équipe

IUPUI, Team 2-3, Harley Spring 2016 Membre de l'équipe IUPUI, Team 2-3, Harley Spring 2016

IUPUI-HARLEY-S16S2G3

4 membres

8 tutoriels rédigés

0 commentaires

Ajouter un commentaire

Nombre de vues :

Dernières 24 heures : 0

7 derniers jours : 0

30 derniers jours : 0

Total : 135