Aller au contenu principal

Jam Voice Battery Replacement

Ce dont vous avez besoin

  1. Jam Voice Battery Replacement, Hard Mesh Cover: étape 1, image 1 de 2 Jam Voice Battery Replacement, Hard Mesh Cover: étape 1, image 2 de 2
    • Insert the plastic opening tool underneath the mesh top.

    • Pry the cover open.

    • To reattach the cover, simply align the round posts on the bottom of the cover into the holes.

  2. Jam Voice Battery Replacement, Motherboard: étape 2, image 1 de 1
    • Remove the four 7mm Phillips screws from the plastic cover.

  3. Jam Voice Battery Replacement: étape 3, image 1 de 2 Jam Voice Battery Replacement: étape 3, image 2 de 2
    • Remove the four 5mm Phillips screws that hold down the speaker in place.

    • Remove the two 6mm Phillips screws that hold down the plastic casing.

  4. Jam Voice Battery Replacement: étape 4, image 1 de 1
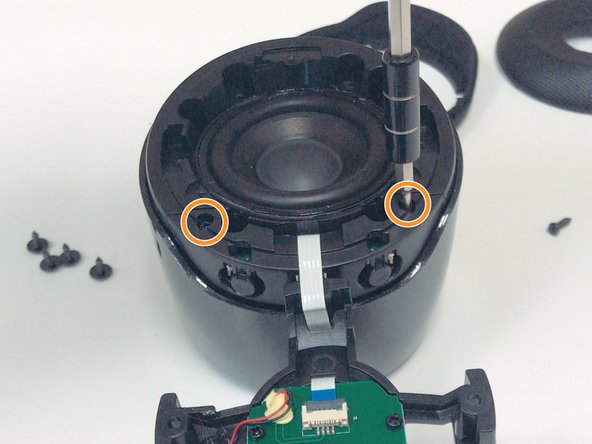
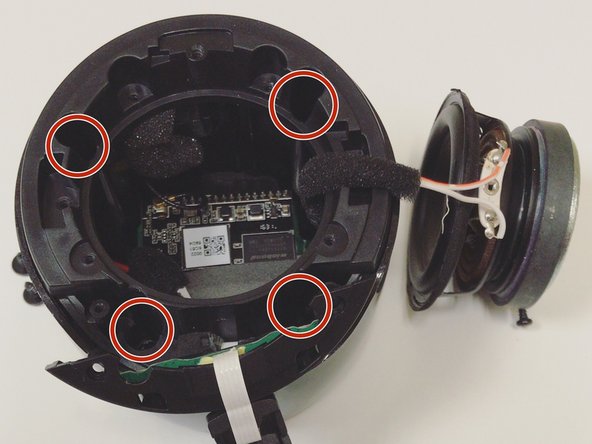
    • Once all six screws are removed, use a Halberd Spudger or similar tool to lift up the speaker.

    • Pull the speaker up and out.

  5. Jam Voice Battery Replacement: étape 5, image 1 de 3 Jam Voice Battery Replacement: étape 5, image 2 de 3 Jam Voice Battery Replacement: étape 5, image 3 de 3
    • Remove the four 7mm Phillips screws to expose the motherboard.

  6. Jam Voice Battery Replacement: étape 6, image 1 de 1
    • After removing all of the screws from the plastic cover, remove it by pulling up and out.

    • Be careful not to pull and damage any of the wires.

  7. Jam Voice Battery Replacement: étape 7, image 1 de 2 Jam Voice Battery Replacement: étape 7, image 2 de 2
    • Remove the three 5mm Phillips screws that hold the motherboard in place.

    • After the screws are removed, place two fingers on the power button and Bluetooth button to push the motherboard out.

  8. Jam Voice Battery Replacement, Battery: étape 8, image 1 de 3 Jam Voice Battery Replacement, Battery: étape 8, image 2 de 3 Jam Voice Battery Replacement, Battery: étape 8, image 3 de 3
    Outil utilisé dans cette étape :
    Tweezers
    $4.99
    J'achète
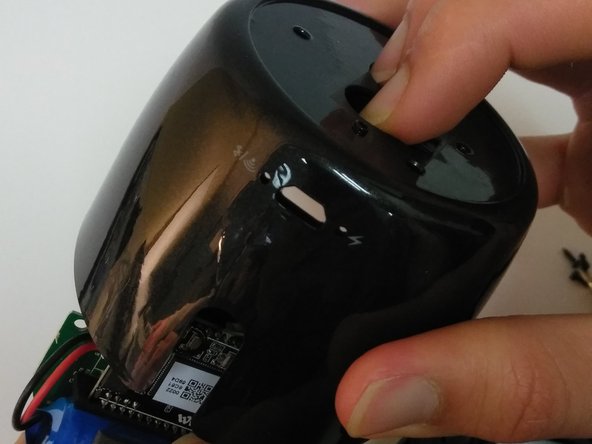
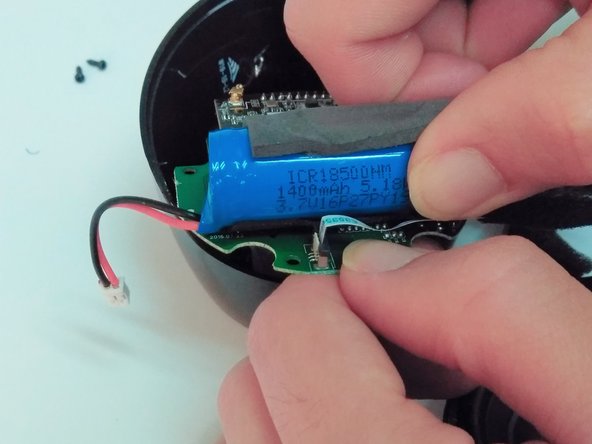
    • Expose the motherboard and battery and place in a position that will be easy to access and work with.

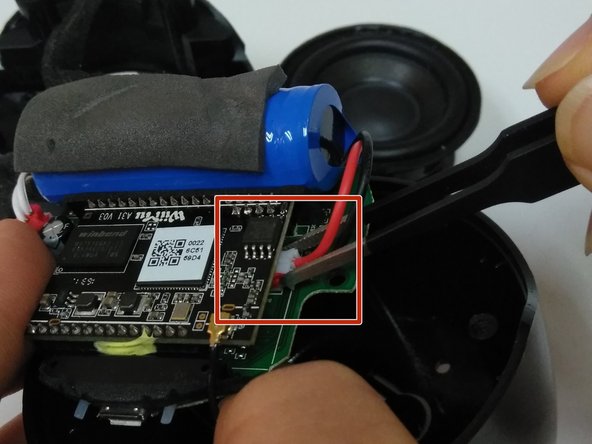
    • Use tweezers to remove the battery's wire from the motherboard at the connection point.

    • The battery's connection point is opposite the speaker's connection point.

    • Pull the battery from the motherboard.

Conclusion

To reassemble your device, follow these instructions in reverse order.

Une autre personne a terminé cette réparation.

Hope Bukhamseen

Membre depuis le 04/05/18

298 Réputation

3 tutoriels rédigés

0 commentaires

Ajouter un commentaire

Nombre de vues :

Dernières 24 heures : 2

7 derniers jours : 6

30 derniers jours : 13

Total : 568