Introduction
This repair guide will demonstrate how to replace the battery in and Ultratab C954. The instructions assume the case has already been removed from the tablet. If your tablet still has the back cover on it refer to our prerequisite guide on back cover(steps 1-3) if the cover is already removed begin with step 4. This repair requires the use of a soldering iron and may be difficult for users who have not used a soldering iron before.
Ce dont vous avez besoin
-
-
On the top of the tablet there are two 1cm screws that hold the back cover on. Locate these screws and remove them using a Phillips head #0 screw driver.
-
-
-
This is what your tablet should look like once the back cover is removed. You are now ready to begin repairing your tablet. Follow the corresponding guide for instructions on repairing major components.
-
To reattach the back cover begin by sliding the cover on making sure the buttons and the speaker are in their designated holes on the back cover. Then attach the two covers by pressing them together until you hear the plastic tabs interlock.
-
With the two screens held together the last step is to put the two 1cm screws on the top of the tablet back in. Your tablet is now ready for use again!
-
-
-
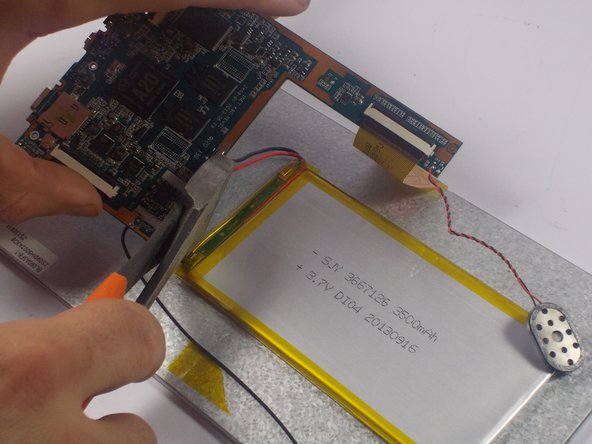
First locate the battery on the tablet, all of the battery information is printed on the top of the battery. This information will allow you to purchase the correct battery for your tablet.
-
-
-
-
Now it is time to remove the old battery. Before removing the battery use a pencil to trace its location, this will allow you to place the new battery in the same place. The battery is glued to the screen and must be removed using spudgers. Gently peel the battery from the screen until it is free.
-
Using a hot glue gun glue the new battery in place making sure the battery lines up with the marks you made and that the wires are facing the correct direction. You want the wires to be on the side with the motherboard.
-
-
-
It is now time to solder the wires in to their correct locations. To do this hold the wire on the old solder, using a small amount of solder melt the solder and wires to the old connection points.
-
For an explanation on soldering refer to iFixit's soldering guide Comment souder et dessouder des connexions
-


To reassemble your device, follow the instructions in the back cover prerequisite guide
To reassemble your device, follow the instructions in the back cover prerequisite guide
Annulation : je n'ai pas terminé ce tutoriel.
Une autre personne a terminé cette réparation.
Équipe

UMass Dartmouth, Team 1-7, Shastany Spring 2015 Membre de l'équipe UMass Dartmouth, Team 1-7, Shastany Spring 2015
UMASSD-SHASTANY-S15S1G7
3 membres
4 tutoriels rédigés
Un commentaire
Here's a cool idea: Before starting to remove the back cover, place piece of sticky tape over the two buttons on the end of the cover. This may keep the buttons in place as you remove the cover. I managed to dislodge both during disassembly, and used the tape to keep them in place as I reassmbled the tablet.