Introduction
Many models of Jura, Krups or AEG coffee makers have installed this heating cartridge. If your device is equipped with the newer "thermoblock" use this link Anleitung.
Ce dont vous avez besoin
-
-
The instructions are suitable for nearly every model of Jura and similar ones e.g. AEG and Krups.
-
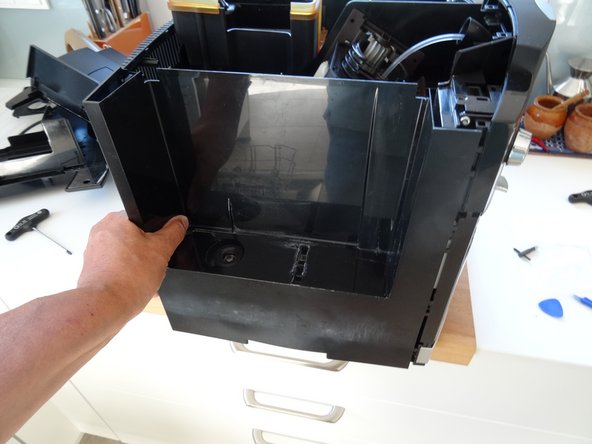
Remove the water reservoir.
-
-
-
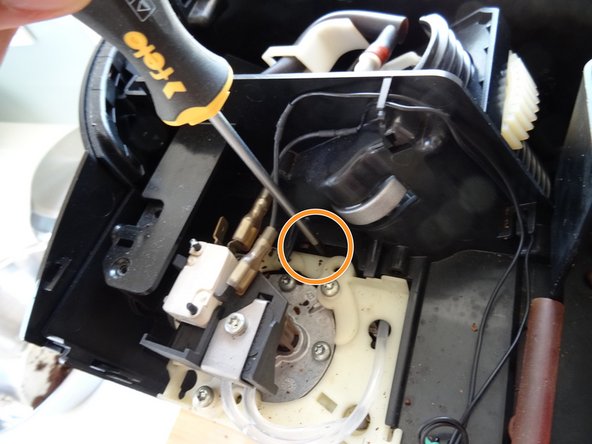
Using an oval head bit you can screw them out. If you haven´t got one you can carefully use pliers. It is a good idea to later change the screws for normal ones.
-
Beneath both top side covers are two Torx T15 screws. Remove those. Now lift off the whole top cover. Sometimes it jams and you have to use a bit of force.
-
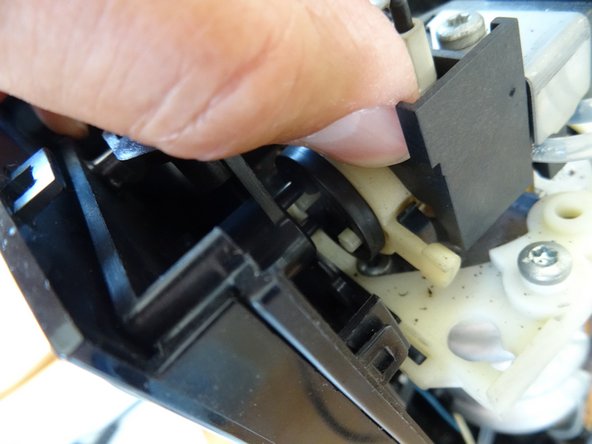
The side covers must be pushed backwards by about 1 cm. Sometimes this is a little bit difficult to move. If necessary, wedge a plastic opening tool into the gap between the side covers and the front panel. The rear cover can be easily removed.
-
-
-
The heating cartridge is the aluminum cylinder under the right side, around which spirals the heating runs. It is bolted to a plastic slide. The next steps will show how to pull out the slide and remove all connections.
-
If the boiler looks like the second picture, it is the thermoblock. There is another guide here.
-
-
-
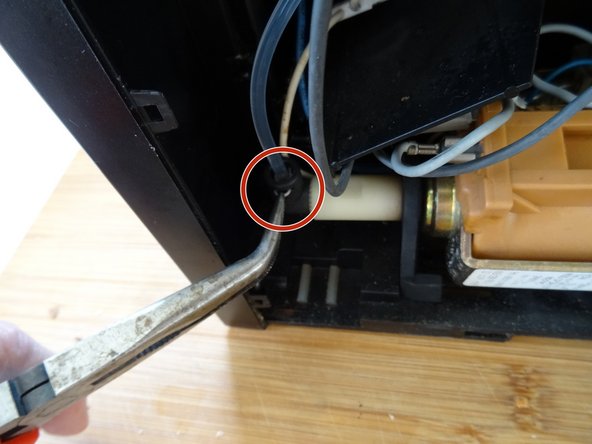
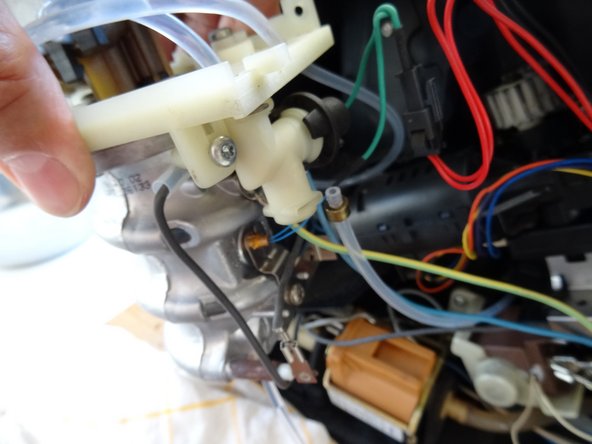
The pressure hoses are secured against slipping out with metal clips. Pull out the metal clamp on the hose between the pump and the heating cartridge
-
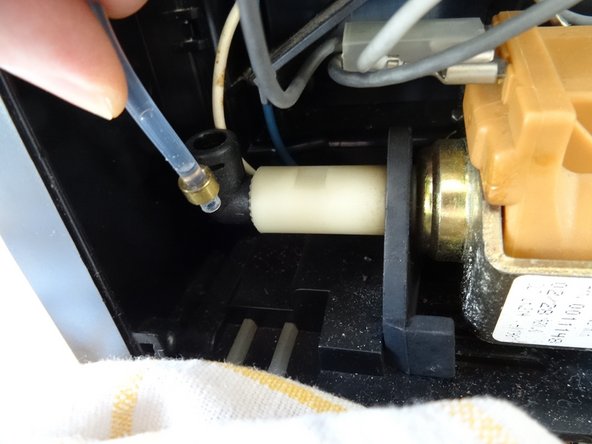
Disconnect the hose from the pump. Pay attention to the little seal, it probably lingers afterwards. It is good to replace them with a new one when assembling.
-
-
-
-
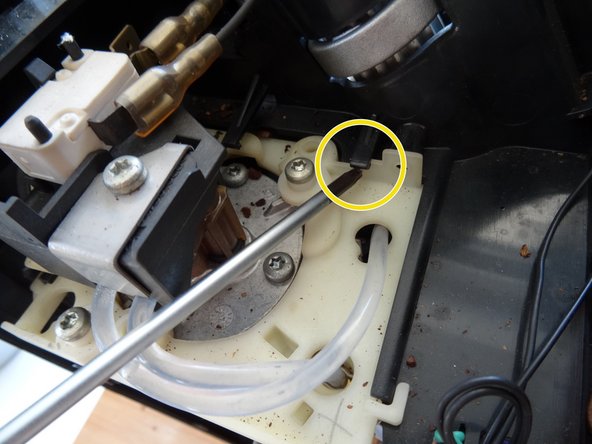
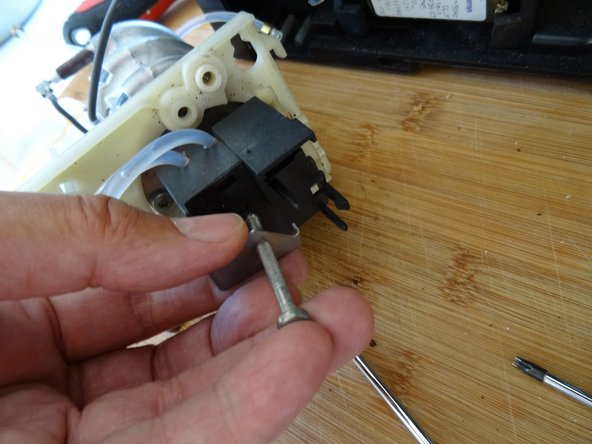
The clamp for the rotary knob on the steam valve is fastened with a Torx 15 screw. Unscrew it, remove the clamp and transfer it to the new part, if necessary.
-
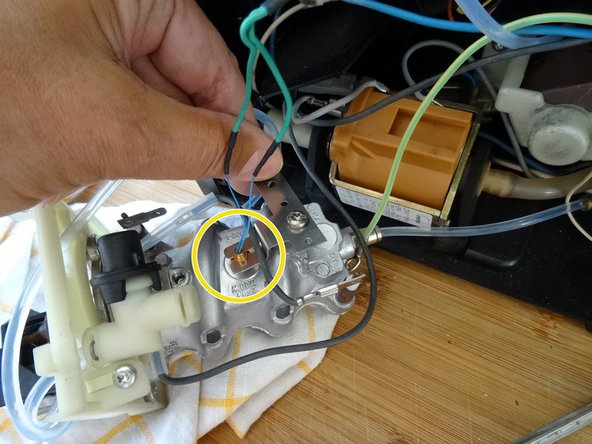
The pressure hose is attached to the lower end of the heating cartridge with a Legris connection. Press the pressure hose firmly with your fingers towards the heating cartridge. Now push the small ring at the end of the Legris connection towards the heating cartridge and pull off the pressure hose at the same time.
-


Work the steps in the reverse order to assemble your device again.
Work the steps in the reverse order to assemble your device again.
Merci à ces traducteurs :
100%

Ces traducteurs nous aident réparer le monde ! Vous voulez contribuer ?
Commencez à traduire ›
Équipe

Repair is War on Entropy Membre de l'équipe Repair is War on Entropy
Community
27 membres
1 209 tutoriels rédigés
Un commentaire
DO YOU HAVE THE REPAIR MANUAL FOR THE jURA SUBITO 630 B2 TYP 968 ESPRESSO MACHINE AND THE SPECIAL KEY TO OPEN THE MACHINE ian@helian.net.au