Aller au contenu principal

Keyboard replacement on a why! W253EU

Ce dont vous avez besoin

  1. Keyboard replacement on a why! W253EU, Battery from why! Remove W253EU: étape 1, image 1 de 3 Keyboard replacement on a why! W253EU, Battery from why! Remove W253EU: étape 1, image 2 de 3 Keyboard replacement on a why! W253EU, Battery from why! Remove W253EU: étape 1, image 3 de 3
    • Turn off the computer.

    • Before each operation it is important to start with the removal of the accumulator.

    • Take the slide unlocked into position, remove the battery.

  2. Keyboard replacement on a why! W253EU, Keyboard: étape 2, image 1 de 3 Keyboard replacement on a why! W253EU, Keyboard: étape 2, image 2 de 3 Keyboard replacement on a why! W253EU, Keyboard: étape 2, image 3 de 3
    • Use a Phillips # 1 screwdriver to remove the two screws located in the slot of the accumulator.

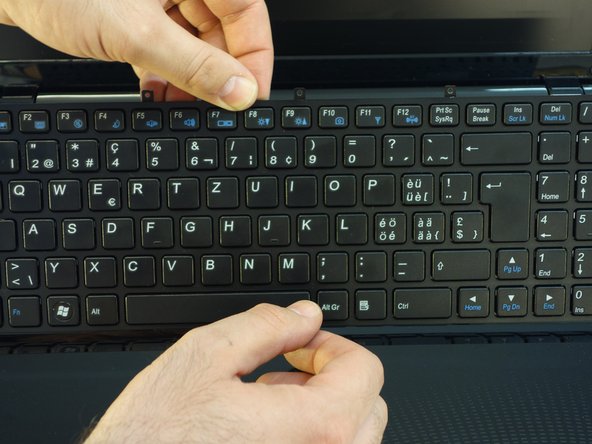
    • Insert a standard screwdriver into the slot in the cover above the keyboard.

    • Lift the cover with the usual care.

  3. Keyboard replacement on a why! W253EU: étape 3, image 1 de 3 Keyboard replacement on a why! W253EU: étape 3, image 2 de 3 Keyboard replacement on a why! W253EU: étape 3, image 3 de 3
    • Use a Phillips # 1 screwdriver to remove the four screws securing the keyboard in the upper part.

  4. Keyboard replacement on a why! W253EU: étape 4, image 1 de 2 Keyboard replacement on a why! W253EU: étape 4, image 2 de 2
    • Turn the keyboard towards the screen.

    • Carefully remove the connection cable in the direction of the plug axis.

Conclusion

For reassembly, follow the instructions in reverse order.

Merci à ces traducteurs :

de en

100%

Ces traducteurs nous aident réparer le monde ! Vous voulez contribuer ?
Commencez à traduire ›

Felice Suglia

Membre depuis le 06/15/13

30 731 Réputation

262 tutoriels rédigés

0 commentaires

Ajouter un commentaire

Nombre de vues :

Dernières 24 heures : 0

7 derniers jours : 1

30 derniers jours : 2

Total : 449