Aller au contenu principal

Kids Digital Watch Battery Replacement

Ce dont vous avez besoin

  1. Kids Digital Watch Battery Replacement, Remove Watch Bands: étape 1, image 1 de 2 Kids Digital Watch Battery Replacement, Remove Watch Bands: étape 1, image 2 de 2
    • Using a twisting and pulling motion, remove the straps from the watch.

  2. Kids Digital Watch Battery Replacement, Unscrew Backplate: étape 2, image 1 de 1
    • Remove the four (4) screws on the backside of the watch with the small Philips head screwdriver.

  3. Kids Digital Watch Battery Replacement, Remove Backplate: étape 3, image 1 de 1
    • Remove the backplate carefully using your hands.

  4. Kids Digital Watch Battery Replacement, Remove Circuit Protector Plate: étape 4, image 1 de 1
    Outil utilisé dans cette étape :
    Tweezers
    $4.99
    J'achète
    • Remove using tweezers the circuit protector plate that is uncovered once the backplate is removed.

  5. Kids Digital Watch Battery Replacement, Removing Screw Near the Blue Component: étape 5, image 1 de 2 Kids Digital Watch Battery Replacement, Removing Screw Near the Blue Component: étape 5, image 2 de 2
    • With the tiny Philips head screwdriver, unscrew and remove the screw closest to the blue component.

  6. Kids Digital Watch Battery Replacement, Removing Screw Near the Yellow Component: étape 6, image 1 de 1
    • Now remove the screw on the other side of the battery near the yellow circuit component.

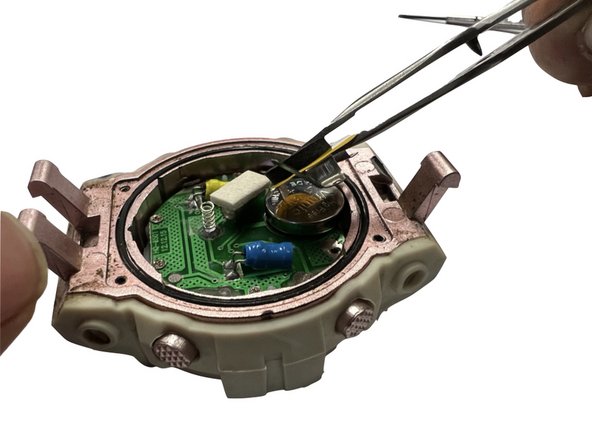
  7. Kids Digital Watch Battery Replacement, Remove the Battery Protector Plate: étape 7, image 1 de 2 Kids Digital Watch Battery Replacement, Remove the Battery Protector Plate: étape 7, image 2 de 2
    • Using tweezers carefully remove the battery protector plate.

  8. Kids Digital Watch Battery Replacement, Remove Battery: étape 8, image 1 de 1
    • Remove the old battery from your watch.

  9. Kids Digital Watch Battery Replacement, Insert New Battery: étape 9, image 1 de 1
    • Insert your new battery onto the circular component with your tweezers.

    • Ensure the positive and negative sides of your battery are oriented correctly.

Conclusion

To reassemble your device, follow these instructions in reverse order.

Une autre personne a terminé cette réparation.

Amelia S

Membre depuis le 03/14/23

194 Réputation

1 tutoriel rédigé

Équipe

ENGR_COMM_FIXERS Membre de l'équipe ENGR_COMM_FIXERS

Community

3 membres

1 tutoriel rédigé

0 commentaires

Ajouter un commentaire

Nombre de vues :

Dernières 24 heures : 0

7 derniers jours : 7

30 derniers jours : 65

Total : 709