Cette version peut contenir des modifications incorrectes. Passez au dernier aperçu vérifié.
Ce dont vous avez besoin
-
Cette étape n’est pas traduite. Aidez à la traduire
-
Wedge a plastic opening tool into the lower right corner of the Kindle Fire.
-
Pry the case apart and run the plastic opening tool along the perimeter of the Kindle Fire to release the clips securing the case halves to each other.
-
It is helpful to pry the bottom of the Kindle Fire away (and out from the side) from the top part. Exerting too much force attempting to split the two without pulling away can cause the tabs on the inside to crack.
-
-
Cette étape n’est pas traduite. Aidez à la traduire
-
Once you have freed all the plastic clips, pull the back case off the Kindle Fire.
-
-
Cette étape n’est pas traduite. Aidez à la traduire
-
Fit the tip of the plastic opening tool between the right battery cell and the Kindle Fire's frame.
-
Lever the battery up and work the plastic opening tool down along its edge to release the glue securing it to the frame.
-
-
Cette étape n’est pas traduite. Aidez à la traduire
-
Repeat the process from the previous step to free the left battery cell.
-
-
Cette étape n’est pas traduite. Aidez à la traduire
-
Lift the back of the battery up to relieve any tension in the battery connector and simultaneously use a spudger to push the battery connector out of its socket.
-
Pull the battery out of the Kindle Fire.
-
-
Cette étape n’est pas traduite. Aidez à la traduire
-
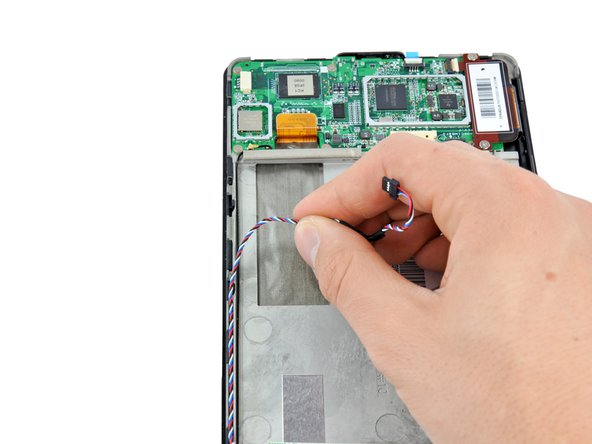
Peel the tape on the upper-left IC that is securing the speaker cable.
-
Use the flat end of a spudger to push the speaker connector out of its socket.
-
Deroute the speaker cable.
-
-
-
Cette étape n’est pas traduite. Aidez à la traduire
-
Remove the two 3.3 mm Phillips #00 screws securing the speakers to the Kindle Fire.
-
Lift the speakers out of the Kindle Fire.
-
-
Cette étape n’est pas traduite. Aidez à la traduire
-
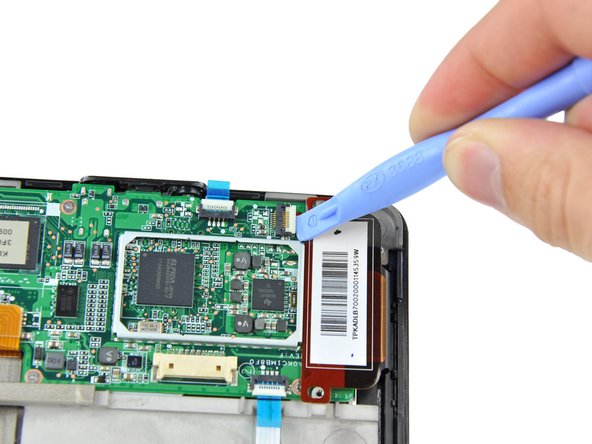
Remove the two 2.3 mm Phillips #00 screws from the touchscreen controller.
-
Use a plastic opening tool to release the touchscreen controller connector.
-
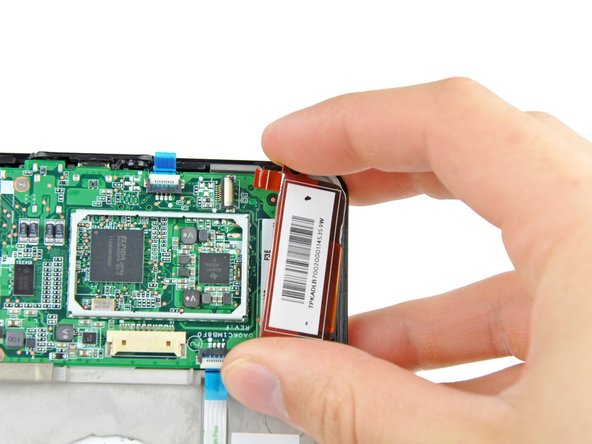
Gently remove the touchscreen controller by lifting it up and to the right.
-
-
Cette étape n’est pas traduite. Aidez à la traduire
-
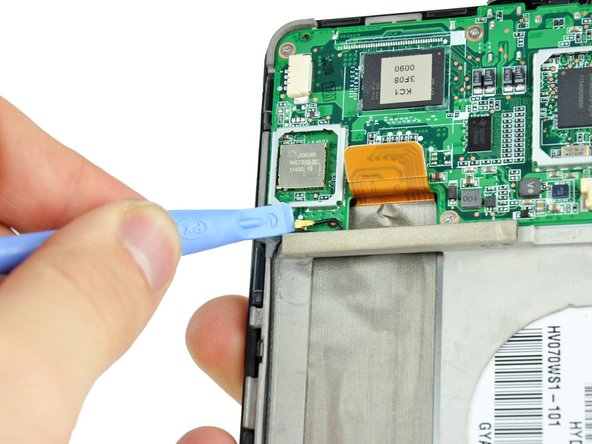
Use a plastic opening tool to flip open the power button ZIF connector.
-
Flip open the ambient light sensor ZIF socket with a plastic opening tool.
-
Use a pair of tweezers to pull the blue tab on the ambient light sensor cable to remove it from its socket.
-
-
Cette étape n’est pas traduite. Aidez à la traduire
-
Use a plastic opening tool to lift up and disconnect the display data cable.
-
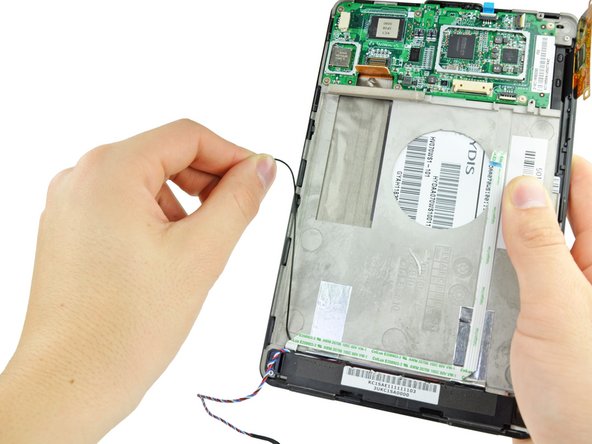
Lift up on the antenna connector with a plastic opening tool to disconnect it.
-
De-route the antenna cable.
-
-
Cette étape n’est pas traduite. Aidez à la traduire
-
Remove the six 2.6 mm Phillips #00 screws securing the motherboard to the frame.
-
-
Cette étape n’est pas traduite. Aidez à la traduire
-
Use a plastic opening tool to gently lever up the bottom side of the motherboard to free from the adhesive on its underside.
-
Lever the top side of the motherboard up with a plastic opening tool until it comes free.
-
Lift the motherboard out of the Kindle Fire, making sure that the power button cable from step 8 comes free from its connector.
-
-
Cette étape n’est pas traduite. Aidez à la traduire
-
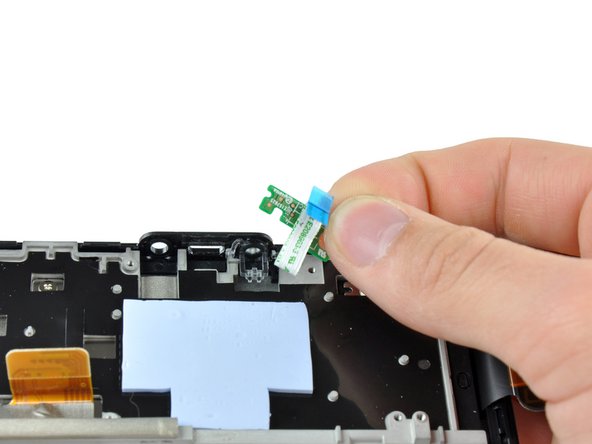
Remove the 2.5 mm Phillips #00 scew securing the power button board to the Kindle Fire.
-
Lift the power button board out of the Kindle Fire.
-
-
Cette étape n’est pas traduite. Aidez à la traduire
-
Use the flat end of a spudger to peel the ambient light sensor cable off of the frame.
-
-
Cette étape n’est pas traduite. Aidez à la traduire
-
Use the flat end of a spudger to peel up the silver tape securing the antenna cable.
-
-
Cette étape n’est pas traduite. Aidez à la traduire
-
Remove the five 3.6 mm Phillips #00 screws securing the frame and ambient light sensor.
-
-
Cette étape n’est pas traduite. Aidez à la traduire
-
Slide the ambient light sensor out from under the frame and remove it from the Kindle Fire.
-
-
Cette étape n’est pas traduite. Aidez à la traduire
-
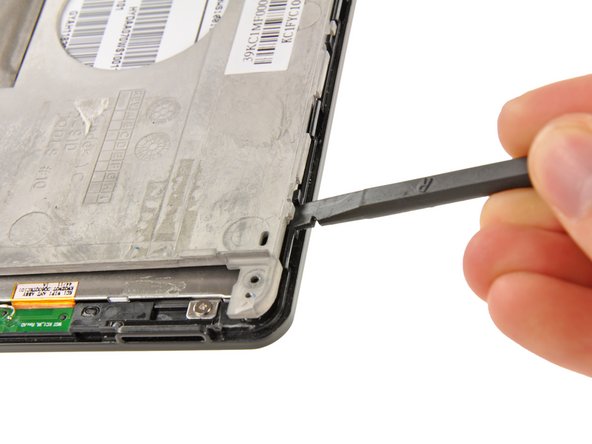
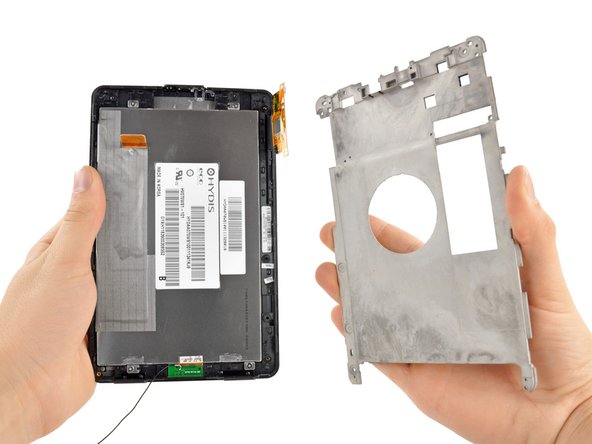
Use the flat end of a spudger to lever the frame away from the display assembly until you can grab it with your hand.
-
Remove the frame from the display assembly.
-


Annulation : je n'ai pas terminé ce tutoriel.
3 autres ont terminé cette réparation.
