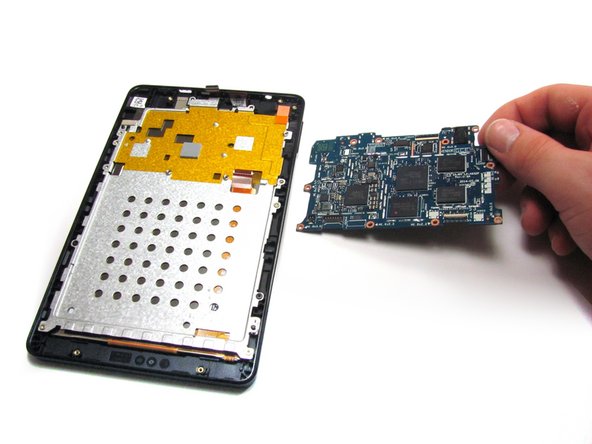
Aller au contenu principal

Kindle Fire HD 6 Motherboard Replacement

Ce dont vous avez besoin

  1. Kindle Fire HD 6 Motherboard Replacement, Back Panel: étape 1, image 1 de 1
    • Place the device face down on a clean cloth or another smooth surface.

    • In the following steps, you will need to apply some force to your device. If your device is on a rough surface, you may scratch the screen.

    • Insert the plastic opening tool between the device’s front and back panels. You might need to wiggle the tool up and down to wedge it in the gap.

    • Maneuver the tool around the device until the back unclips from the front panel.

  2. Kindle Fire HD 6 Motherboard Replacement: étape 2, image 1 de 2 Kindle Fire HD 6 Motherboard Replacement: étape 2, image 2 de 2
    • Carefully separate the back panel from the rest of the device internals.

  3. Kindle Fire HD 6 Motherboard Replacement, Rear Facing Camera: étape 3, image 1 de 1
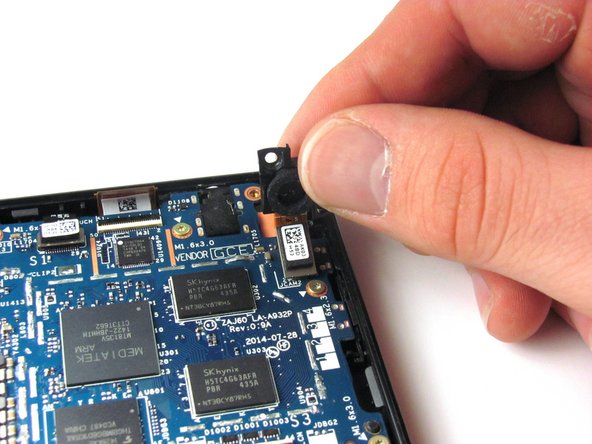
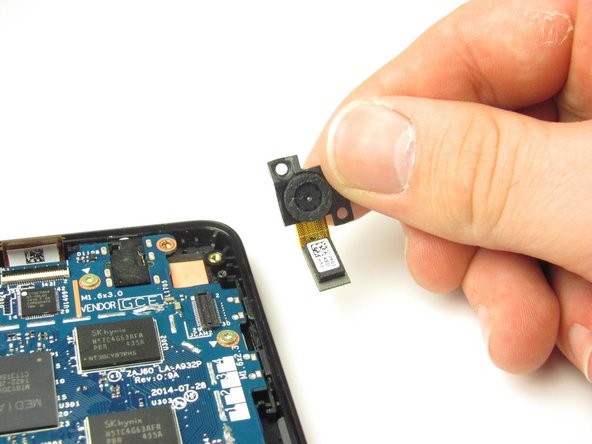
    • Unscrew the two 3.5mm T5 Torx Screws from the top of the camera.

  4. Kindle Fire HD 6 Motherboard Replacement: étape 4, image 1 de 3 Kindle Fire HD 6 Motherboard Replacement: étape 4, image 2 de 3 Kindle Fire HD 6 Motherboard Replacement: étape 4, image 3 de 3
    • Be careful not to damage the camera lens as you remove the camera.

    • Gently pull the camera up and out of the device. As you pull, unclip the black and white connector with orange tape by popping it off at its base.

  5. Kindle Fire HD 6 Motherboard Replacement, Speaker: étape 5, image 1 de 1
    • Unscrew the two 3.5mm T5 Torx screws at the base of the speaker.

  6. Kindle Fire HD 6 Motherboard Replacement: étape 6, image 1 de 2 Kindle Fire HD 6 Motherboard Replacement: étape 6, image 2 de 2
    • Unclip the speaker wire that runs up the side of the battery and clips into the motherboard next to the battery connector. Gently pull it straight up.

  7. Kindle Fire HD 6 Motherboard Replacement: étape 7, image 1 de 2 Kindle Fire HD 6 Motherboard Replacement: étape 7, image 2 de 2
    • Lift the speaker out of the device.

  8. Kindle Fire HD 6 Motherboard Replacement, Battery: étape 8, image 1 de 1
    Outil utilisé dans cette étape :
    iOpener
    $12.99
    J'achète
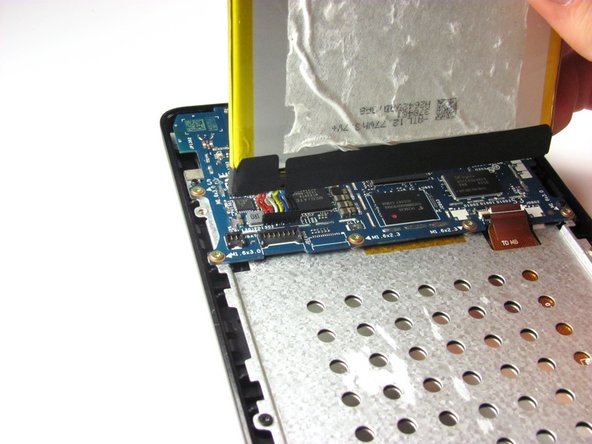
    • Gently pry the battery free from the adhesive holding it in place.

    • Take care not to pierce or rupture the battery, which can release dangerous chemicals.

    • If you're having trouble working the battery free, warm it up with an iOpener or hair dryer to soften the adhesive, and then slide a credit card behind the battery to break up the adhesive.

    • Be careful not to yank the battery out—you'll need to disconnect a connector before removing the battery completely.

  9. Kindle Fire HD 6 Motherboard Replacement: étape 9, image 1 de 2 Kindle Fire HD 6 Motherboard Replacement: étape 9, image 2 de 2
    • Remove the multi-colored connector that joins the battery and the motherboard by pulling it straight up.

    • Remove the battery.

  10. Kindle Fire HD 6 Motherboard Replacement, Motherboard: étape 10, image 1 de 2 Kindle Fire HD 6 Motherboard Replacement, Motherboard: étape 10, image 2 de 2
    • Zero insertion force connectors can break easily. Before performing this step, read the iFixit Guide to Recognizing and Disconnecting Cable Connectors to find out how to safely remove them.

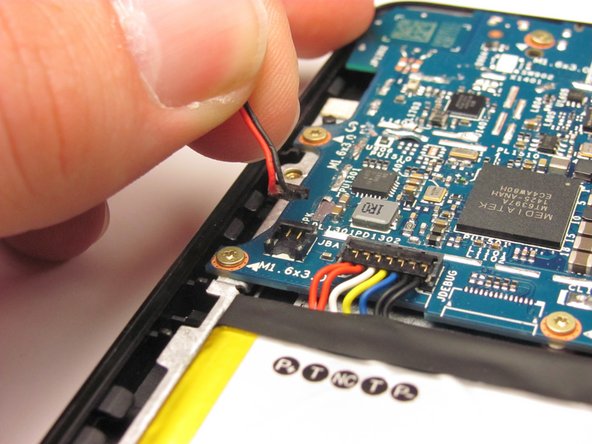
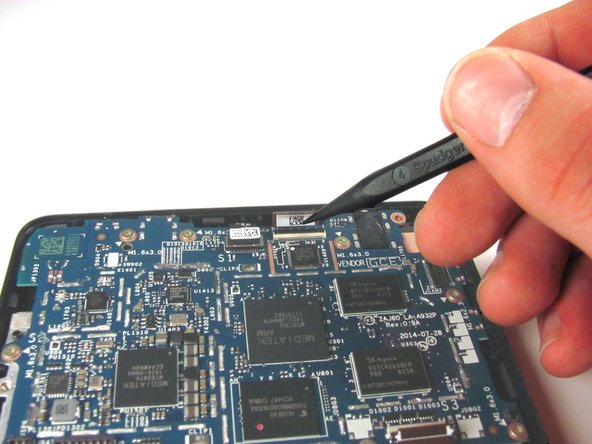
    • Use the tip of the spudger to disconnect the two zero insertion force connectors on the bottom and top of the motherboard.

    • The first connector is attached to an orange tape, and is located in the bottom-right corner of the motherboard. Remove this connector.

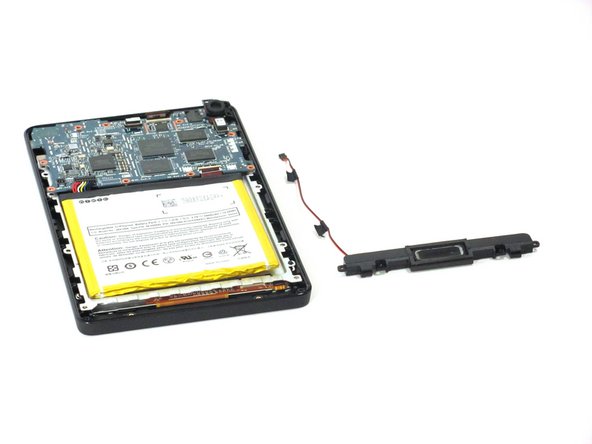
    • The second connector is long and thin, and is located at the top of the motherboard, a bit to the right of center. Remove this connector.

  11. Kindle Fire HD 6 Motherboard Replacement: étape 11, image 1 de 2 Kindle Fire HD 6 Motherboard Replacement: étape 11, image 2 de 2
    • Disconnect the black and white connector at the very top-center of the motherboard by unclipping it using the flat side of the spudger.

  12. Kindle Fire HD 6 Motherboard Replacement: étape 12, image 1 de 1
    • Unscrew the ten 3.5mm T5 Torx screws around the edge of the motherboard.

  13. Kindle Fire HD 6 Motherboard Replacement: étape 13, image 1 de 2 Kindle Fire HD 6 Motherboard Replacement: étape 13, image 2 de 2
    • Starting from the bottom, lift the motherboard out of the device. You will have to push the motherboard about two millimeters toward the top of the device to unhook the top edge.

Conclusion

To reassemble your device, follow these instructions in reverse order.

3 autres ont terminé cette réparation.

Cassandra Beck

Membre depuis le 01/13/15

885 Réputation

5 tutoriels rédigés

Équipe

Cal Poly, Team 70-4, Forte Winter 2015 Membre de l'équipe Cal Poly, Team 70-4, Forte Winter 2015

CPSU-FORTE-W15S70G4

4 membres

12 tutoriels rédigés

0 commentaires

Ajouter un commentaire

Nombre de vues :

Dernières 24 heures : 0

7 derniers jours : 1

30 derniers jours : 5

Total : 2,846