Aller au contenu principal

Kyocera DuraForce Pro Camera Replacement

Ce dont vous avez besoin

  1. Kyocera DuraForce Pro Camera Replacement, Camera: étape 1, image 1 de 3 Kyocera DuraForce Pro Camera Replacement, Camera: étape 1, image 2 de 3 Kyocera DuraForce Pro Camera Replacement, Camera: étape 1, image 3 de 3
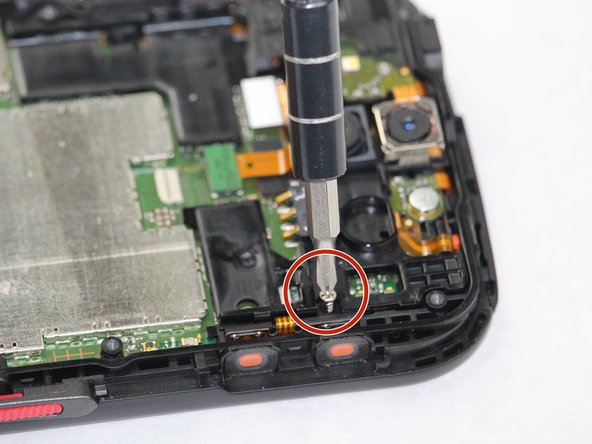
    • Begin with the phone on its side.

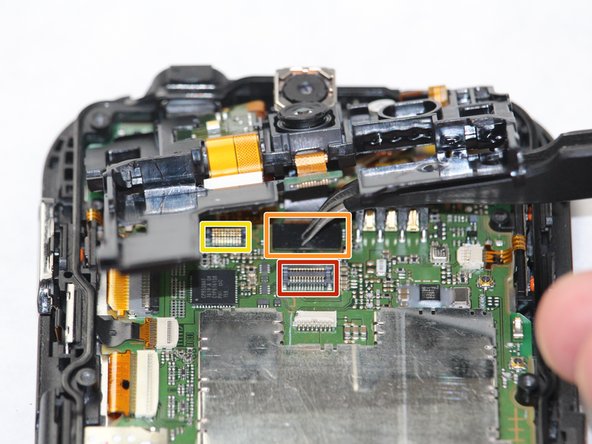
    • Use the plastic opening tool to remove the cover. It is easier to begin near the volume button. The cover should pop off on its own.

  2. Kyocera DuraForce Pro Camera Replacement: étape 2, image 1 de 3 Kyocera DuraForce Pro Camera Replacement: étape 2, image 2 de 3 Kyocera DuraForce Pro Camera Replacement: étape 2, image 3 de 3
    • Remove the 8 screws around the outer portion of the phone with the JIS #0 screwdriver bit.

    • Use the plastic opening tool to remove the backside of the phone.

    • Slide the plastic opening tool under the battery to pry it up and remove it.

  3. Kyocera DuraForce Pro Camera Replacement: étape 3, image 1 de 3 Kyocera DuraForce Pro Camera Replacement: étape 3, image 2 de 3 Kyocera DuraForce Pro Camera Replacement: étape 3, image 3 de 3
    • Once the battery pops out, remove the orange tape that connects the battery to the phone.

    • Next, remove the 2 screws connecting the mounting bracket.

    • Remove mounting bracket.

  4. Kyocera DuraForce Pro Camera Replacement: étape 4, image 1 de 2 Kyocera DuraForce Pro Camera Replacement: étape 4, image 2 de 2
    • Pull the camera housing out of the phone.

Conclusion

To reassemble your device, follow these instructions in reverse order.

Dylan Ulbricht

Membre depuis le 10/08/18

735 Réputation

5 tutoriels rédigés

Équipe

Sam Houston State, Team S15-G4, Blackburne Fall 2018 Membre de l'équipe Sam Houston State, Team S15-G4, Blackburne Fall 2018

SHSU-BLACKBURNE-F18S15G4

3 membres

10 tutoriels rédigés

0 commentaires

Ajouter un commentaire

Nombre de vues :

Dernières 24 heures : 0

7 derniers jours : 1

30 derniers jours : 20

Total : 1,772