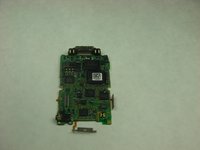
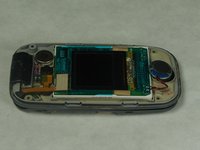
Aller au contenu principal

LG CU400 Top Half Assembly Replacement

Conditions préalables uniquement
Ce tutoriel est uniquement destiné à être utilisé comme prérequis d'autres tutoriels. Il ne se suffit pas à lui-même.

Ce dont vous avez besoin

  1. LG CU400 Top Half Assembly Replacement, Battery: étape 1, image 1 de 2 LG CU400 Top Half Assembly Replacement, Battery: étape 1, image 2 de 2
    • Push the button labeled 'PUSH' on the rear cover.

  2. LG CU400 Top Half Assembly Replacement: étape 2, image 1 de 3 LG CU400 Top Half Assembly Replacement: étape 2, image 2 de 3 LG CU400 Top Half Assembly Replacement: étape 2, image 3 de 3
    • Slide the rear cover towards you.

  3. LG CU400 Top Half Assembly Replacement: étape 3, image 1 de 2 LG CU400 Top Half Assembly Replacement: étape 3, image 2 de 2
    • To remove the battery, grasp the top front edge of the battery and pull the battery away from the phone.

    • When installing the new battery, have the metal contacts of the phone match up with the metal contacts of the battery.

  4. LG CU400 Top Half Assembly Replacement, Bottom Half Assembly: étape 4, image 1 de 2 LG CU400 Top Half Assembly Replacement, Bottom Half Assembly: étape 4, image 2 de 2
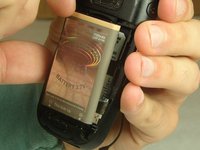
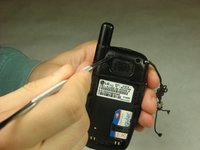
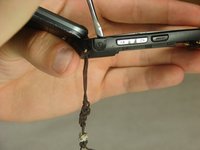
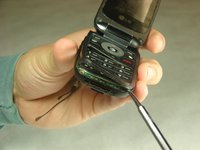
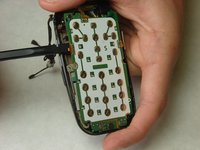
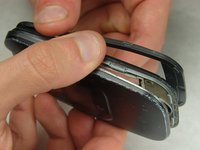
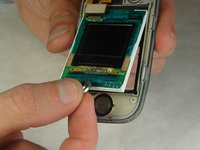
    • Remove the sim card by sliding the card out from under the retainer using either your fingers or a spudger.

  5. LG CU400 Top Half Assembly Replacement: étape 5, image 1 de 2 LG CU400 Top Half Assembly Replacement: étape 5, image 2 de 2
    • Remove the rubber covers in the highlighted locations using a metal spudger.

  6. LG CU400 Top Half Assembly Replacement: étape 6, image 1 de 2 LG CU400 Top Half Assembly Replacement: étape 6, image 2 de 2
    • Remove the six 3mm #000 flat Phillips head screws from the back of the phone using a Phillips #000 Screwdriver.

  7. LG CU400 Top Half Assembly Replacement: étape 7, image 1 de 2 LG CU400 Top Half Assembly Replacement: étape 7, image 2 de 2
    • Remove the headphone jack cover with your finger or metal spudger.

  8. LG CU400 Top Half Assembly Replacement: étape 8, image 1 de 3 LG CU400 Top Half Assembly Replacement: étape 8, image 2 de 3 LG CU400 Top Half Assembly Replacement: étape 8, image 3 de 3
    • Insert the metal spudger between the keypad assembly and back cover assembly and pry the two assemblies apart.

    • Pry gently as to not break the plastic clips that hold the two assemblies together.

    • Work your way around the perimeter of the phone with the metal spudger to separate the two assemblies.

  9. LG CU400 Top Half Assembly Replacement: étape 9, image 1 de 2 LG CU400 Top Half Assembly Replacement: étape 9, image 2 de 2
    • Once you have worked your way around the perimeter of the phone, you will have access to the components in the bottom half assembly.

  10. LG CU400 Top Half Assembly Replacement, Motherboard: étape 10, image 1 de 3 LG CU400 Top Half Assembly Replacement, Motherboard: étape 10, image 2 de 3 LG CU400 Top Half Assembly Replacement, Motherboard: étape 10, image 3 de 3
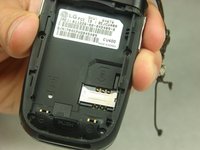
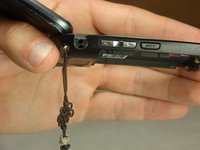
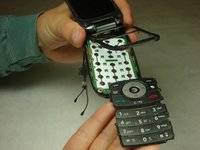
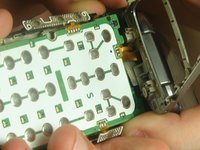
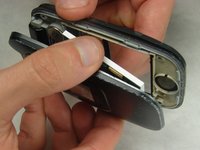
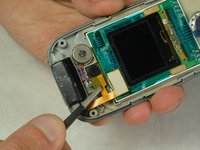
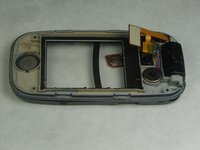
    • You should notice that the number pad is loose and can simply be taken out of the open phone casing.

  11. LG CU400 Top Half Assembly Replacement: étape 11, image 1 de 2 LG CU400 Top Half Assembly Replacement: étape 11, image 2 de 2
    • Using the spudger, start to gently pry the motherboard from the back of the phone and work your way around the perimeter of the motherboard.

    • There are copper ribbon cables connected to each side of the motherboard leading to the buttons for volume control and the camera that need slid out of the phone casing as the motherboard is being removed.

    • There are three in total, but do not remove the top one from the phone casing yet.

  12. LG CU400 Top Half Assembly Replacement: étape 12, image 1 de 1
    Outil utilisé dans cette étape :
    Tweezers
    $4.99
    • Once the motherboard is not locked in place it will still be attached to the back phone casing by two wires, red and black, twisted together.

    • Use tweezers to grab the black piece that these wires are attached to and simply pull it off the motherboard.

    • You may need to flip the phone over so that the screen is facing down. Feel free to move the keypad assembly to the closed position for this step.

  13. LG CU400 Top Half Assembly Replacement: étape 13, image 1 de 1
    • Remove the display ribbon cable from the back of the motherboard using tweezers.

    • Make sure to lift it so that you are pulling the entire thing off at once and not pulling off the flat piece at an angle.

  14. LG CU400 Top Half Assembly Replacement: étape 14, image 1 de 1
    • Use tweezers to remove the top ribbon cable, mentioned in step 11, from the hinge area.

  15. LG CU400 Top Half Assembly Replacement: étape 15, image 1 de 3 LG CU400 Top Half Assembly Replacement: étape 15, image 2 de 3 LG CU400 Top Half Assembly Replacement: étape 15, image 3 de 3
    • Grasp either side of the motherboard and gently lift it away from the phone casing.

    • The motherboard should be completely free of the phone casing, and you should have what is shown in the pictures.

  16. LG CU400 Top Half Assembly Replacement, Top Half Assembly: étape 16, image 1 de 1
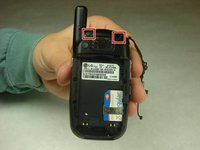
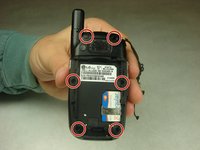
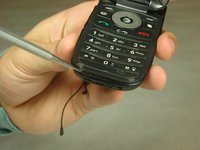
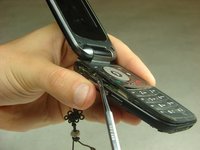
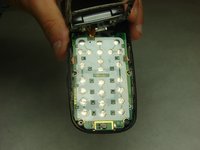
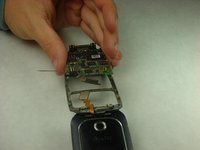
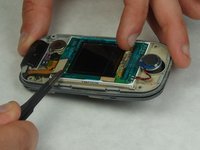
    • Remove the four rubber covers from the front screen using a metal spudger.

  17. LG CU400 Top Half Assembly Replacement: étape 17, image 1 de 2 LG CU400 Top Half Assembly Replacement: étape 17, image 2 de 2
    • Remove the four 3mm #000 flat Phillips head screws from the front screen using a Phillips #000 Screwdriver.

  18. LG CU400 Top Half Assembly Replacement: étape 18, image 1 de 3 LG CU400 Top Half Assembly Replacement: étape 18, image 2 de 3 LG CU400 Top Half Assembly Replacement: étape 18, image 3 de 3
    • Insert the metal spudger in the seam on the top assembly. This will pry the two pieces apart from each other.

    • Continue to work around the perimeter of the phone with the metal spudger.

    • Once you have worked around the perimeter of the phone you should have two halves to the top assembly, the screen assembly and the cover.

  19. LG CU400 Top Half Assembly Replacement: étape 19, image 1 de 3 LG CU400 Top Half Assembly Replacement: étape 19, image 2 de 3 LG CU400 Top Half Assembly Replacement: étape 19, image 3 de 3
    Outil utilisé dans cette étape :
    Tweezers
    $4.99
    • Set aside the cover half.

    • Using tweezers, carefully disconnect the display ribbon cable from the screen assembly and phone by lifting up on both connections.

    • The display ribbon cable will still be attached to the phone via the hinge. The disconnection of the display ribbon cable in this step is to remove the screen from the screen assembly.

  20. LG CU400 Top Half Assembly Replacement: étape 20, image 1 de 2 LG CU400 Top Half Assembly Replacement: étape 20, image 2 de 2
    • Grip the screen and ear speaker connected to the screen via red and black wires, and carefully pull the screen away from the screen assembly.

Conclusion

To reassemble your device, follow these instructions in reverse order.

Helen Wilson

Membre depuis le 10/03/16

151 Réputation

2 tutoriels rédigés

Équipe

IUPUI, Team 1-3, Harley Fall 2016 Membre de l'équipe IUPUI, Team 1-3, Harley Fall 2016

IUPUI-HARLEY-F16S1G3

4 membres

14 tutoriels rédigés

0 commentaires

Ajouter un commentaire

Nombre de vues :

Dernières 24 heures : 0

7 derniers jours : 0

30 derniers jours : 0

Total : 72