Introduction
In this guide you will take you through the step by step process on how to replace your display on your LG G Pad 7.0. Replacing your display is a tricky procedure with you having to remove key components like a mother board, charging port and connectors inside your device, so don't forget to power down your device.
You must be careful when removing the 7 inch glass display. Chances are your display is no longer operating properly or simply just cracked and in need of replacement. In this guide you will take you through the step by step process on how to replace your display on your LG G Pad 7.0.
Replacing your display is a tricky procedure with you having to remove key components like a mother board, charging port and connectors inside your device, so don't forget to power down your device. You must be careful when removing the 7 inch glass display. Chances are your display is no longer operating properly or simply just cracked and in need of replacement.
Ce dont vous avez besoin
-
-
The screen assembly is secured to the plastic backing with clips.Insert the plastic opening tool between the screen and plastic.
-
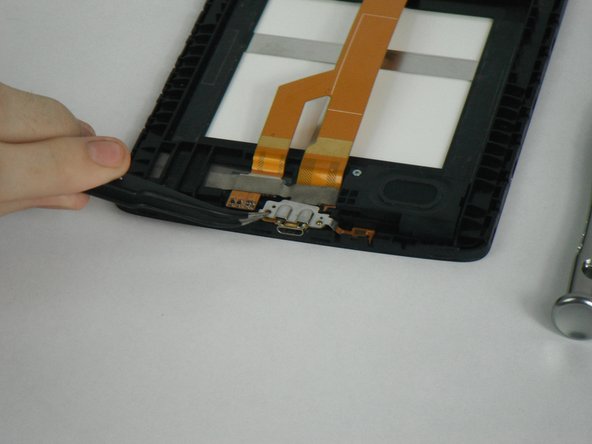
Carefully work your way around the device making sure not to go too deep damaging any eternal components, freeing it from the connecting clips.
-
Lift the tablet from the plastic frame. You may need to loosen some more clips if it is difficult to remove.
-
-
-
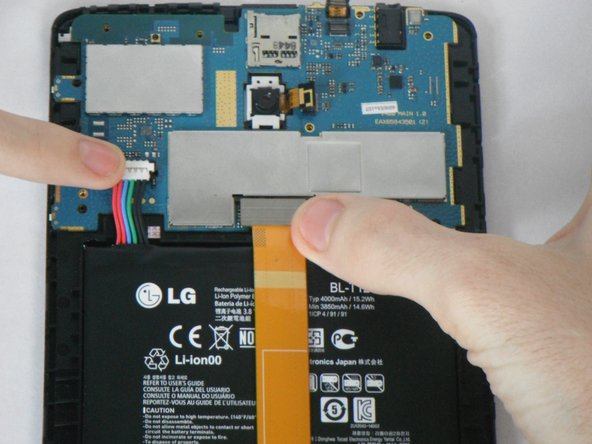
Remove the red marked connectors by gently prying up. Be sure not to rip the ribbon cables as they are very fragile.
-
Remove the three connectors marked in orange by gently prying them upwards. The cables are very fragile so be careful not to rip them.
-
-
-
-
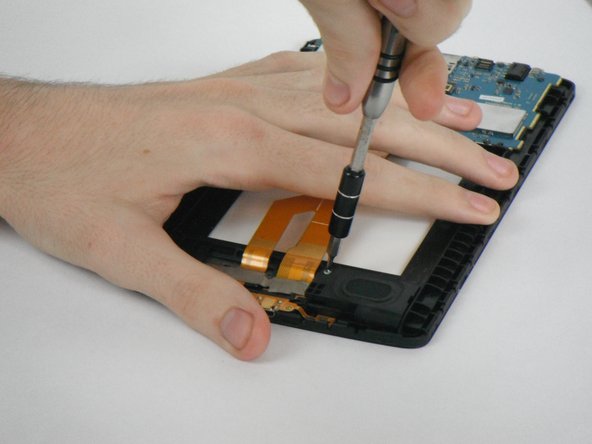
Remove the 7 screws marked in red that are securing the logic board to the case.
-
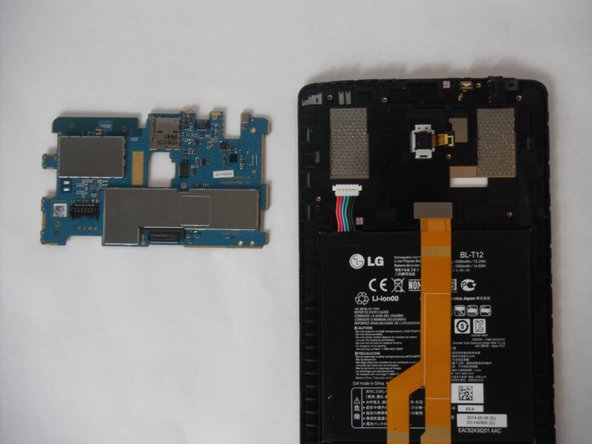
Be sure that all the connectors marked in orange are removed before pulling out the mother board.
-
Very carefully remove the logic board after the screws have been removed
-
-
-
Remove the two screw marked in red.
-
Using the tweezers , gently pull out the metal bracket that holds the charging port in place.
-
Carefully pull out the ribbon connector in orange.
-
Remove the one screw that holds the speaker in place.
-
Slowly pull out the speaker.
-


To reassemble your device, follow these instructions in reverse order.
To reassemble your device, follow these instructions in reverse order.
Annulation : je n'ai pas terminé ce tutoriel.
3 autres ont terminé cette réparation.

Équipe
