Introduction
Use this guide to replace the headphone jack in your LG G3 Vigor.
Ce dont vous avez besoin
-
-
Remove the twelve Phillips #00 screws securing the midframe to the rest of the phone.
-
-
-
-
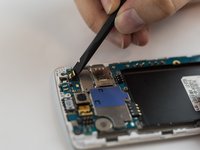
Use the spudger to gently unplug the ribbon cable connected to the motherboard. Then remove the rear facing camera.
-
-
-
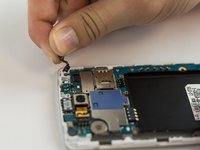
Use the spudger to gently unplug the ribbon cable connected to the motherboard.
-
Remove the front camera.
-
-
-
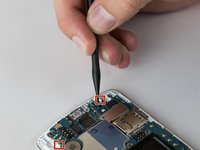
Use the flat edge of a spudger to disconnect the motherboard ribbon connector.
-
-
-
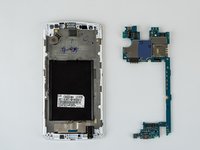
Remove the headphone jack by inserting the spudger into the jack and pulling it up and out.
-


To reassemble your device, follow these instructions in reverse order.
To reassemble your device, follow these instructions in reverse order.
Annulation : je n'ai pas terminé ce tutoriel.
2 autres ont terminé cette réparation.
