Aller au contenu principal

LG K40 Battery Replacement

  1. LG K40 Battery Replacement, Separating the back: étape 1, image 1 de 2 LG K40 Battery Replacement, Separating the back: étape 1, image 2 de 2
    • Use an opening pick to separate the back panel from the phone.

  2. LG K40 Battery Replacement: étape 2, image 1 de 2 LG K40 Battery Replacement: étape 2, image 2 de 2
    • Pull the back panel away.

  3. LG K40 Battery Replacement: étape 3, image 1 de 2 LG K40 Battery Replacement: étape 3, image 2 de 2
    • Watch out, there is a touch sensor cable still attached to the main board.

  4. LG K40 Battery Replacement, Unscrew: étape 4, image 1 de 1
    • Unscrew all screws pictured.

  5. LG K40 Battery Replacement, Remove plastic cover: étape 5, image 1 de 3 LG K40 Battery Replacement, Remove plastic cover: étape 5, image 2 de 3 LG K40 Battery Replacement, Remove plastic cover: étape 5, image 3 de 3
    • Remove the black plastic as pictured.

  6. LG K40 Battery Replacement, Disconnect battery: étape 6, image 1 de 1
    • Disconnect the battery.

  7. LG K40 Battery Replacement, Remove battery: étape 7, image 1 de 3 LG K40 Battery Replacement, Remove battery: étape 7, image 2 de 3 LG K40 Battery Replacement, Remove battery: étape 7, image 3 de 3
    • Caution: Don't jab the battery with any sharp tools. A punctured battery may leak dangerous chemicals or catch fire.

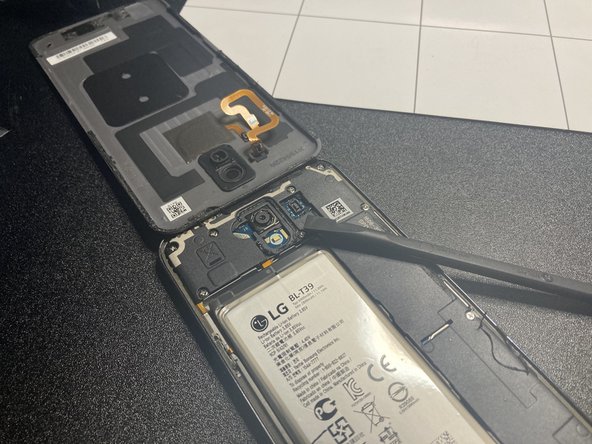
    • Pry up the battery. This will require a lot of force, but fortunately, there aren’t any cables under it.

    • Look at that carnage…

    • You can use adhesive softener to make the job of removing the battery easier.

Conclusion

To reassemble your device, follow these instructions in reverse order.

guardian10

Membre depuis le 03/10/22

9 781 Réputation

14 tutoriels rédigés

Équipe

Android Alliance Membre de l'équipe Android Alliance

Community

87 membres

700 tutoriels rédigés

0 commentaires

Ajouter un commentaire

Nombre de vues :

Dernières 24 heures : 0

7 derniers jours : 5

30 derniers jours : 50

Total : 629