Aller au contenu principal

LG Optimus L90 Touch Screen Replacement

Tutoriel Archivé
Ce tutoriel est conservé uniquement à des fins de suivis historiques. Utilisez la version actuelle du tutoriel pour effectuer votre réparation.

Ce dont vous avez besoin

  1. LG Optimus L90 Touch Screen Replacement, Battery: étape 1, image 1 de 3 LG Optimus L90 Touch Screen Replacement, Battery: étape 1, image 2 de 3 LG Optimus L90 Touch Screen Replacement, Battery: étape 1, image 3 de 3
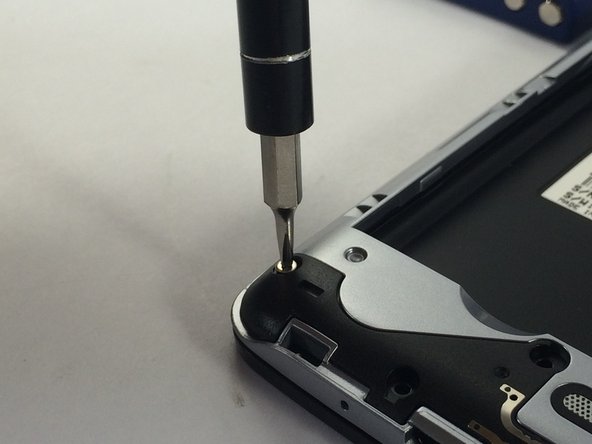
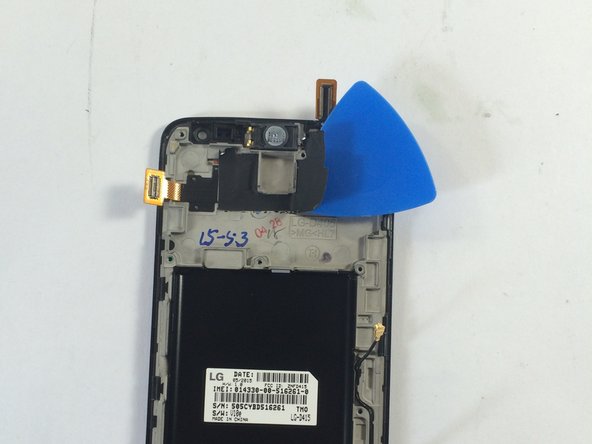
    • Carefully slide an opening pick between the the rear cover and the body of the phone.

    • Using the pick, separate the cover from the back of the phone.

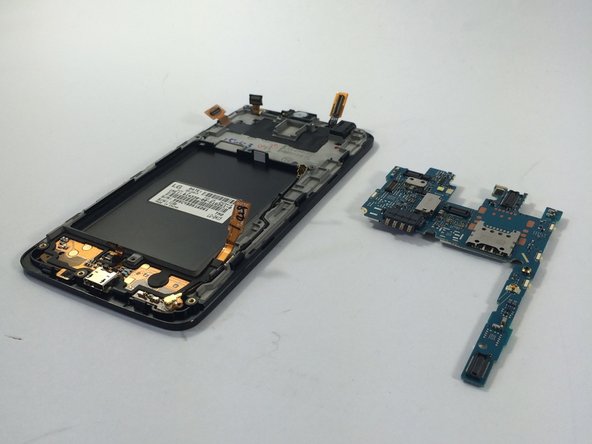
    • Remove the rear cover.

  2. LG Optimus L90 Touch Screen Replacement: étape 2, image 1 de 2 LG Optimus L90 Touch Screen Replacement: étape 2, image 2 de 2
    • Insert a plastic opening tool int o the small recess at the bottom of the battery.

    • Use the plastic opening tool to lift up the bottom of the battery.

    • Remove the battery from the phone.

  3. LG Optimus L90 Touch Screen Replacement, Motherboard: étape 3, image 1 de 2 LG Optimus L90 Touch Screen Replacement, Motherboard: étape 3, image 2 de 2
    • Remove the eleven JIS #000 screws securing the midframe to the phone.

  4. LG Optimus L90 Touch Screen Replacement: étape 4, image 1 de 3 LG Optimus L90 Touch Screen Replacement: étape 4, image 2 de 3 LG Optimus L90 Touch Screen Replacement: étape 4, image 3 de 3
    • Using an opening pick, carefully separate the midframe from the motherboard.

  5. LG Optimus L90 Touch Screen Replacement: étape 5, image 1 de 3 LG Optimus L90 Touch Screen Replacement: étape 5, image 2 de 3 LG Optimus L90 Touch Screen Replacement: étape 5, image 3 de 3
    • Disconnect the flex cables (gold tags with prongs) from the motherboard.

  6. LG Optimus L90 Touch Screen Replacement: étape 6, image 1 de 2 LG Optimus L90 Touch Screen Replacement: étape 6, image 2 de 2
    • Disconnect the thin black cable in the bottom-right corner of the phone.

  7. LG Optimus L90 Touch Screen Replacement: étape 7, image 1 de 3 LG Optimus L90 Touch Screen Replacement: étape 7, image 2 de 3 LG Optimus L90 Touch Screen Replacement: étape 7, image 3 de 3
    • Gently pry the motherboard away from the phone.

  8. LG Optimus L90 Touch Screen Replacement, Touch Screen: étape 8, image 1 de 2 LG Optimus L90 Touch Screen Replacement, Touch Screen: étape 8, image 2 de 2
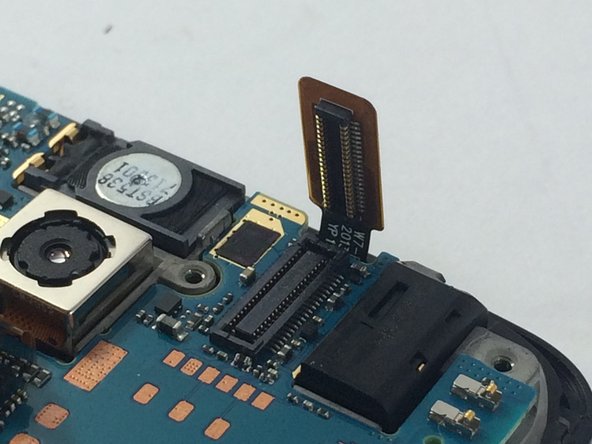
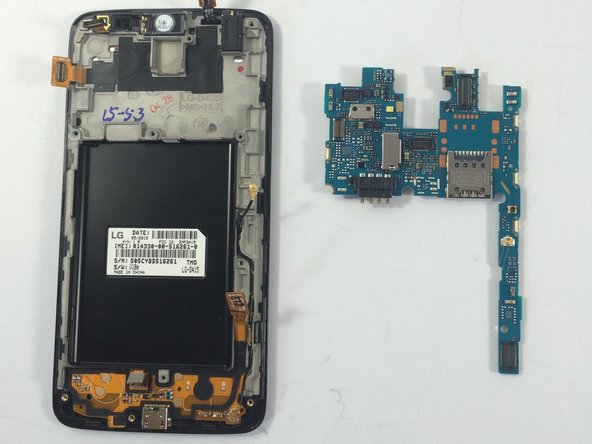
    • Once the motherboard is carefully removed, use your prying tool to remove the black tape that is located around the back camera. Place the tape off to the side when finished as you will need this later.

  9. LG Optimus L90 Touch Screen Replacement: étape 9, image 1 de 1
    • Once the tape is removed, use your heat gun to heat up the screen of the phone for 1-2 minutes. This will soften the adhesive that binds the screen to the phone.

  10. LG Optimus L90 Touch Screen Replacement: étape 10, image 1 de 1
    • Once the screen is up to a decent temperature, use your prying tool to separate the screen from the body of the phone. Once the damaged screen is removed the new one is ready to be inserted.

Conclusion

To reassemble your device, follow these instructions in reverse order.

4 autres ont terminé cette réparation.

Alex Arruda

Membre depuis le 03/04/16

511 Réputation

5 tutoriels rédigés

Équipe

UMass Dartmouth, Team 3-5, Bhusal Spring 2016 Membre de l'équipe UMass Dartmouth, Team 3-5, Bhusal Spring 2016

UMASSD-BHUSAL-S16S3G5

2 membres

7 tutoriels rédigés

0 commentaires

Ajouter un commentaire

Nombre de vues :

Dernières 24 heures : 1

7 derniers jours : 1

30 derniers jours : 5

Total : 2,238