Introduction
This is a guide for replacing the camera of the lg v50 smartphone.
The great thing about this lg phones is that no special screwdrivers are needed, and one need only a small philips head, a supudger, and maybe a heat opener.
For online youtube guides, i recommend YouTuber Jerryrigeverything for the lg g8 teardown and pbkreviews for the lg v50 teardown.
Please be warned that this process requires a near complete teardown; the exception of the USB c port, battery and one boards, almost the entire smartphone must be disassembled.
Prepare to spend anywhere from 30 minutes to 2 hours for this repair.
Ce dont vous avez besoin
-
-
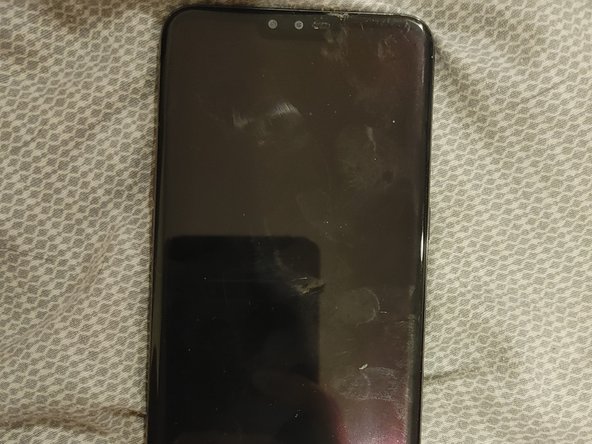
Begin by laying your tools and your smartphones on a flat surface. I have taken a photo of the lgv50 on a blanket and the lg8 on a wooden surface. Although physically different, the two phones use the same main camera, although the lgv50 shines in having 3 camera and a larger screen.
-
Remove the SD and sim card slot now as it will be a problem later.
-
Note that I am using the LG v50 Korean model which can be used with a dual screen and can be seen with the three prong on the back cover. In my disassemblies, this does not change much from the global lg v50. However the camera components are different. Order the right one
-
-
-
This step is included, as the LG models are different based on regions. Make sure you order the right part. Although the LG v50s are similar and use many of the parts of the g8, there are some minut differences.
-
Here are some pictures of a disassembled g8, with two cameras instead of 3. I have put it next to an lgv50 for reference. I have uploaded a seperate teardown guide for others to use if need be.
-
Please do not be hasty like me and use a knife as you could risk damaging internal components.
-
Note that I am using the LG v50 Korean model which can be used with a dual screen and can be seen with the three prong on the back cover. This is different than the LG v50's global camera.
-
Although many of the same components are used, note that the camera is not the same. The global LG v50 version uses the same camera as the g8, but the Korean version uses a triangular connector. Be sure to order the right part.
-
-
-
begin your disassembly by removing the lcd display. Apply heat with an iopener tool or a blow dryer for at least two minutes to loosen the adhesive.
-
Use a suction cup or prying tool to lift the display and make a point of entry on the one of corner.
-
After prying through a corner, make your way around the display until all the adhesive is seperate from the display.
-
Make sure that you do not pry more than quarter a centimeter into the phone as you could damage the display. As you can see from the photos, the adhesive is very small and does not need to be pried into a lot. The chance of damage is small given the lack of wires, but still possible so be careful.
-
Use a plastic spudger or picks if possible instead of metal, as sharp metal can damage the internal components. Use a plastic spudger if possible.
-
-
-
-
In order to access the camera, we will need to remove all the screws on the top and left side.
-
Fortunately all the screws are small Phillip heads screws, so no special screwdrivers are necessary.
-
You will need to remove eleven total screws: three on the top directly above the camera, three in the middle directly below, three on the bottom left, and two on the bottom right.
-
Essentially, you will need to remove every screw you see after removing the back cover.
-
-
-
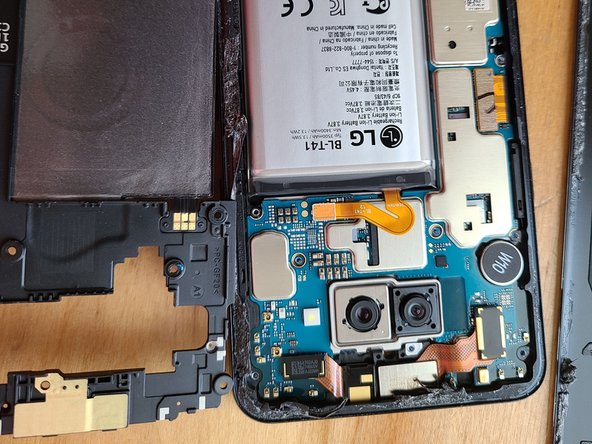
Gently use a spudger to remove the 2 plastic guards: begin with the large display on top that connects to the wireless charger and then remove the long l shaped one on the bottom.
-
Be careful in lifting the wireless charging flap, the long square rectangle in the center with an o. Do not lift more than 15 degrees or you risk damaging the charger.
-
-
-
Before removing the board, it is necessary to remove the display connectors.
-
For this, remove: the top front camera connector, the battery connector in the middle, and the circuit connector on the left middle.
-
We'll also need to remove the bottom two wires which I have pointed to in the spudger. Be very gentle in removing these as even twisting them too much can damage them.
-
For good measure, you can also remove the audio jack connection on the bottom right, but it is not necessary.
-
-
-
be very careful in this, as this is the most difficult part of the procedure.
-
If you have not removed the Sim SD card slot, remove it now.
-
Remove the board gently lifting the top board 15 degrees or until you see the connector on the bottom lower part. Use a spudger to disconnect the top board from the bottom board.
-
After the connector is removed, gently lift and remove the board.
-
The front facing camera is gently wedged inbetween the boards and makes this section a little tricky. It is to best the top front facing camera in the same place rather than move it around. If this proves too difficult, simply remove the front facing camera entirely.
-
The difficulty in the section comes from the fragile nature of the board and the front facing camera's position. Although this is easier to remove than the front display adhesive, this section is most likely to damage the smartphone.
-
-
-
After removing the board, remove the connector to the connector to the camera.
-
Gently remove the camera and use your replacement.
-
As a final note, the LG v50 global edition without the three prongs uses a triangle back connector. Which will not fit with the korean LG v50n connector.
-


To reassemble your device, follow these instructions in reverse order.
Note that the front-facing camera may be a little tricky to reinstall. Nudge the camera in the right direction until it is snug in the socket. Do not force any pieces.
To reassemble your device, follow these instructions in reverse order.
Note that the front-facing camera may be a little tricky to reinstall. Nudge the camera in the right direction until it is snug in the socket. Do not force any pieces.
