Aller au contenu principal

LG VX8560 Keypad Replacement

Ce dont vous avez besoin

  1. LG VX8560 Keypad Replacement, Keypad: étape 1, image 1 de 2 LG VX8560 Keypad Replacement, Keypad: étape 1, image 2 de 2
    • Remove the battery by sliding the battery cover off the phone.

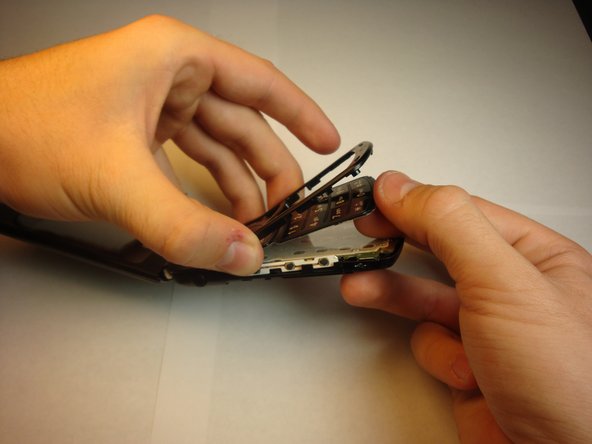
    • Unscrew all 4 screws along the edge of the phone using the Philips #00 Screwdriver.

  2. LG VX8560 Keypad Replacement: étape 2, image 1 de 2 LG VX8560 Keypad Replacement: étape 2, image 2 de 2
    • Insert the iFixit Opening Tool between the phone’s keypad cover and the back cover, and gently pull apart.

    • Be careful with the motherboard; don’t let it detach.

  3. LG VX8560 Keypad Replacement: étape 3, image 1 de 1
    • Insert the new keypad into the cover frame and check the dimensions.

  4. LG VX8560 Keypad Replacement: étape 4, image 1 de 2 LG VX8560 Keypad Replacement: étape 4, image 2 de 2
    • Gently snap the cover frame back to the right position.

    • Replace the screws using the Phillips #00 Screwdriver.

    • Insert the battery and snap the back cover on.

Conclusion

The keypad is successfully replaced.

Une autre personne a terminé cette réparation.

Jack Foley

Membre depuis le 04/25/13

37 Réputation

3 tutoriels rédigés

Équipe

Cal Poly, Team 13-62, Johann Spring 2013 Membre de l'équipe Cal Poly, Team 13-62, Johann Spring 2013

CPSU-JOHANN-S13S13G62

4 membres

12 tutoriels rédigés

0 commentaires

Ajouter un commentaire

Nombre de vues :

Dernières 24 heures : 2

7 derniers jours : 8

30 derniers jours : 12

Total : 267