Aller au contenu principal

Ce tutoriel a des changements plus récents. Passer à la dernière version non vérifiée.

LG Voyager Antenna Replacement

Ce dont vous avez besoin

  1. LG Voyager Antenna Replacement, Battery: étape 1, image 1 de 1
    • Turn over the phone so the front screen is facing down and the back side is up.

  2. LG Voyager Antenna Replacement: étape 2, image 1 de 1
    • Pull down on the button at the bottom of the phone. The battery will pop up and can then be safely removed.

  3. LG Voyager Antenna Replacement: étape 3, image 1 de 1
    • To install the new battery, position the battery so that the three small metal contacts of the battery are facing the three metal contacts of the phone

    • Insert the top of the battery, with the two plastic tabs, into their respective holes in the top

    • Then press down on the bottom of the battery and it should snap into place

  4. LG Voyager Antenna Replacement, Antenna: étape 4, image 1 de 1
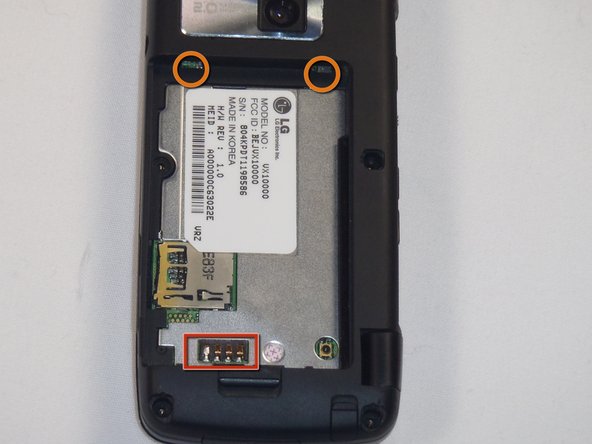
    • First remove the battery by pulling the tab away from the device

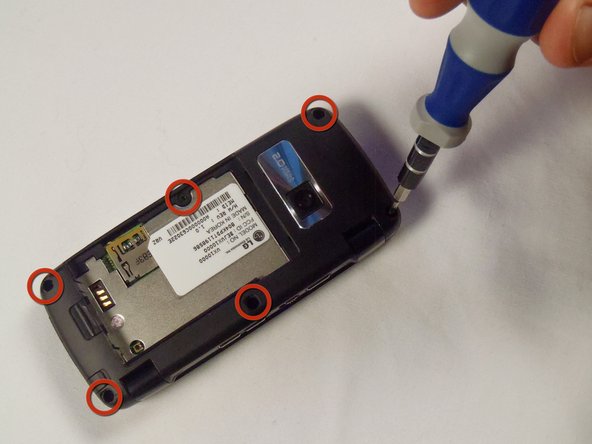
    • Next remove the 5 rubber modules by gently prying underneath them. This will expose the screws underneath

  5. LG Voyager Antenna Replacement: étape 5, image 1 de 2 LG Voyager Antenna Replacement: étape 5, image 2 de 2
    • Next remove the 6 #00 Phillips screws holding the back in place

    • screws: 1.43mm head, 3.61mm length

  6. LG Voyager Antenna Replacement: étape 6, image 1 de 3 LG Voyager Antenna Replacement: étape 6, image 2 de 3 LG Voyager Antenna Replacement: étape 6, image 3 de 3
    • Now, slide a plastic opening tool in between the two plastic pieces that form the outside of the back case

    • Gently work the plastic opening tool around the edge of the case to separate the two pieces

    • Once the case has been separated you should be able to see the circuitry inside the phone

  7. LG Voyager Antenna Replacement: étape 7, image 1 de 3 LG Voyager Antenna Replacement: étape 7, image 2 de 3 LG Voyager Antenna Replacement: étape 7, image 3 de 3
    • Remove the #00 Philips screw holding the antenna in place

    • Screw: 4.52mm length, 2.68mm head

    • Once the screw is removed, lift the small case around the antenna off

  8. LG Voyager Antenna Replacement: étape 8, image 1 de 2 LG Voyager Antenna Replacement: étape 8, image 2 de 2
    • Now that you have the antenna exposed, you can remove it

Conclusion

To reassemble your device, follow these instructions in reverse order.

Une autre personne a terminé cette réparation.

Paul Heckler II

Membre depuis le 04/12/12

40 Réputation

1 tutoriel rédigé

Équipe

Cal Poly, Team 17-26, Amido Spring 2012 Membre de l'équipe Cal Poly, Team 17-26, Amido Spring 2012

CPSU-AMIDO-S12S17G26

4 membres

4 tutoriels rédigés

0 commentaires

Ajouter un commentaire

Nombre de vues :

Dernières 24 heures : 0

7 derniers jours : 2

30 derniers jours : 3

Total : 291