Introduction
There are at least 2 major differences in La Pavonis Domus Bar. The model is close or similar to Lelit Anita.
But the newer models of Domus Bar (DMB) and Anita have a different brewing group than the older ones (slightly improved for replacements). This guide is for the older version, as far as I could find, from before 2007.
The new seal has the following dimensions:
71,5 x 54 x 4 mm
Ce dont vous avez besoin
-
-
Use your fingers or something else to put some pressure on the wrench and the nut, so you don’t tear it.
-
The nut is quite flat, but you can open it with a 14mm wrench when you angle the wrench so it fits between the openings in the group case.
-
Put the coffee machine in the back or if you can remove the bean collector, on the top.
-
Remember to empty the water canister, the spill collectors. Turn off your machine and disconnect it from power.
-
You don't need to open the machine for replacing the seal.
-
-
-
-
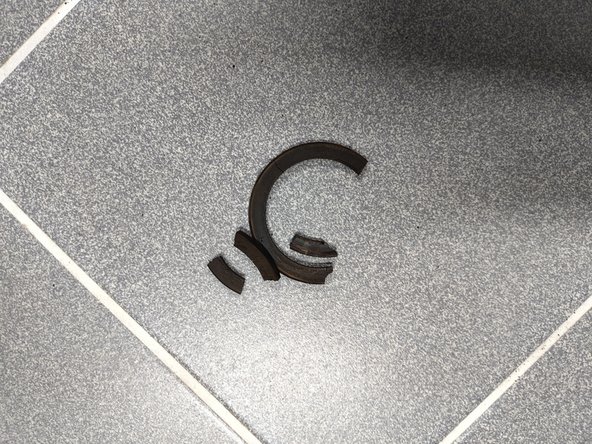
Remove the seal by prying it out of the group set.
-
Make use of the cutouts in the group casing.
-
Older seals can dry out and might break. That’s no problem as you need to replace the seal anyway.
-
When adding the new seal, use the guide backwards. Make sure the seal fits well. Don’t tighten the copper screw too hard and clean or service the machine regularly.
-


To reassemble your device, follow these instructions in reverse order.
To reassemble your device, follow these instructions in reverse order.
Équipe
