Cette version peut contenir des modifications incorrectes. Passez au dernier aperçu vérifié.
Ce dont vous avez besoin
-
Cette étape n’est pas traduite. Aidez à la traduire
-
Flip the IdeaPad bottom side up.
-
Using a Phillips #1 screwdriver, remove the two 6.0mm screws on the back panel, that hold the keyboard.
-
Flip the computer back to top facing.
-
-
Cette étape n’est pas traduite. Aidez à la traduire
-
Unlock the ZIF conector before pulling the cable out
-
-
-
-
À l'aide d'un tournevis cruciforme #1, dévissez la vis de 5,0 mm du panneau arrière.
-
-
-
Posez l'ordinateur à l'envers.
-
Avec un tournevis cruciforme #1, enlevez les dix vis de 6,0 mm qui fixent le panneau arrière.
-
Retournez l'ordinateur à l'endroit.
-
-
-
Retournez l'ordinateur portable à l'envers et soulevez délicatement le boîtier supérieur du panneau arrière.
-
-
Cette étape n’est pas traduite. Aidez à la traduire
-
Using a Phillips #1 screwdriver, remove the four 4.0mm corner screws securing the hard drive assembly to the body.
-
Disconnect the hard drive from the back panel by sliding it to the left until loosened.
-
Remove it completely by lifting the hard drive out of the back panel.
-
-
Cette étape n’est pas traduite. Aidez à la traduire
-
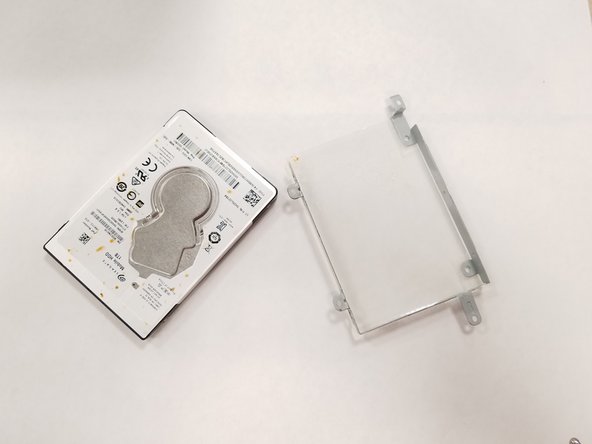
Using the Phillips #1 screwdriver, remove the four 3.0mm corner screws from the caddy of the hard drive.
-
Separate the plastic caddy from the hard drive.
-
Annulation : je n'ai pas terminé ce tutoriel.
6 autres ont terminé cette réparation.
4 commentaires
I found that two of the screws on the bottom hold down the keyboard, so they need to be unscrewed before the keyboard will come up. Also, there are two “shallow” screws (that become visible after the DVD drive is removed) which need to be removed, and the battery doesn’t really need to be removed to replace the hard drive.
I’ve posted these comments on their associated steps, but it doesn’t hurt to repeat them here: There are 3 screws on the bottom of the laptop holding certain parts in place (keyboard & optical drive). These will need to be removed before doing anything else in this guide, so it’s best to just remove all 11 screws (yes, there are 11, not 10 as stated) from the bottom of the laptop. After removing the optical drive, there will be 2 more screws to remove. The screw underneath the keyboard holds the fan assembly in place, not the optical drive, as they are on opposite sides of the laptop.
Cannot remove optical hard drive following instructions. Does not appear to be removable on my Lenovo Ideapad 110.


