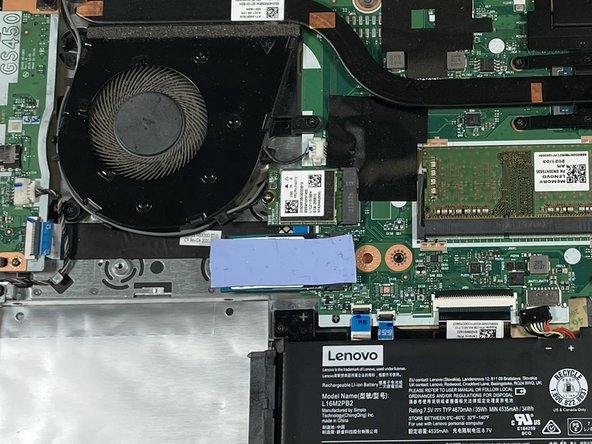
Aller au contenu principal

Lenovo IdeaPad 3-1481W000NGUS Wi-Fi Card Replacement

Ce dont vous avez besoin

  1. Lenovo IdeaPad 3-1481W000NGUS Wi-Fi Card Replacement, Back Cover: étape 1, image 1 de 3 Lenovo IdeaPad 3-1481W000NGUS Wi-Fi Card Replacement, Back Cover: étape 1, image 2 de 3 Lenovo IdeaPad 3-1481W000NGUS Wi-Fi Card Replacement, Back Cover: étape 1, image 3 de 3
    Outil utilisé dans cette étape :
    Magnetic Project Mat
    $19.95
    J'achète
    • Orient the laptop so that the bottom is facing up.

    • Remove the six 7 mm screws using a Phillips #00 screwdriver.

    • Remove the four 4 mm screws using a Phillips #00 screwdriver.

    • Throughout this repair, keep track of each screw and make sure it goes back exactly where it came from.

  2. Lenovo IdeaPad 3-1481W000NGUS Wi-Fi Card Replacement: étape 2, image 1 de 3 Lenovo IdeaPad 3-1481W000NGUS Wi-Fi Card Replacement: étape 2, image 2 de 3 Lenovo IdeaPad 3-1481W000NGUS Wi-Fi Card Replacement: étape 2, image 3 de 3
    • Pry up the sides of the back case using the iFixit opening tool. Then, lift to remove.

    • You may hear snapping when removing the panel. This is normal!

  3. Lenovo IdeaPad 3-1481W000NGUS Wi-Fi Card Replacement, Wi-Fi Card: étape 3, image 1 de 2 Lenovo IdeaPad 3-1481W000NGUS Wi-Fi Card Replacement, Wi-Fi Card: étape 3, image 2 de 2
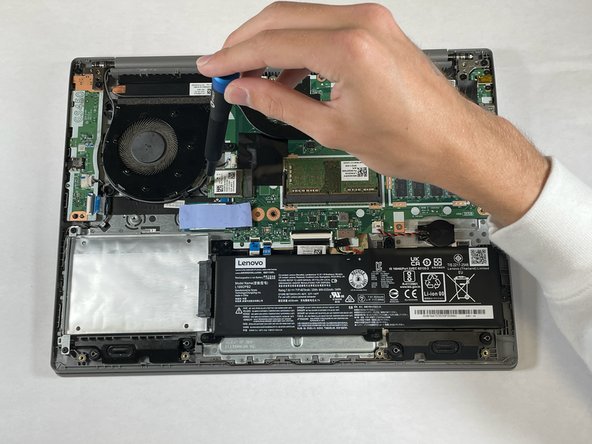
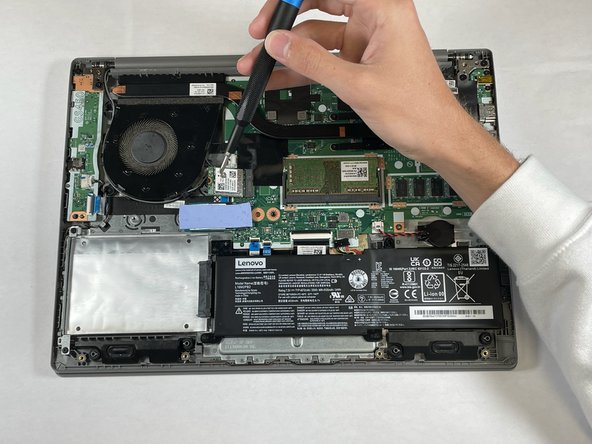
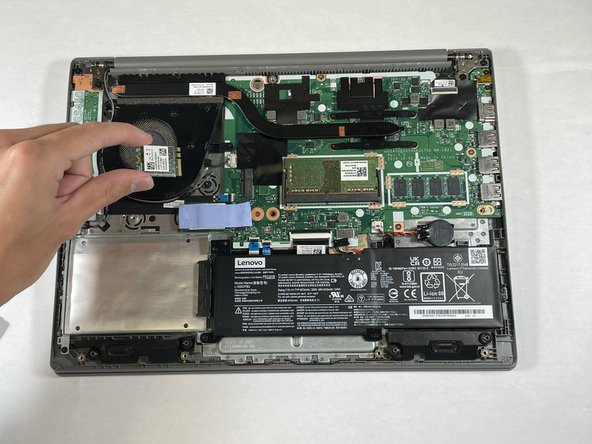
    • Use your fingernail or an opening tool to gently pull out and disconnect the battery pack cable.

    • Do not pull on the cables.

  4. Lenovo IdeaPad 3-1481W000NGUS Wi-Fi Card Replacement: étape 4, image 1 de 2 Lenovo IdeaPad 3-1481W000NGUS Wi-Fi Card Replacement: étape 4, image 2 de 2
    • Use the spudger to remove each cable from the Wi-Fi card, one cable at a time.

    • The cables do not need much force to be removed.

  5. Lenovo IdeaPad 3-1481W000NGUS Wi-Fi Card Replacement: étape 5, image 1 de 3 Lenovo IdeaPad 3-1481W000NGUS Wi-Fi Card Replacement: étape 5, image 2 de 3 Lenovo IdeaPad 3-1481W000NGUS Wi-Fi Card Replacement: étape 5, image 3 de 3
    • Remove the single 2 mm screw using a Phillips #00 screwdriver.

    • Try not to press to hard down on the computer to avoid damage.

  6. Lenovo IdeaPad 3-1481W000NGUS Wi-Fi Card Replacement: étape 6, image 1 de 3 Lenovo IdeaPad 3-1481W000NGUS Wi-Fi Card Replacement: étape 6, image 2 de 3 Lenovo IdeaPad 3-1481W000NGUS Wi-Fi Card Replacement: étape 6, image 3 de 3
    • Pull the card away from the housing capsule on the right side of the Wi-Fi card to remove it from the laptop.

    • Make sure no cables are still connected or wrapped around the Wi-Fi card when removing.

Conclusion

To reassemble your device, follow these instructions in reverse order.

William Hart

Membre depuis le 03/01/23

109 Réputation

1 tutoriel rédigé

Équipe

0 commentaires

Ajouter un commentaire

Nombre de vues :

Dernières 24 heures : 2

7 derniers jours : 7

30 derniers jours : 37

Total : 208