Introduction
Is your Lenovo IdeaPad 330-15IKB 81DE overheating or making unusual noises? Your fan may be clogged with dust, malfunctioning, or no longer working efficiently. This guide will walk you through the steps to replace or clean your fan, ensuring your laptop stays cool and operates smoothly.
Ce dont vous avez besoin
-
-
Ensure the laptop is powered off.
-
Turn the device over so the bottom is facing up.
-
Remove the 13 6 mm screws from the bottom of the device using a Phillips #0 screwdriver.
-
Carefully glide a Jimmy along the seam of the casing.
-
Remove the back cover of the laptop.
-
-
-
-
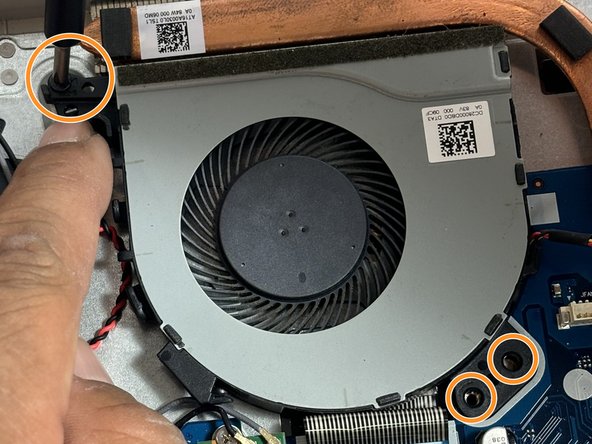
Carefully unplug the fan connector.
-
Remove the three 3 mm screws to the left of the fan using a Phillips #0 screwdriver.
-
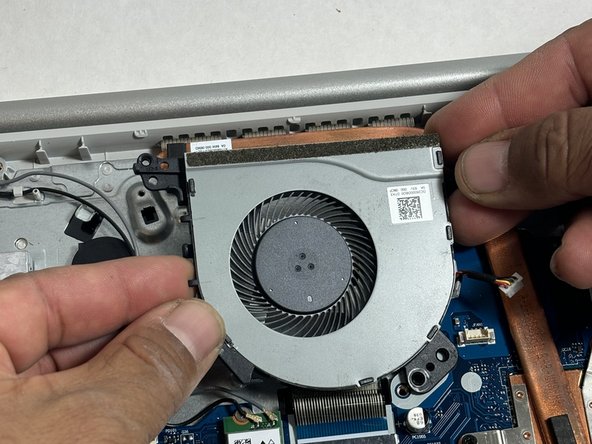
Lift the fan up and remove it from the back of the device.
-


To reassemble your device, follow these instructions in reverse order.
To reassemble your device, follow these instructions in reverse order.

Équipe

UMass Dartmouth, Team 2-1, Konn Fall 2024 Membre de l'équipe UMass Dartmouth, Team 2-1, Konn Fall 2024
UMASSD-KONN-F24S2G1
4 membres
5 tutoriels rédigés