Aller au contenu principal

Lenovo IdeaPad U410 Solid State Drive Replacement

Ce dont vous avez besoin

  1. Lenovo IdeaPad U410 Solid State Drive  Replacement, Bottom Cover: étape 1, image 1 de 2 Lenovo IdeaPad U410 Solid State Drive  Replacement, Bottom Cover: étape 1, image 2 de 2
    • Using the metal spudger, remove all the rubber squares on the bottom of the laptop.

  2. Lenovo IdeaPad U410 Solid State Drive  Replacement: étape 2, image 1 de 3 Lenovo IdeaPad U410 Solid State Drive  Replacement: étape 2, image 2 de 3 Lenovo IdeaPad U410 Solid State Drive  Replacement: étape 2, image 3 de 3
    • Remove the three 6 mm Phillips #1 screws holding the panel on the laptop.

    • Pry the panel from the laptop using your hands or the metal spudger if necessary.

  3. Lenovo IdeaPad U410 Solid State Drive  Replacement, Solid State Drive: étape 3, image 1 de 3 Lenovo IdeaPad U410 Solid State Drive  Replacement, Solid State Drive: étape 3, image 2 de 3 Lenovo IdeaPad U410 Solid State Drive  Replacement, Solid State Drive: étape 3, image 3 de 3
    • Make sure your laptop is powered off.

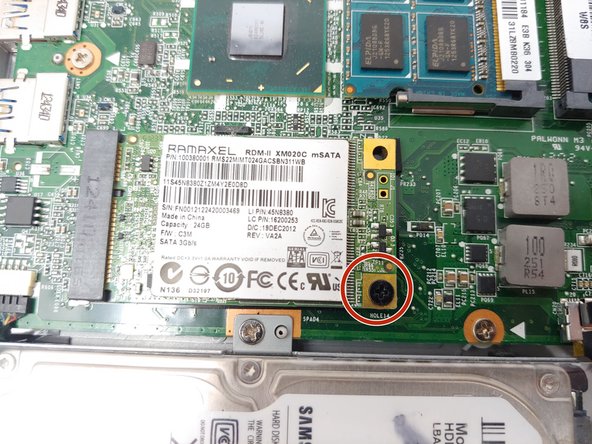
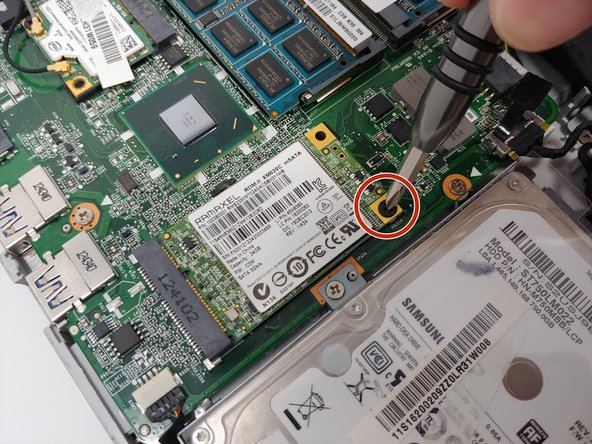
    • Use a Phillips #1 screwdriver to remove the 3 mm screw holding the SSD in place.

  4. Lenovo IdeaPad U410 Solid State Drive  Replacement: étape 4, image 1 de 1
    • Grab the SSD and pull it out from the mSATA slot.

Conclusion

To reassemble your device, follow these instructions in reverse order.

Une autre personne a terminé cette réparation.

Edric An

Membre depuis le 09/18/18

433 Réputation

3 tutoriels rédigés

Équipe

0 commentaires

Ajouter un commentaire

Nombre de vues :

Dernières 24 heures : 0

7 derniers jours : 3

30 derniers jours : 7

Total : 677