Cette version peut contenir des modifications incorrectes. Passez au dernier aperçu vérifié.
Ce dont vous avez besoin
-
Cette étape n’est pas traduite. Aidez à la traduire
-
Use a Phillips #00 screwdriver to remove one M2 x 3mm screw from the side of the device.
-
-
Cette étape n’est pas traduite. Aidez à la traduire
-
Swing the cover out slightly like a hinge.
-
Pull the cover directly away from the case towards the base of the laptop.
-
Lift the cover up and away from the device to remove it.
-
-
Cette étape n’est pas traduite. Aidez à la traduire
-
Use the clear tab to slide the hard drive out of the device.
-
-
-
Cette étape n’est pas traduite. Aidez à la traduire
-
To replace the hard drive, remove the four M2 × 4mm wafer-headed screws on the sides of the hard drive case using a Phillips #00 screwdriver.
-
Slide the old hard drive directly out.
-
-
Cette étape n’est pas traduite. Aidez à la traduire
-
Use a Phillips #0 screwdriver to remove eight M2 × 3 mm screws near the front opening and scattered across the bottom of the laptop.
-
Remove three M2x3 mm screws using a Phillips #00 screwdriver from the base of the laptop near the opening.
-
-
Cette étape n’est pas traduite. Aidez à la traduire
-
Remove the M3 x 2mm screw from the hole left by the hard drive using a Phillips #00 screwdriver.
-
-
Cette étape n’est pas traduite. Aidez à la traduire
-
Wedge the plastic opening tool between the upper and lower halves of the lower case.
-
Lift the end of the opening tool slowly until the case separates.
-
-
Cette étape n’est pas traduite. Aidez à la traduire
-
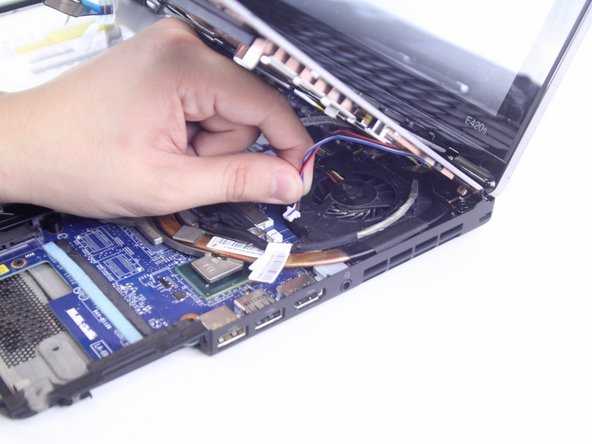
Locate and disconnect the 4 ribbon wires from the top case.
-
Locate and disconnect the two additional connecting wires.
-
-
Cette étape n’est pas traduite. Aidez à la traduire
-
Lift the unattached case away from the device and place it to the side.
-


Équipe

Linn Benton Community College, Team S2-G1, Karnes Fall 2018 Membre de l'équipe Linn Benton Community College, Team S2-G1, Karnes Fall 2018
LBCC-KARNES-F18S2G1
3 membres
8 tutoriels rédigés