Aller au contenu principal

Lenovo ThinkPad S431 HDMI-USB Jack assembly Replacement

Ce dont vous avez besoin

  1. Lenovo ThinkPad S431 HDMI-USB Jack assembly Replacement, Hard Disk Drive: étape 1, image 1 de 2 Lenovo ThinkPad S431 HDMI-USB Jack assembly Replacement, Hard Disk Drive: étape 1, image 2 de 2
    • Remove the 8 screws that hold down the back panel using the Phillips #000 screwdriver.

  2. Lenovo ThinkPad S431 HDMI-USB Jack assembly Replacement: étape 2, image 1 de 1
    • Remove the two M2 x 3 mm, wafer-head, nylon-coated screws that hold down the hard drive assembly using the Phillips #0 screwdriver.

  3. Lenovo ThinkPad S431 HDMI-USB Jack assembly Replacement: étape 3, image 1 de 1
    • Pull the hard drive assembly out with backside up.

  4. Lenovo ThinkPad S431 HDMI-USB Jack assembly Replacement: étape 4, image 1 de 1
    • Remove the four M3 x 3 mm, flat-head, nylon-coated screws on the side of the hard drive assembly using the Phillips #0 screwdriver.

  5. Lenovo ThinkPad S431 HDMI-USB Jack assembly Replacement: étape 5, image 1 de 1
    • Gently, remove the plastic cover with the blue strips.

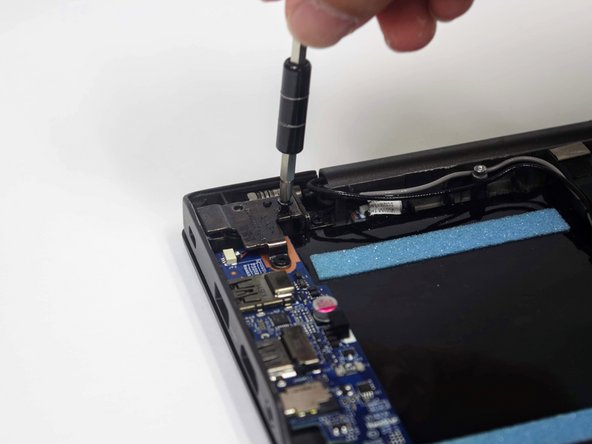
  6. Lenovo ThinkPad S431 HDMI-USB Jack assembly Replacement, HDMI-USB Jack assembly: étape 6, image 1 de 2 Lenovo ThinkPad S431 HDMI-USB Jack assembly Replacement, HDMI-USB Jack assembly: étape 6, image 2 de 2
    • Remove the 3 screws holding down the T shaped cover using the Phillips head #1. Two of the screws are M2.5x 4 wafer head. The other is a M2x4MM.

    • The two similar screws have blue threading around them.

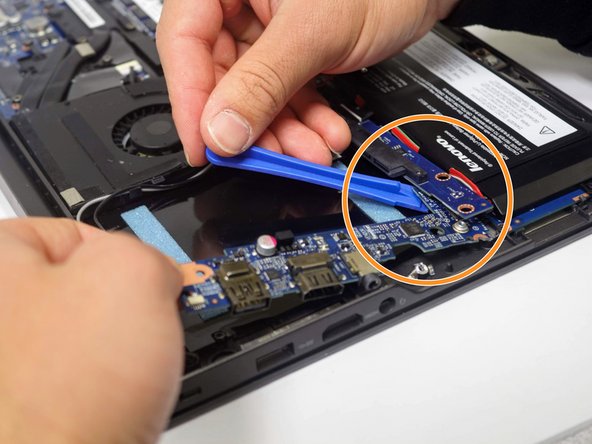
  7. Lenovo ThinkPad S431 HDMI-USB Jack assembly Replacement: étape 7, image 1 de 2 Lenovo ThinkPad S431 HDMI-USB Jack assembly Replacement: étape 7, image 2 de 2
    • Use the opening tool to lift up the T shaped cover.

    • Remove the M2x3MM wafer head screw.

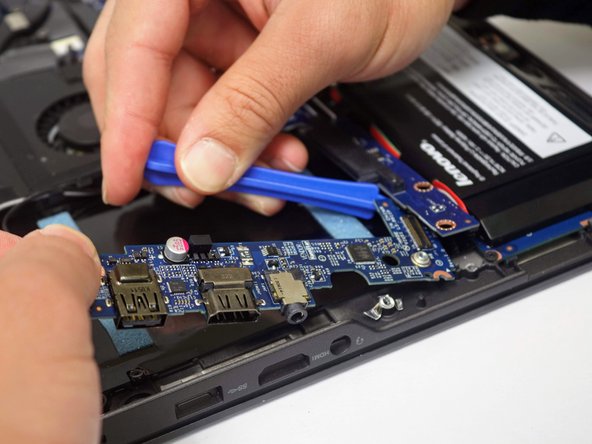
  8. Lenovo ThinkPad S431 HDMI-USB Jack assembly Replacement: étape 8, image 1 de 3 Lenovo ThinkPad S431 HDMI-USB Jack assembly Replacement: étape 8, image 2 de 3 Lenovo ThinkPad S431 HDMI-USB Jack assembly Replacement: étape 8, image 3 de 3
    • Take off the 2 M2x3MM wafered screws holding down the chip top of assembly.

    • Lift the chip to release the HDMI-USB jack assembly

  9. Lenovo ThinkPad S431 HDMI-USB Jack assembly Replacement: étape 9, image 1 de 1
    • Detach the connector.

Conclusion

To reassemble your device, follow these instructions in reverse order.

0 commentaires

Ajouter un commentaire

Nombre de vues :

Dernières 24 heures : 2

7 derniers jours : 3

30 derniers jours : 8

Total : 284