Aller au contenu principal

Lenovo ThinkPad T530 Optical Drive Reader Replacement

Ce dont vous avez besoin

  1. Lenovo ThinkPad T530 Optical Drive Reader Replacement, Place your laptop upside down: étape 1, image 1 de 2 Lenovo ThinkPad T530 Optical Drive Reader Replacement, Place your laptop upside down: étape 1, image 2 de 2
    • Ensure that the laptop is disconnected from the wall charger, and that the laptop is entirely powered off before following any of the steps below.

    • Flip your laptop upside down, so that the keyboard is facing down.

  2. Lenovo ThinkPad T530 Optical Drive Reader Replacement, Unlock Battery: étape 2, image 1 de 2 Lenovo ThinkPad T530 Optical Drive Reader Replacement, Unlock Battery: étape 2, image 2 de 2
    • Locate the latch located on the battery near the top of the laptop.

    • Using your finger, slide the latch to the right-most (Unlocked) position.

    • None of this should require an exhuberant amount of force.

  3. Lenovo ThinkPad T530 Optical Drive Reader Replacement, Remove the Battery: étape 3, image 1 de 2 Lenovo ThinkPad T530 Optical Drive Reader Replacement, Remove the Battery: étape 3, image 2 de 2
    • You can now pull the battery away from the laptop. When pulling the battery out, ensure to pull it out straight.

  4. Lenovo ThinkPad T530 Optical Drive Reader Replacement, Removing the Optical Drive: étape 4, image 1 de 3 Lenovo ThinkPad T530 Optical Drive Reader Replacement, Removing the Optical Drive: étape 4, image 2 de 3 Lenovo ThinkPad T530 Optical Drive Reader Replacement, Removing the Optical Drive: étape 4, image 3 de 3
    • Locate the locking switch, highlighted in red. Move the switch up, to the unlocked position.

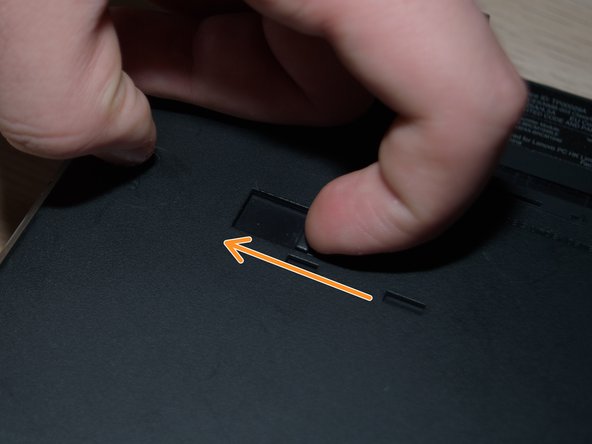
    • Locate the release switch, highlighted in orange. Move the switch to the left, to the release position.

  5. Lenovo ThinkPad T530 Optical Drive Reader Replacement, Removing the Optical Drive (Continued): étape 5, image 1 de 2 Lenovo ThinkPad T530 Optical Drive Reader Replacement, Removing the Optical Drive (Continued): étape 5, image 2 de 2
    • The Optical Drive should eject out of its slot, and you should be able to pull it out of the slot entirely.

Conclusion

To reassemble your device, follow these instructions in reverse order.

Pièces jointes

Albert Stoynov

Membre depuis le 09/11/23

1 198 Réputation

10 tutoriels rédigés

0 commentaires

Ajouter un commentaire

Nombre de vues :

Dernières 24 heures : 1

7 derniers jours : 2

30 derniers jours : 3

Total : 55