Introduction
Use this guide to replace a noisy or burned-out fan.
Ce dont vous avez besoin
-
-
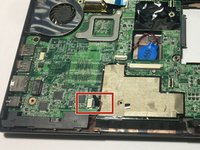
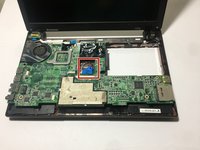
Please follow steps 3-6 from the Keyboard Replacement Guide, then return to this guide.
-
-


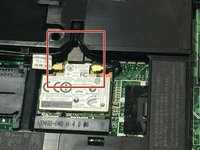


Presque terminé !
Then you are good to go.
Conclusion
Then you are good to go.
Annulation : je n'ai pas terminé ce tutoriel.
3 autres ont terminé cette réparation.
Équipe

University of North Texas, Team S2-G2, Thomas Spring 2018 Membre de l'équipe University of North Texas, Team S2-G2, Thomas Spring 2018
UNT-THOMAS-S18S2G2
3 membres
3 tutoriels rédigés