Introduction
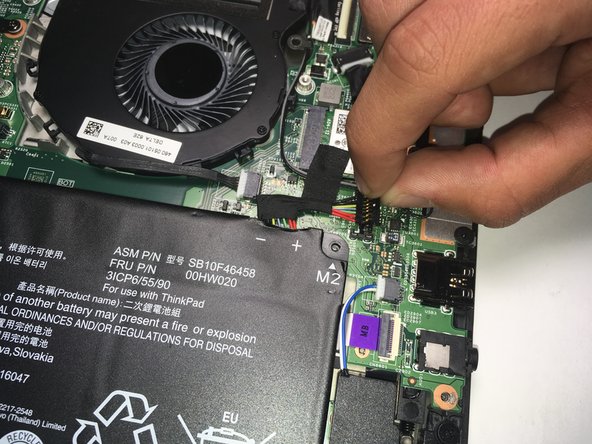
This guide explains how to safely remove the battery from your Lenovo Thinkpad Yoga 14 20FY.
Ce dont vous avez besoin
-
-
Remove the indicated nine M2 x 6 mm nylon-coated screws using a Phillips head screwdriver.
-
-



To reassemble your device, follow these instructions in reverse order.
To reassemble your device, follow these instructions in reverse order.
Annulation : je n'ai pas terminé ce tutoriel.
7 autres ont terminé cette réparation.



Équipe

Cal Poly, Team S14-G2, Banghart Spring 2017 Membre de l'équipe Cal Poly, Team S14-G2, Banghart Spring 2017
CPSU-BANGHART-S17S14G2
5 membres
6 tutoriels rédigés
5 commentaires
What size screwdriver do you need to remove the screws for the back cover?
Even the Hardware Maintenance Manual from Lenovo's website doesn't state the screwdriver size. I used a PH00 and it fit well.
Mike -
I did all the steps for removal, but I have a problem with the installation of the new battery. I can’t seem to manage to connect the wires (bundled into the plastic black thingy) back into the compartment from which I released the thingy that was connected to the old battery . In other words, I can’t do the opposite of Step 5 and push it back in. If anyone can post a picture or even a short video of how to insert it back, I would appreciate it. Right now my Laptop says there’s no battery, even though I connected it, so I must be doing something wrong. Thanks. G.
After connecting new battery, system showing as plugged in but the charging light is not glowing? If I replace old battery charging light comes fine! Any idea?
Suggestion: disconnect the CMOS (coin) battery while installing the battery, then plug it back in afterwards.
After installing the replacement battery sold by iFixit, I was presented with a message that the battery was not genuine and that it would not charge. I could still boot the computer, but the computer would not report the battery charge percentage. I tried flashing the BIOS to an updated version (v1.59), but that did not help. What helped in the end was disconnecting the CMOS battery and plugging it in again. While disconnected, I also pressed the small button labeled BTN1 (just below where the CMOS battery's wires plug into the main board in the photo for Step 4 above) for 5 seconds, in case that might reset something.
