Cette version peut contenir des modifications incorrectes. Passez au dernier aperçu vérifié.
Ce dont vous avez besoin
-
Cette étape n’est pas traduite. Aidez à la traduire
-
Flip the computer upside down.
-
The red rectangle shows the location of the battery.
-
-
Cette étape n’est pas traduite. Aidez à la traduire
-
Locate the two switches that lock the battery. Push the left-hand switch outward into the "unlocked" position.
-
-
Cette étape n’est pas traduite. Aidez à la traduire
-
Now push and hold the right clip to the right while using your other hand to gently slide the battery away from the computer.
-
-
Cette étape n’est pas traduite. Aidez à la traduire
-
Locate the hard drive enclosure (marked by the red rectangle).
-
-
Cette étape n’est pas traduite. Aidez à la traduire
-
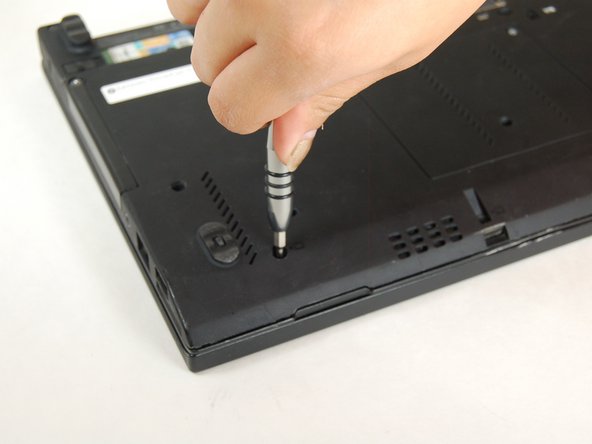
Use a small Phillips screwdriver to unscrew the single screw that holds down the hard drive enclosure cover.
-
Carefully remove the hard drive enclosure cover.
-
-
Cette étape n’est pas traduite. Aidez à la traduire
-
Gently pull the black pull tab out from above the hard drive. Continue pulling on the pull tab until the hard drive and the two plastic rails come out of the enclosure.
-
-
Cette étape n’est pas traduite. Aidez à la traduire
-
Remove the plastic rails from the old SSD/hard drive and place them on the new SSD/hard drive.
-
-
Cette étape n’est pas traduite. Aidez à la traduire
-
Once you have located the two screws, remove them with a small Phillips screwdriver.
-
-
-
Cette étape n’est pas traduite. Aidez à la traduire
-
Use a a plastic spudger (or a flat screwdriver) to push the keyboard towards the screen. This will pop the bottom of the keyboard out of the casing.
-
-
Cette étape n’est pas traduite. Aidez à la traduire
-
Carefully lift the keyboard so that you can access its connector.
-
-
Cette étape n’est pas traduite. Aidez à la traduire
-
You are done - the keyboard is not connected to the laptop any more and can be replaced.
-
-
Cette étape n’est pas traduite. Aidez à la traduire
-
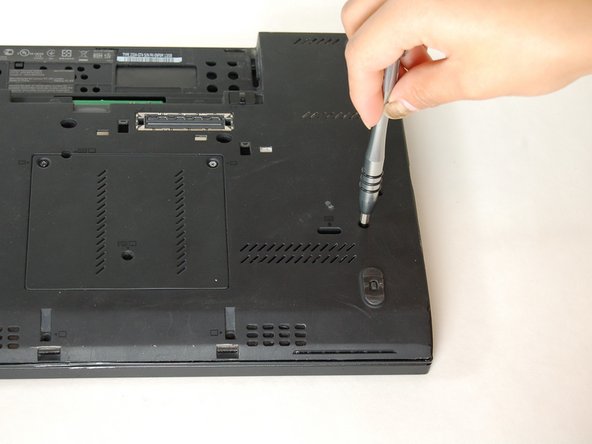
Unscrew two 5.7mm screws from the top of the bottom of the laptop.
-
-
Cette étape n’est pas traduite. Aidez à la traduire
-
Unlock the white seal and disconnect the blue cable.
-
-
Cette étape n’est pas traduite. Aidez à la traduire
-
Carefully disconnect blue and red cables and remove them from plastic case.
-
-
Cette étape n’est pas traduite. Aidez à la traduire
-
Unlock white seal and diconnect blue cable from upper corner.
-
-
Cette étape n’est pas traduite. Aidez à la traduire
-
Carefully pull off black frame from laptop board.
-
-
Cette étape n’est pas traduite. Aidez à la traduire
-
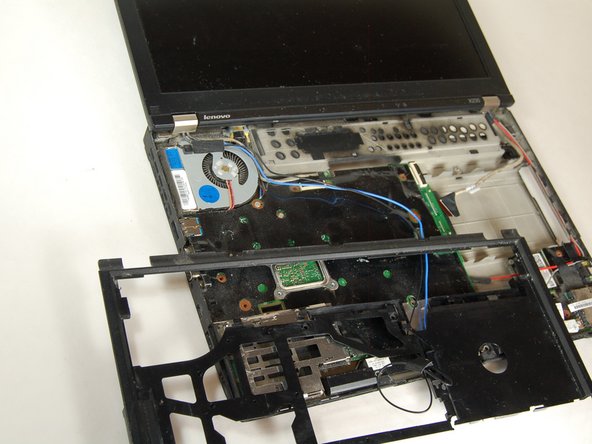
Carefully lift the screen module straight up to detach from board.
-
-
Cette étape n’est pas traduite. Aidez à la traduire
-
Remove a total of twenty-three 4.1mm screws from around the black plastic in the board.
-
-
Cette étape n’est pas traduite. Aidez à la traduire
-
Disconnect black and red wires from bottom right corner.
-
-
Cette étape n’est pas traduite. Aidez à la traduire
-
Carefully detach the motherboard (black plastic) from the laptop.
-


Annulation : je n'ai pas terminé ce tutoriel.
16 autres ont terminé cette réparation.
Équipe

Texas Tech, Team 6-3, Bennett Fall 2016 Membre de l'équipe Texas Tech, Team 6-3, Bennett Fall 2016
TTU-BENNETT-F16S6G3
4 membres
3 tutoriels rédigés
6 commentaires
is the cpu replaceable on one of these, or its soldered to the mobo? I want some laptop from the X- series wich will be able to handle an i7 (best if x230 as it is the newest i can afford)
The X230 CPU is soldered to the board. i7 not really worth it because the performance difference is about +5% and battery life is poor compared to the i5 X230.
i am using lenovo x230, when i press the power button not show screen POST Bios (Blank Screen) but the power button and the flash light on. What is my x230 problem ? htttp://www.designstrusted.com
Really clear document, better to use than Youtube videos.