Introduction
In this guide, the reader will go through the necessary instructions needed to replace a non-functioning hard disk drive in the Lenovo Y50-70 Touch Laptop.
This specific repair does not require any previous knowledge about computers and can be completed by a beginner using only a single Phillips #1 screwdriver and a small, plastic, prying tool.
When performing this repair, ensure you are in a static free environment so as not to provide an electrical shock to the computer and possibly further damage the device. It is also recommended to keep track of removed parts in a separate enclosed container so to not lose any necessary components needed to put the computer back together.
Ce dont vous avez besoin
-
-
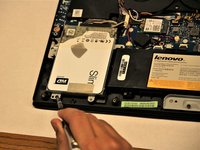
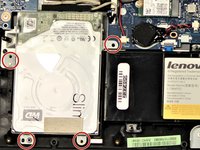
Use a Phillips #1 screwdriver to unscrew and remove the ten 6 mm screws on the bottom cover.
-
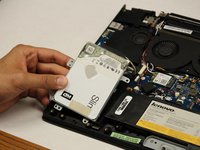
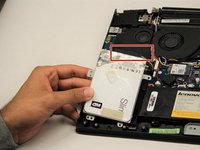
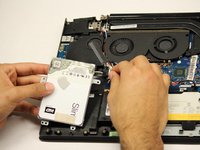
Remove the bottom cover.
-
-


To reassemble your device, follow these instructions in reverse order.
To reassemble your device, follow these instructions in reverse order.
Annulation : je n'ai pas terminé ce tutoriel.
2 autres ont terminé cette réparation.
Équipe

IUPUI, Team 6-6, Beck Spring 2022 Membre de l'équipe IUPUI, Team 6-6, Beck Spring 2022
IUPUI-BECK-S22S6G6
4 membres
3 tutoriels rédigés