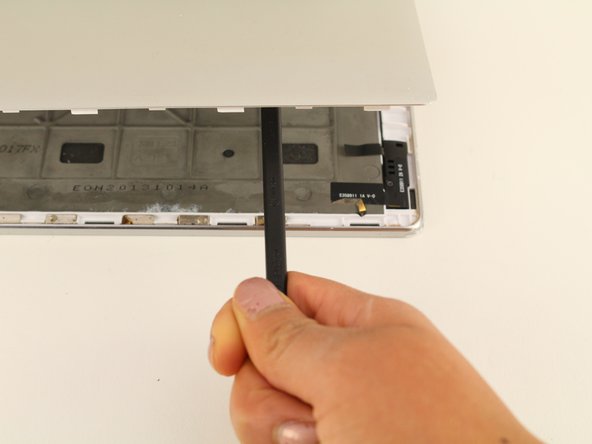
Aller au contenu principal

Lenovo Yoga Tablet 10 Back Camera Replacement

Ce dont vous avez besoin

  1. Lenovo Yoga Tablet 10 Back Camera Replacement, Back Cover: étape 1, image 1 de 1
    • Remove the two Phillips #000 screws.

    • These screws are located behind the stand for the device.

    • Our device did not include these screws.

  2. Lenovo Yoga Tablet 10 Back Camera Replacement: étape 2, image 1 de 1
    • Use a plastic iFixit opening tool to pry the edges of the back case loose by placing it in between the edge of the cover and the screen.

    • Do not immediately attempt to remove the back of the case without attempting Step three, or you risk snapping the back cover.

  3. Lenovo Yoga Tablet 10 Back Camera Replacement: étape 3, image 1 de 2 Lenovo Yoga Tablet 10 Back Camera Replacement: étape 3, image 2 de 2
    • Use the spudger to reach into the center of the device and pry off the back case by giving it a light force upwards.

  4. Lenovo Yoga Tablet 10 Back Camera Replacement, Back Camera: étape 4, image 1 de 2 Lenovo Yoga Tablet 10 Back Camera Replacement, Back Camera: étape 4, image 2 de 2
    • Remove one 5mm screw using the Phillips #00 Screwdriver.

  5. Lenovo Yoga Tablet 10 Back Camera Replacement: étape 5, image 1 de 3 Lenovo Yoga Tablet 10 Back Camera Replacement: étape 5, image 2 de 3 Lenovo Yoga Tablet 10 Back Camera Replacement: étape 5, image 3 de 3
    • Use the spudger to disconnect the camera and battery from the printed circuit board by putting the spudger in between the connections and the printed circuit board and pushing the spudger up.

  6. Lenovo Yoga Tablet 10 Back Camera Replacement: étape 6, image 1 de 1
    • Remove one 5mm screw with the Phillips #00 screwdriver.

  7. Lenovo Yoga Tablet 10 Back Camera Replacement: étape 7, image 1 de 3 Lenovo Yoga Tablet 10 Back Camera Replacement: étape 7, image 2 de 3 Lenovo Yoga Tablet 10 Back Camera Replacement: étape 7, image 3 de 3
    • Use the nylon tip tweezers to push the camera out from between the power button and the kickstand.

Conclusion

To reassemble your device, follow these instructions in reverse order.

Une autre personne a terminé cette réparation.

Juan Benjamin

Membre depuis le 01/24/19

490 Réputation

4 tutoriels rédigés

Équipe

Cal Poly, Team S2-G6, White Winter 2019 Membre de l'équipe Cal Poly, Team S2-G6, White Winter 2019

CPSU-WHITE-W19S2G6

4 membres

7 tutoriels rédigés

Un commentaire

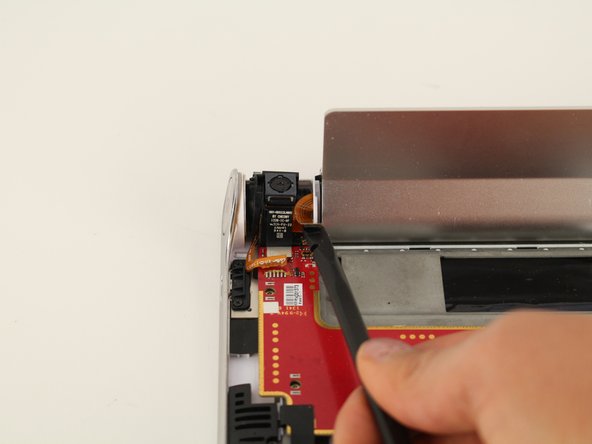
“To reassemble your device, follow these instructions in reverse order. “ Including unripping the power switch tail, which is soldered to the board. Look at the last picture!

The camera/speaker assembly cannot be removed without unsoldering this tail.

Fixin Ma Stuff - Réponse

Ajouter un commentaire

Nombre de vues :

Dernières 24 heures : 0

7 derniers jours : 1

30 derniers jours : 2

Total : 459