Aller au contenu principal

Lenovo Z70-80 Optical Drive Replacement

Ce dont vous avez besoin

  1. Lenovo Z70-80 Optical Drive Replacement, Battery: étape 1, image 1 de 2 Lenovo Z70-80 Optical Drive Replacement, Battery: étape 1, image 2 de 2
    • Use your fingers two push both latches away from each other to release the battery.

    • Pull the battery out.

  2. Lenovo Z70-80 Optical Drive Replacement, Back Panel: étape 2, image 1 de 3 Lenovo Z70-80 Optical Drive Replacement, Back Panel: étape 2, image 2 de 3 Lenovo Z70-80 Optical Drive Replacement, Back Panel: étape 2, image 3 de 3
    • Remove the two Phillips #0 screws from the bottom panel.

    • Slide the panel down slightly, and then lift to pull it off.

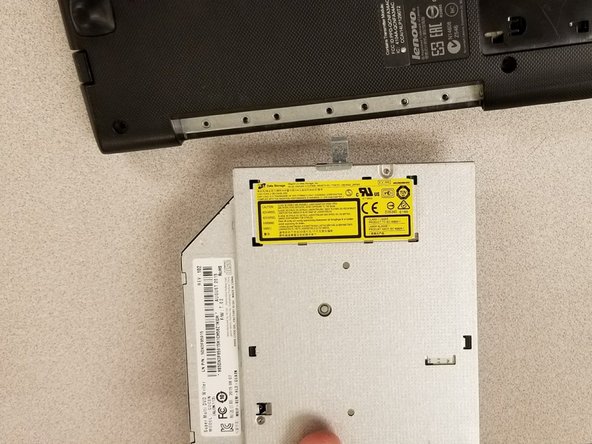
  3. Lenovo Z70-80 Optical Drive Replacement, Optical Drive: étape 3, image 1 de 3 Lenovo Z70-80 Optical Drive Replacement, Optical Drive: étape 3, image 2 de 3 Lenovo Z70-80 Optical Drive Replacement, Optical Drive: étape 3, image 3 de 3
    • Remove the single 3mm Phillips #0 screw from the optical drive.

    • Pull the optical drive out of the side.

Conclusion

To reassemble your device, follow these instructions in reverse order.

Eduardo Delgado

Membre depuis le 01/24/18

412 Réputation

4 tutoriels rédigés

Équipe

Gateway, Team S1-G4, Johnson Spring 2018 Membre de l'équipe Gateway, Team S1-G4, Johnson Spring 2018

GCC-JOHNSON-S18S1G4

2 membres

12 tutoriels rédigés

0 commentaires

Ajouter un commentaire

Nombre de vues :

Dernières 24 heures : 0

7 derniers jours : 5

30 derniers jours : 10

Total : 861