Aller au contenu principal
Pour réparer ensemble - Je crée un compte

Lite FX Rotating Big Ball of Lite Model 1929 Motor Replacement

Ce dont vous avez besoin

    1. Lite FX Rotating Big Ball of Lite Model 1929 Motor Replacement, Back Panel: étape 1, image 1 de 1
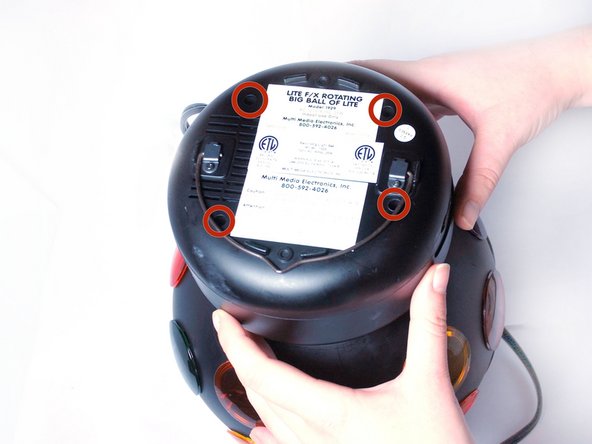
      • Turn the device over so that the base is facing up.

      Demander à FixBot

      Ajouter un commentaire

    2. Lite FX Rotating Big Ball of Lite Model 1929 Motor Replacement: étape 2, image 1 de 1
      • Peel off the piece of metal that is glued to hold the two halves of the base together.

      • You may need to reapply glue to the piece of metal when reassembling the device.

      Demander à FixBot

      Ajouter un commentaire

    3. Lite FX Rotating Big Ball of Lite Model 1929 Motor Replacement: étape 3, image 1 de 2 Lite FX Rotating Big Ball of Lite Model 1929 Motor Replacement: étape 3, image 2 de 2
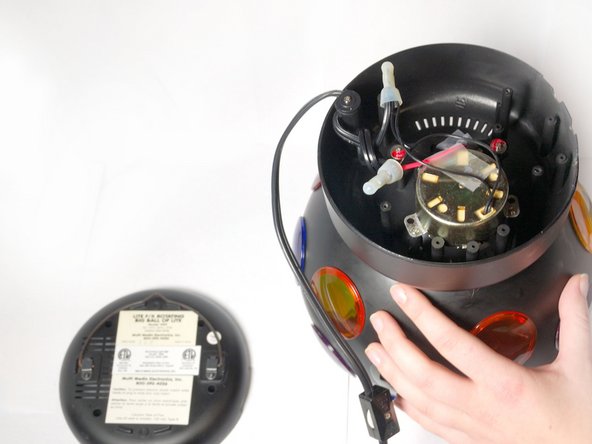
      • Unscrew the four 10mm Phillips head screws on the bottom of the device.

      • Once the base is removed, the device should look as shown on the picture.

      Demander à FixBot

      Ajouter un commentaire

    1. Lite FX Rotating Big Ball of Lite Model 1929 Motor Replacement, Motor: étape 4, image 1 de 2 Lite FX Rotating Big Ball of Lite Model 1929 Motor Replacement, Motor: étape 4, image 2 de 2
      Outil utilisé dans cette étape :
      Tweezers
      $4.99
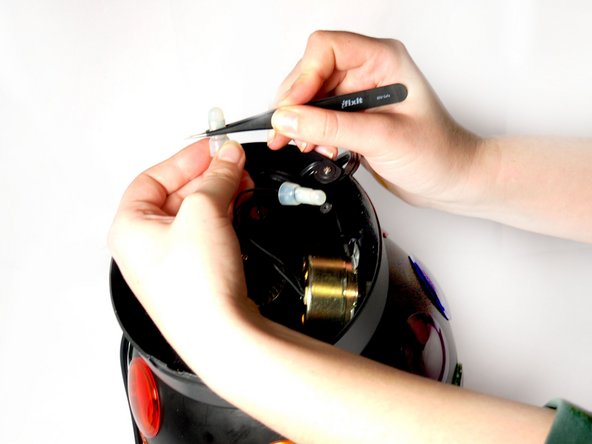
      • Use a pair of tweezers to crush the sides of the wirenuts.

      • The wirenuts are crimped to lock the wires in place. Usually the wires are just twisted into them.

      • Pull all of the wires out of the wirenuts.

      Demander à FixBot

      Ajouter un commentaire

    2. Lite FX Rotating Big Ball of Lite Model 1929 Motor Replacement: étape 5, image 1 de 2 Lite FX Rotating Big Ball of Lite Model 1929 Motor Replacement: étape 5, image 2 de 2
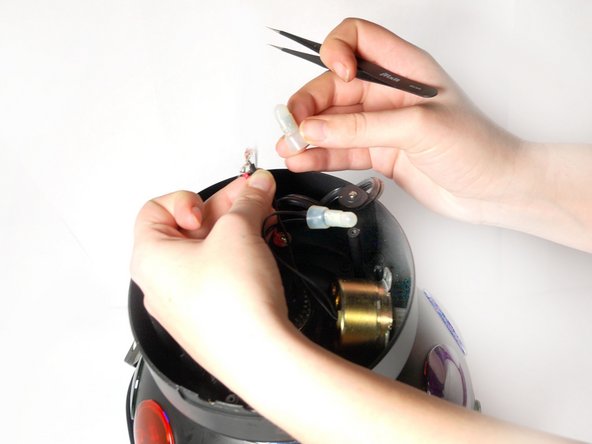
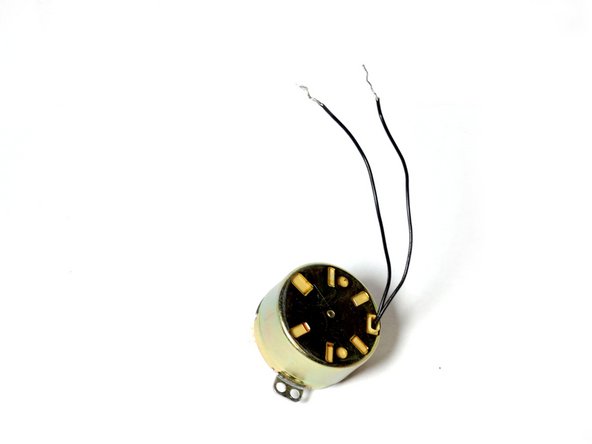
      • Separate the wires that belong to the motor.

      • The wires should be small and black.

      • Remove the motor.

      Demander à FixBot

      Ajouter un commentaire

Conclusion

To reassemble your device, follow these instructions in reverse order, starting from step five.

Annulation : je n'ai pas terminé ce tutoriel.

2 autres ont terminé cette réparation.

Courtney Elliott

Membre depuis le 01/14/14

378 Réputation

3 tutoriels rédigés

Équipe

Cal Poly, Team 17-3, Forte Winter 2014 Membre de l'équipe Cal Poly, Team 17-3, Forte Winter 2014

CPSU-FORTE-W14S17G3

5 membres

84 tutoriels rédigés

2 commentaires de tutoriel

Where can you find a replacement motor?

bellyjb - Réponse Partager

I can't find one either!!!!

Dallin - Réponse Partager

Ajouter un commentaire

Nombre de vues :

Dernières 24 heures : 4

7 derniers jours : 25

30 derniers jours : 86

Total : 3,442