Cette version peut contenir des modifications incorrectes. Passez au dernier aperçu vérifié.
Ce dont vous avez besoin
-
Cette étape n’est pas traduite. Aidez à la traduire
-
Remove these three Phillips #1 screws:
-
Two 10mm screws.
-
One 7mm screw.
-
-
Cette étape n’est pas traduite. Aidez à la traduire
-
Using your fingers, lower the rubber boot to reveal two screws underneath the joystick.
-
Remove the two 10mm Phillips #1 screws.
-
-
-
Cette étape n’est pas traduite. Aidez à la traduire
-
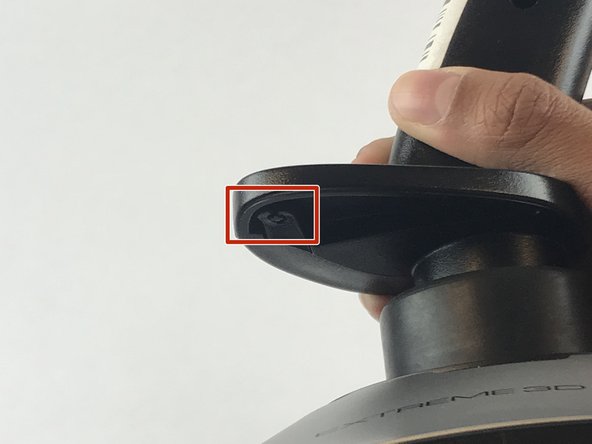
Pull apart the joystick chassis by hand.
-
Release this clip located underneath the hand rest
-
-
Cette étape n’est pas traduite. Aidez à la traduire
-
Remove the eight 10mm Phillips #1 screws from the bottom.
-
-
Cette étape n’est pas traduite. Aidez à la traduire
-
Flip the joystick upright.
-
Lift up the sliver base cover and feed the loose circuit board through.
-


Annulation : je n'ai pas terminé ce tutoriel.
3 autres ont terminé cette réparation.
Équipe

USF Tampa, Team S7-G1, Passmore Spring 2018 Membre de l'équipe USF Tampa, Team S7-G1, Passmore Spring 2018
USFT-PASSMORE-S18S7G1
4 membres
7 tutoriels rédigés